Thursday, December 19, 2013

Wet n Wild Rustic Color Block

Hey everyone!

It's been a while.... I am going to sound like a broken record but I cannot believe how crazy busy life is these days.

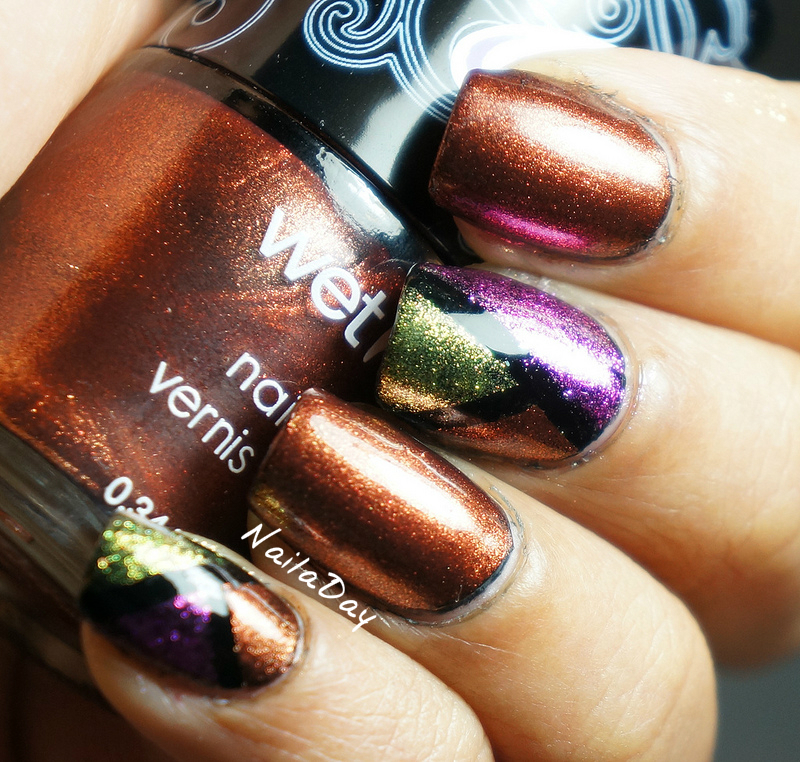
The mani I'm going to show you today, I wasn't really too excited about it. I painted a base of Wet n Wild Ebony Hate Chris and layered Wet n Wild Rustic over it. I don't like how I can see black edges under Rustic.

NailaDay: Wet n Wild Rustic Color Block

I really wanted try my hand at a color block design. I think I may have to retry.

NailaDay: Wet n Wild Rustic Color Block

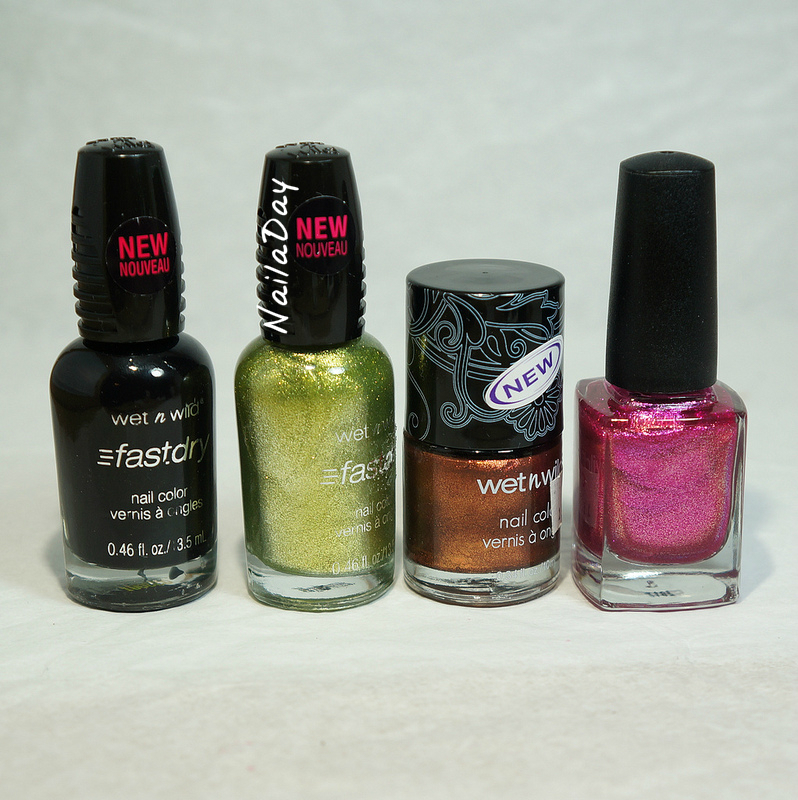
The colors I used are:
Wet n Wild Craze Rustic
Wet n Wild Ebony Hates Chris
Wet n Wild Ocean Grotto
No name pink foil


NailaDay: Wet n Wild Rustic Color Block

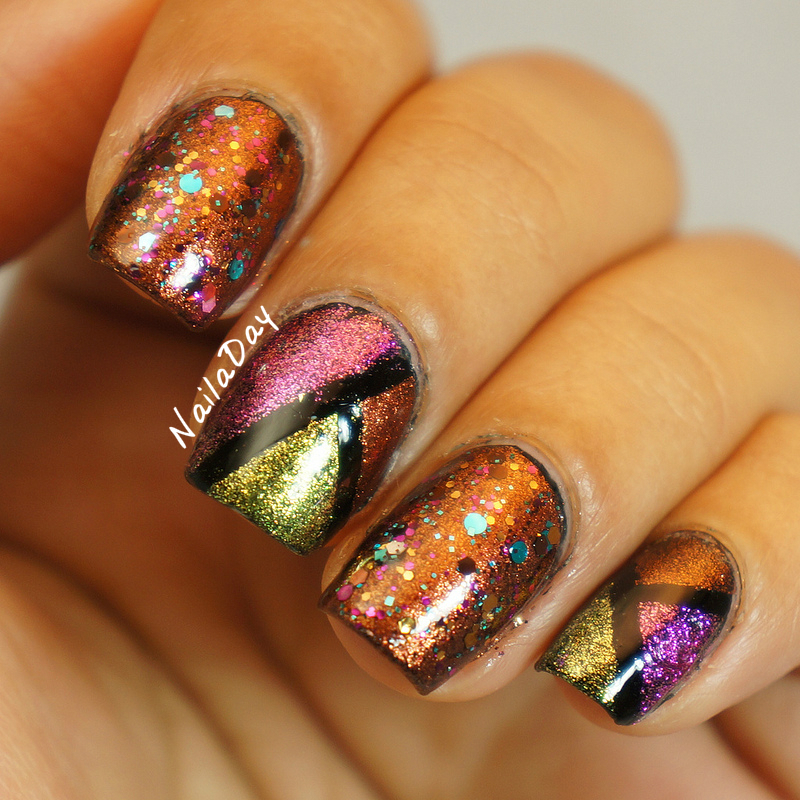
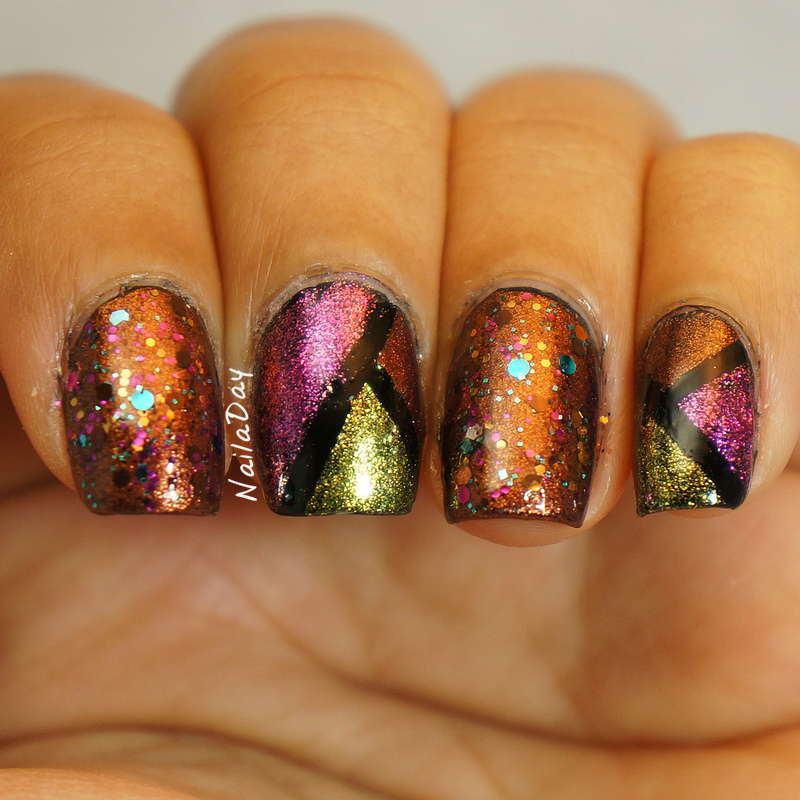
Because of being somewhat disappointed with this. I tried to save it by adding glitter, haha. I added Laquerlicious Mocha Sprinkles.

NailaDay: Wet n Wild Rustic Color Block


NailaDay: Wet n Wild Rustic Color Block


What do you think? Does the glitter make it ok or was it too much? I thought the colors went really well together!

Monday, December 9, 2013

Savina Marine Life with loose glitter

Hi everyone!
Life is so so busy right now! I am still painting my nails but only about once a week. That's about as frequently as I can create a blog post as well. And that is with great effort! So, without much ado, here is Savina Marine Life. A very vibrant sea green color. In real life it is even more greenish that these pictures show it to be. 

NailaDay: Savina Marine Life with loose glitter skittlette

For the "art" part of it, I did some glitter placement with some iridescent hex glitter from TJ Maxx. It was part of a set of various colored glitter by Martha Stewart. Believe it or not, it had both larger hexes and fine loose glitter in almost the exact shade of green as Marine Life. Of course, I had to use them :-) This was my first time using loose glitter. I just painted the color, then a coat of clear and sprinkled and patted the loose glitter on the nail while it was still wet. Then, once dry, I brushed off any glitter that didn't stick. Removal wasn't too much of a pain either! It was so sparkly!

NailaDay: Savina Marine Life with loose glitter skittlette


Wednesday, December 4, 2013

Petities CQ Solar skittlette with rhinestones

Hi everybody!
Before I get started with showing you today's mani, I want to share something very cool. Some time ago, I found Meghan from Will Paint Nails For Food on Instagram and I started following her blog because of her awesome manis. Recently though, she has been doing an awesome series of posts called Blogger Bootcamp in which she gives much needed and very useful advice to beauty bloggers. Even though I've been blogging for over a year now, I found many of her tips on point. The last post in the series invites bloggers to participate in a group critique. Although it's been less than a day, I've received so many great suggestions from other bloggers that I'm seriously considering making a few changes here in the near future. If you are one of those bloggers, thank you!


NailaDay: Petities CQ Solar skittlette with rhinestones
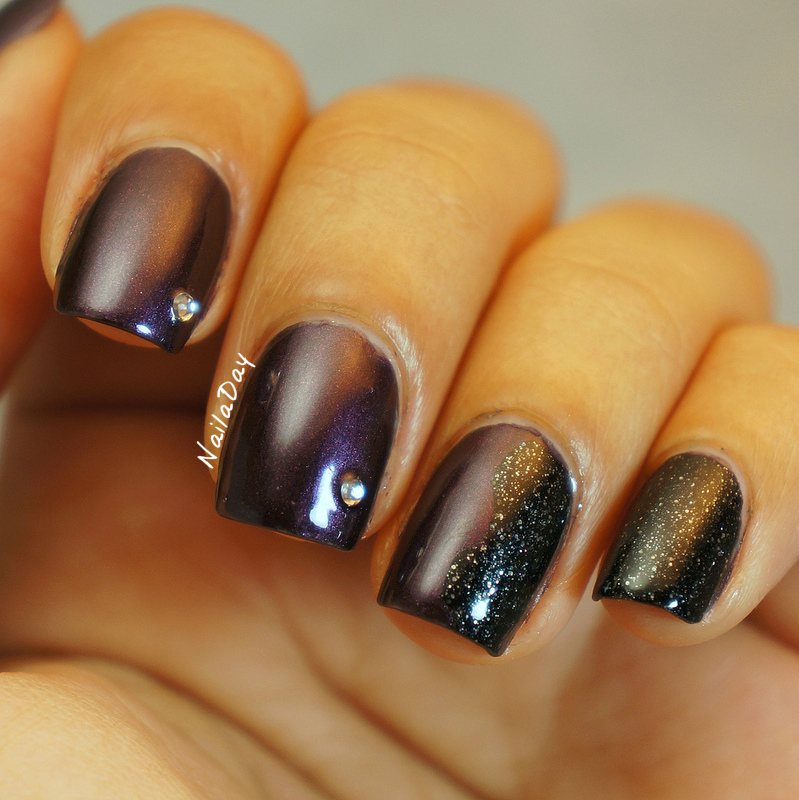
Ok, on to the mani. This is a brand that I've only found in Rite Aid. It's CQ Petites and this purple color is Solar. The black with the silver flecks is L'Oreal The Queen's Ambition.

NailaDay: Petities CQ Solar skittlette with rhinestones


I used rhinestones for the first time ever in this mani. I kept the mani on for four days and the two rhinestones on the right hand were both gone by the end of it. The left hand hung on though! I used tape to create the design on the ring finger.

NailaDay: Petities CQ Solar skittlette with rhinestones

NailaDay: Petities CQ Solar skittlette with rhinestones

Wednesday, November 27, 2013

Advanced Stamping Tutorial: Sponged nail decals

Hi everyone! Happy Thanksgiving a day early since I probably won't be posting tomorrow.

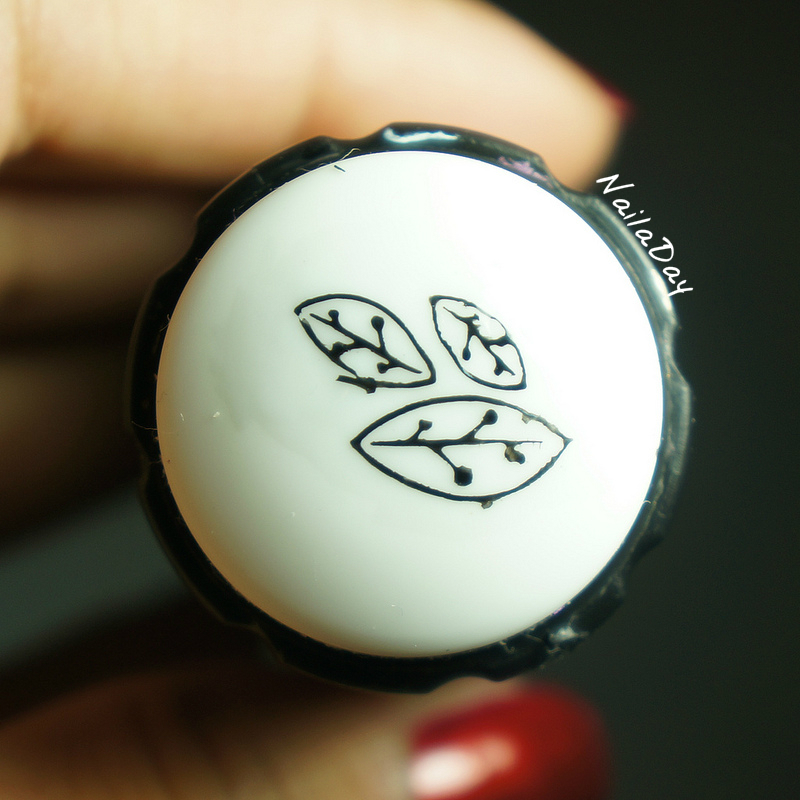
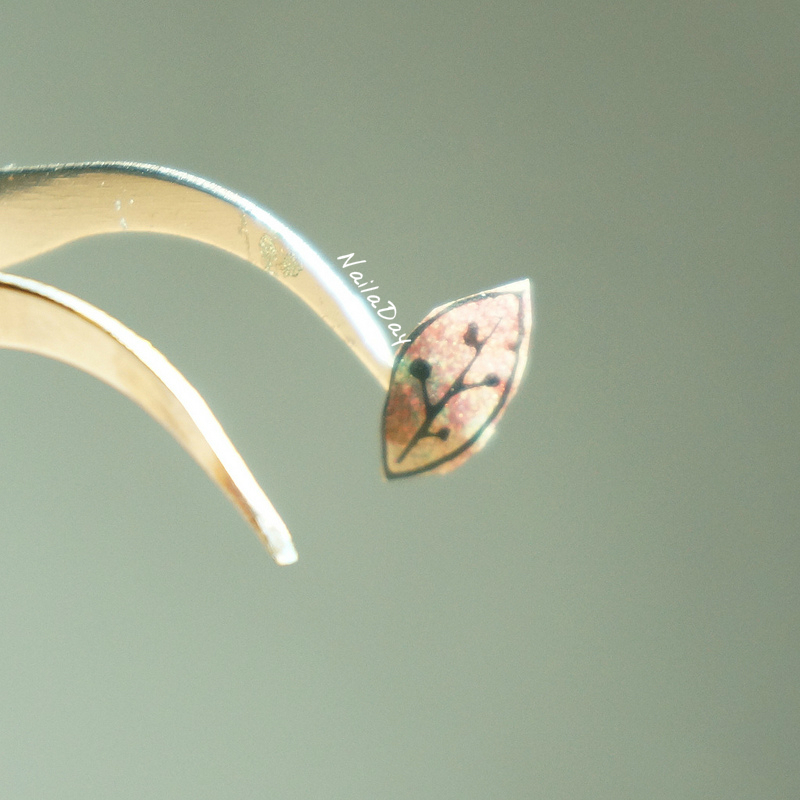
I wanted to show you guys a quick tutorial on those sponged leaves decal from my last mani. To get those leaves, I used a new technique for me. I first stamped the leaves onto the stamper and while they were still on the stamper I took away the portions I didn't want with a piece of tape. Way better than using acetone or remover! This next step is important, I found out. I carefully laid a coat of clear nail polish over the design without letting the brush touch the design. Last time I failed to do this step and the design came away when I tried to fill it with color.

NailaDay: Sponged stamp decals tutorial

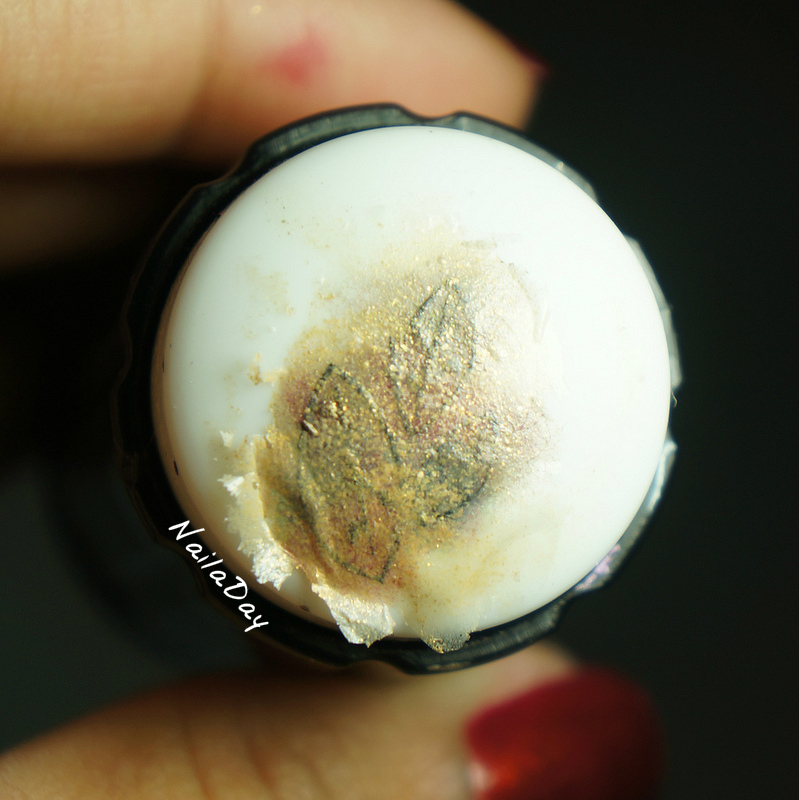
Then I sponged various colors onto the leaves, keeping in mind that I needed to work backwards because it's the other side that's going to show up.

NailaDay: Sponged stamp decals tutorial

For example, the red went first, then the brown, then the tan.

NailaDay: Sponged stamp decals tutorial

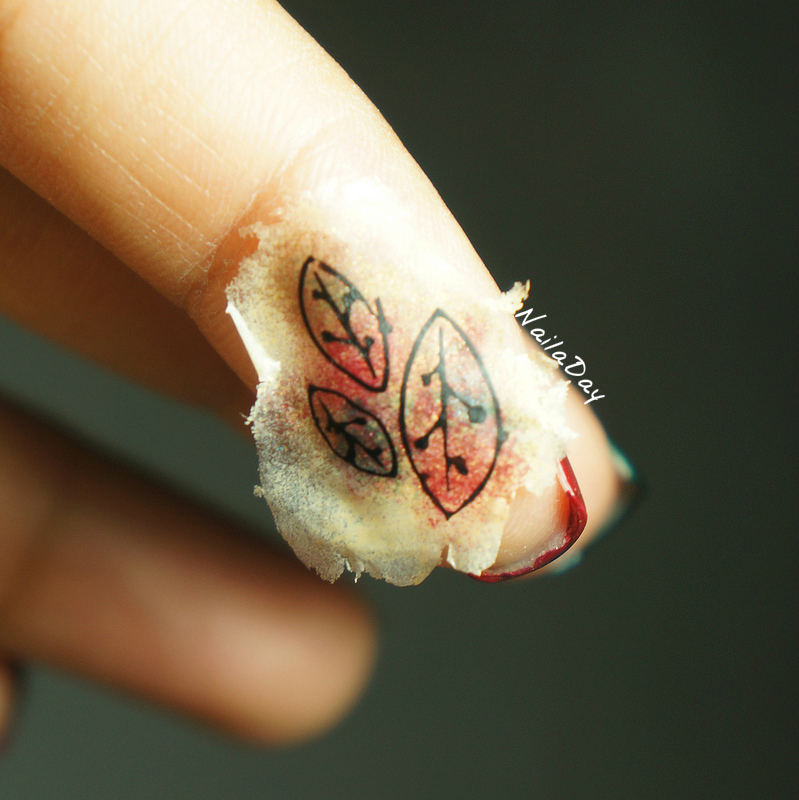
Then, because I didn't want the background sponged part around the leaves, I cut out the individual leaves with a pair of nail scissors that I never use and placed them on my nail. Topcoat to seal it in and you're done!

NailaDay: Sponged stamp decals tutorial

Sorry a couple of those pictures are blurry but I hope that you guys understood what I was doing! I think I could have saturated the sponged colors more but overall, I'm happy I came up with this new way to color in stamped images!

Here is my mani before I added the leaves. Which version do you like?

NailaDay: Thanksgiving watermarble with China Glaze Vintage Vixen polishes

NailaDay: Thanksgiving watermarble with China Glaze Vintage Vixen polishes

Sunday, November 24, 2013

Adventures in Stamping Sunday Stamping: Thanksgiving nails

Hey guys!
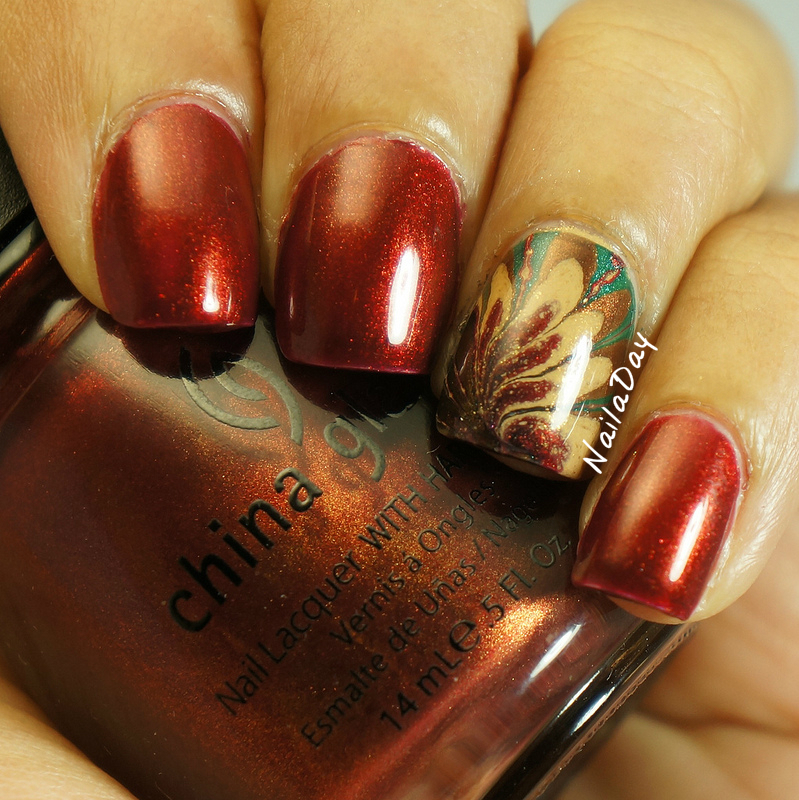
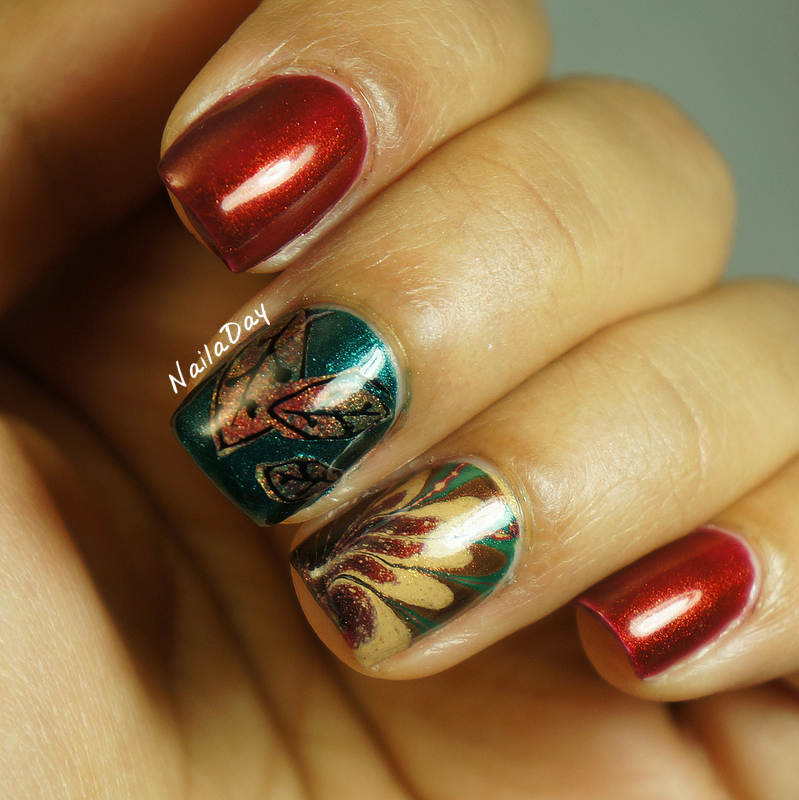
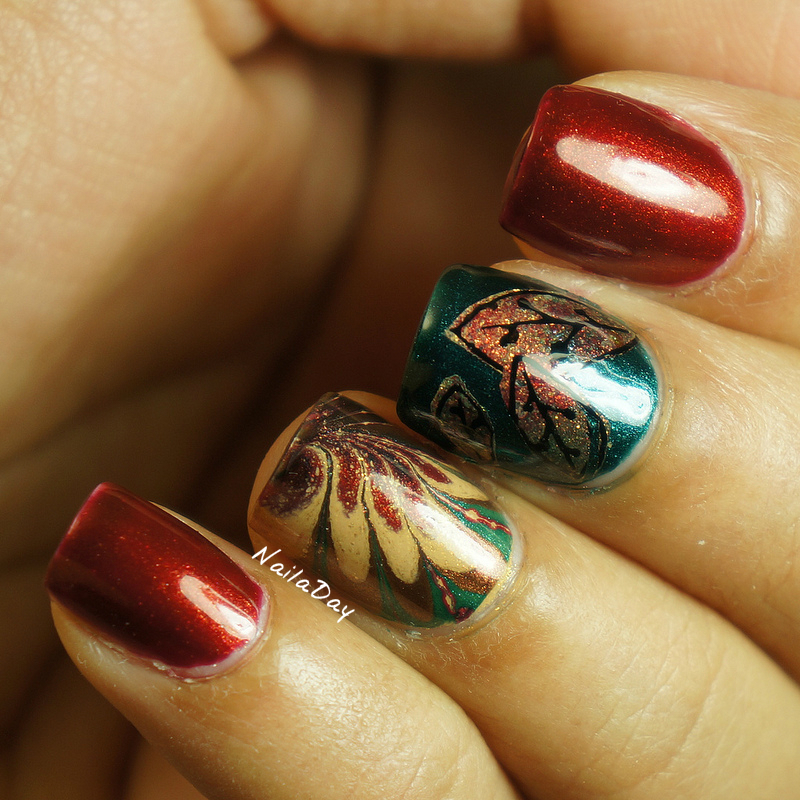
I managed to pull together another Sunday Stamping challenge mani. This is for Thanksgiving nails. I was doing a Thanksgiving mani anyway with marbling and I decided to add some cut out leaf decals from the image plate Cheeky CH33.

NailaDay: Adventures in Stamping Sunday Stamping: Thanksgiving nails with China Glaze Vintage Vixen polishes


The polishes I used are all from the old Vintage Vixen collection:
    China Glaze Foxy
    China Glaze Emerald Fitzgerald
    China Glaze Goin' My Way?
    China Glaze Classic Camel


NailaDay: Adventures in Stamping Sunday Stamping: Thanksgiving nails with China Glaze Vintage Vixen polishes


NailaDay: Adventures in Stamping Sunday Stamping: Thanksgiving nails with China Glaze Vintage Vixen polishes


Tomorrow, I'll show you guys a tutorial for how I did those stamped leaves!

Thursday, November 21, 2013

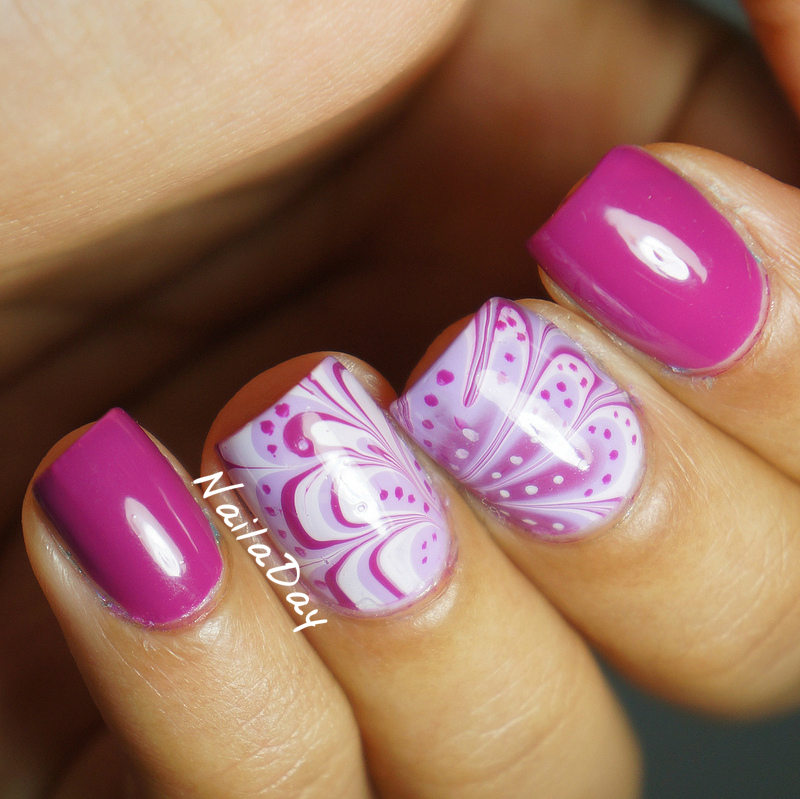
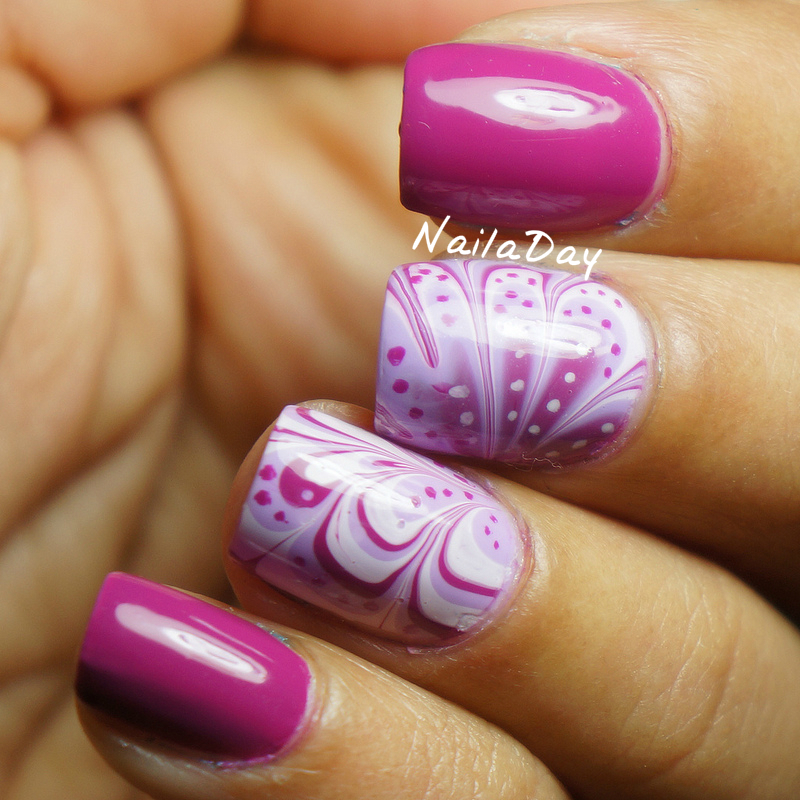
Pink Watermarble with Sinful Colors Polishes

Hi peeps!
Today, I am happy to show you my first embellished watermarble design. Ever since the first time I saw this, I have wanted to try it out. I like the results of my middle finger way more than my ring but I was in a bit of a rush when I did this. 

NailaDay: Pink Watermarble with Sinful Colors Polishes


NailaDay: Pink Watermarble with Sinful Colors Polishes

NailaDay: Pink Watermarble with Sinful Colors Polishes


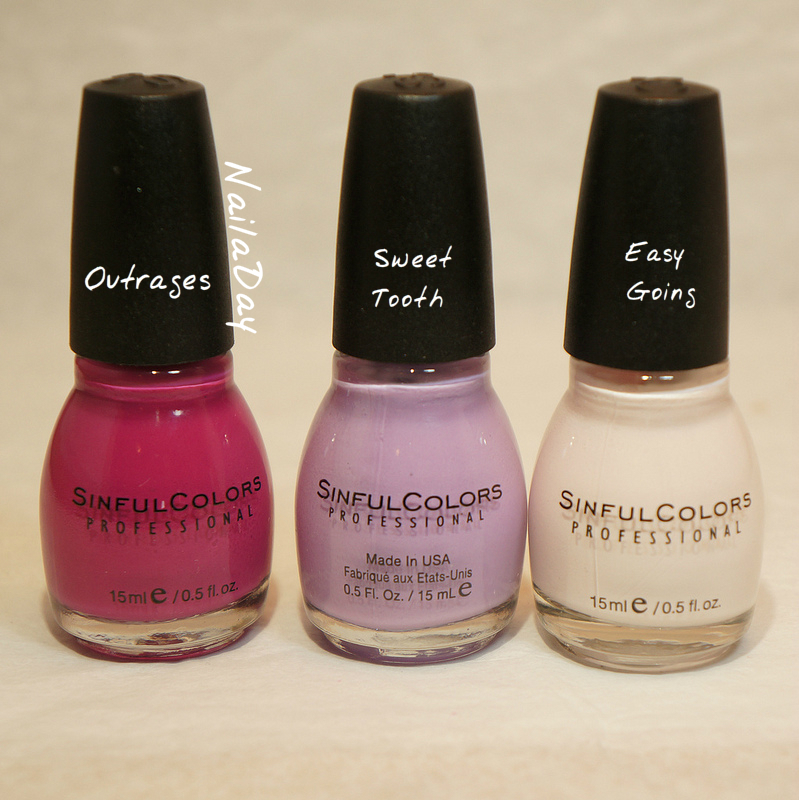
I used all Sinful Colors polishes for this watermarble. I find that all the Sinful Colors creme polishes work fairly well for watermarbling. I absolutely loved the color and consistency of the bright pink color. What isn't consistent is the spelling of the name. I swear that's how it's spelled on my bottle!

NailaDay: Pink Watermarble with Sinful Colors Polishes

Have a good day everyone!!

Tuesday, November 19, 2013

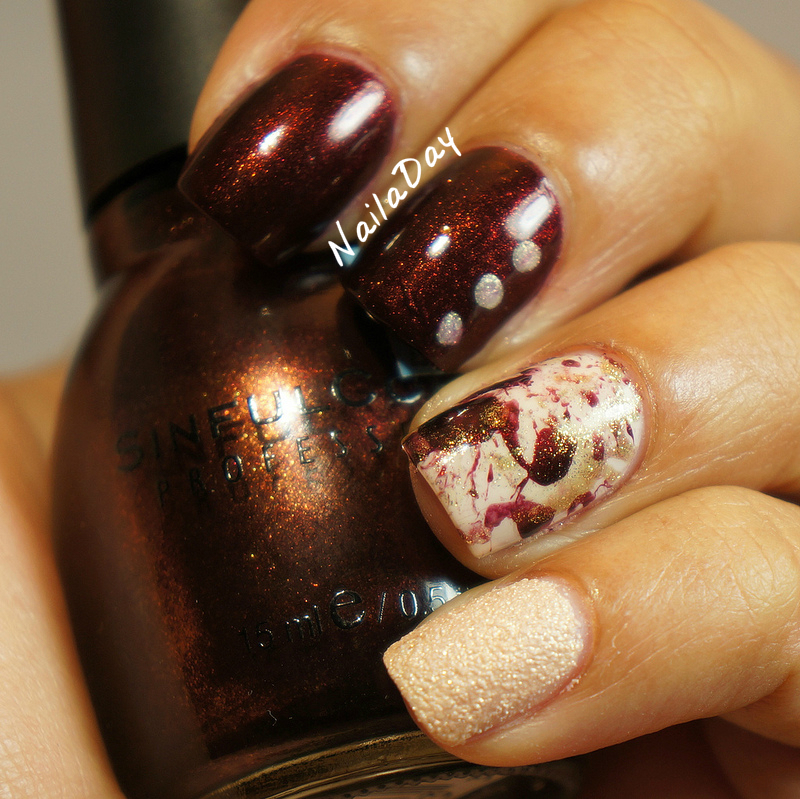
Sinful Colors Mercury Rising splatter skittlette

Hello lovelies!
How is everyone? Hope everyone had a good weekend! I can't believe how busy things have suddenly become for me! Between a baby that still wakes up multiple times a night, a full time job that's ramping up, THE exam of my career coming up in three months and the holidays, my plate is so full I'm surprised I'm still carrying it!! 

NailaDay: Sinful Colors Mercury Rising splatter skittlette


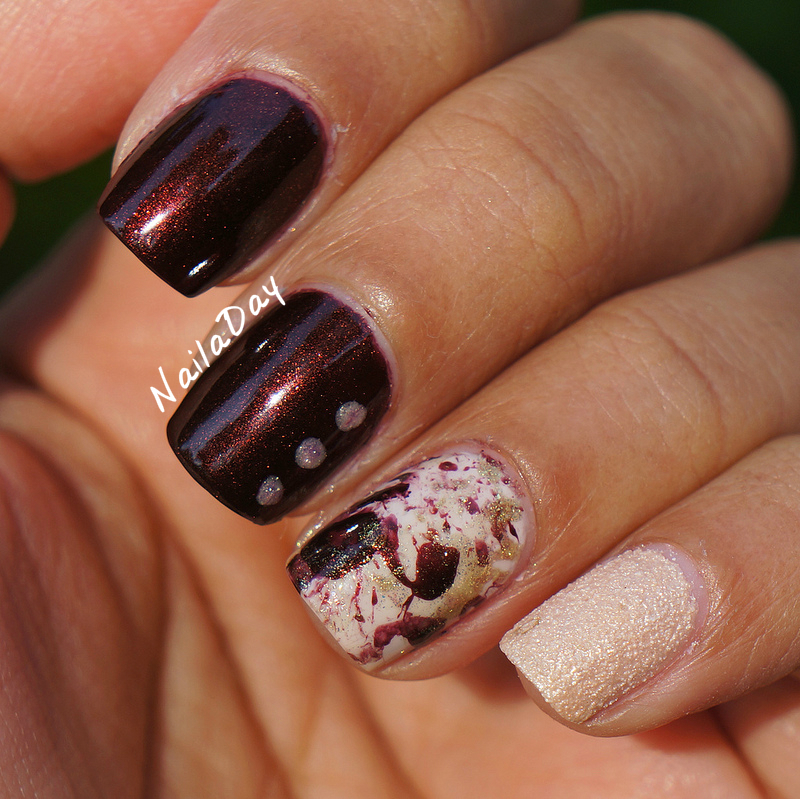
Anyways, I'm not going to say much here except that I loved this mani and I wish I'd worn this longer. This is my first splatter attempt and I finally got the hang of it with some trial and error. Aaannnd, I love the results!! I especially love it as an accent nail.


NailaDay: Sinful Colors Mercury Rising splatter skittlette


NailaDay: Sinful Colors Mercury Rising splatter skittlette

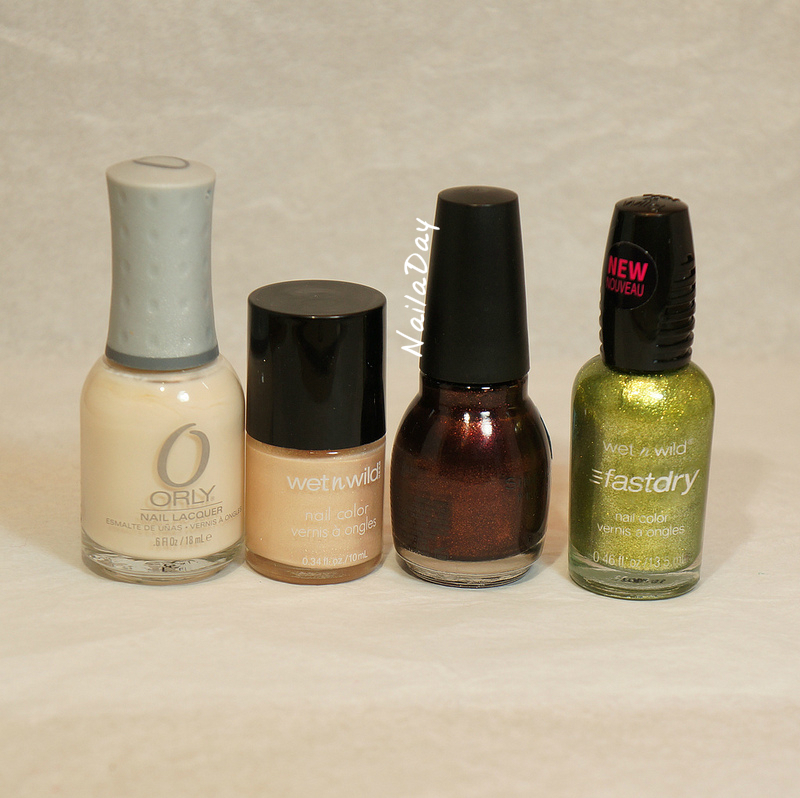
Polishes used in this mani:
             Orly Powder Puff (3 coats); this is my go to off white
             Wet n Wild Femme Trouper (texture, from Rite Aid)
             Sinful Colors Mercury Rising (brown with shimmer, 2 coats)
             Wet N Wild Fast Dry Ocean Grotto (lovely green foil shimmer but sheer on its own)

NailaDay: Sinful Colors Mercury Rising splatter skittlette


Thursday, November 14, 2013

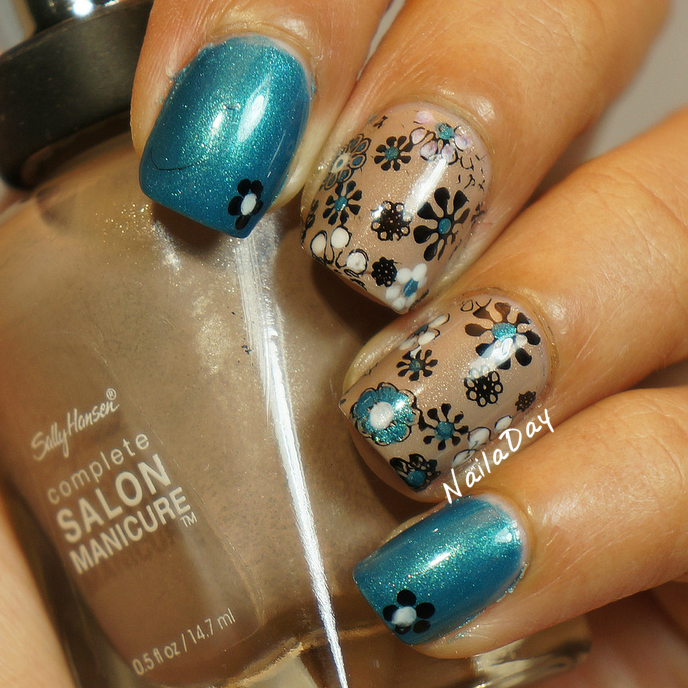
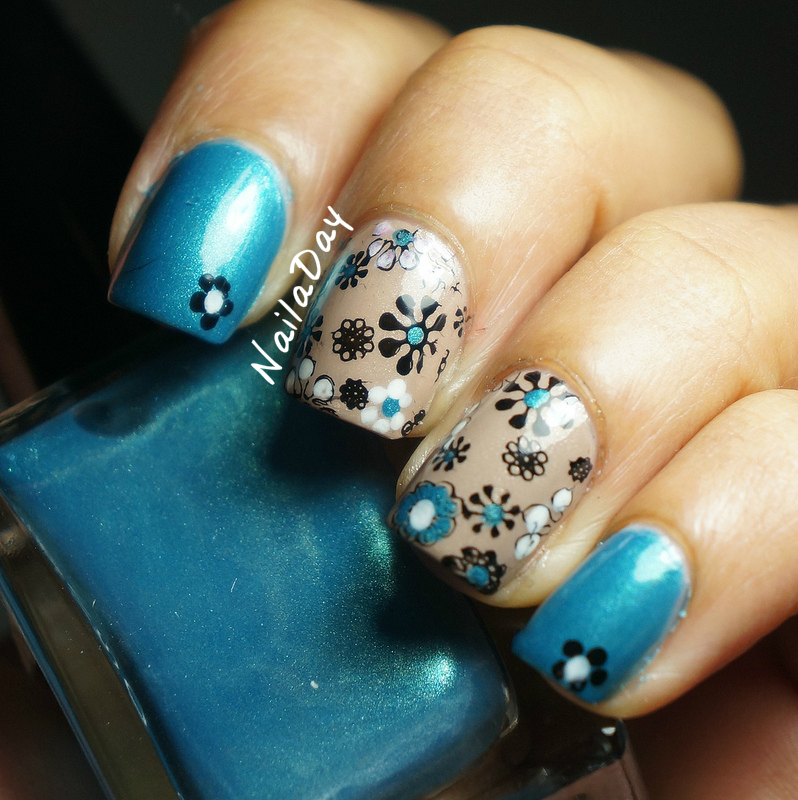
Rimmel Marine Blue and Sally Hansen Fedora flowers

Hi folks!

Depending on what part of the world you live in, winter has come. And no, that is not a Game of Thrones reference. I tried reading that book and I had to stop after the third really bad thing happened to a good person. A child, no less! This was only a few chapters into the first book and I couldn't go on. I've heard stories about the television series and I don't think I can watch that either. I see bad stuff in real life all the time, in the news, at work. I don't need it in my free time/escape activity as well. I tend to gravitate towards things that are happy, cute, pretty, funny...etc. I guess that explains my love of nail polish :-)

Ok, mini digression over. What was I saying again? Oh yeah, winter is here. Boo :-( That is all. I suppose I'll start doing winter themed manis just to make it a little more bearable but for now, here are some flowers. 

NailaDay: Rimmel Marine Blue and Sally Hansen Fedora flowers


NailaDay: Rimmel Marine Blue and Sally Hansen Fedora flowers

NailaDay: Rimmel Marine Blue and Sally Hansen Fedora flowers


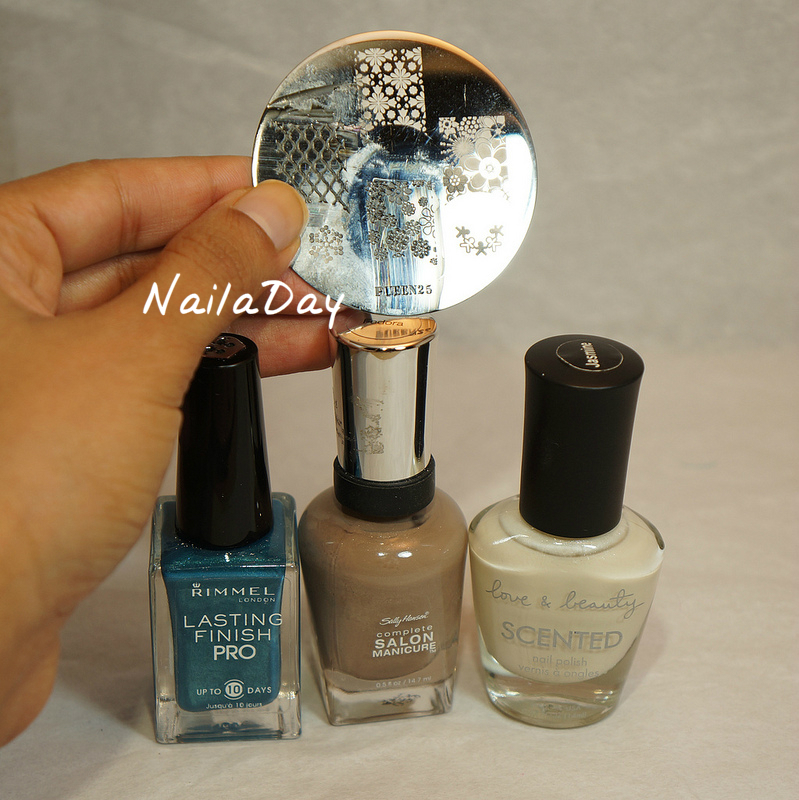
I know I did a similar thing for my baby shower mani, but here we have different colors and stamp pattern. I didn't add the glitters either. The teal polish here is Rimmel Marine Blue. The beige is Sally Hansen SCM Fedora and the white is a Forever 21 Love and Beauty polish called Jasmine. It's says it's scented but I can't really tell. The image is from the Pueen plate 25.


NailaDay: Rimmel Marine Blue and Sally Hansen Fedora flowers


Related Posts Plugin for WordPress, Blogger...