Showing posts with label Forever 21 Love and Beauty. Show all posts

Wednesday, May 18, 2016

Femme Fatale Lacquer Royal Rubies

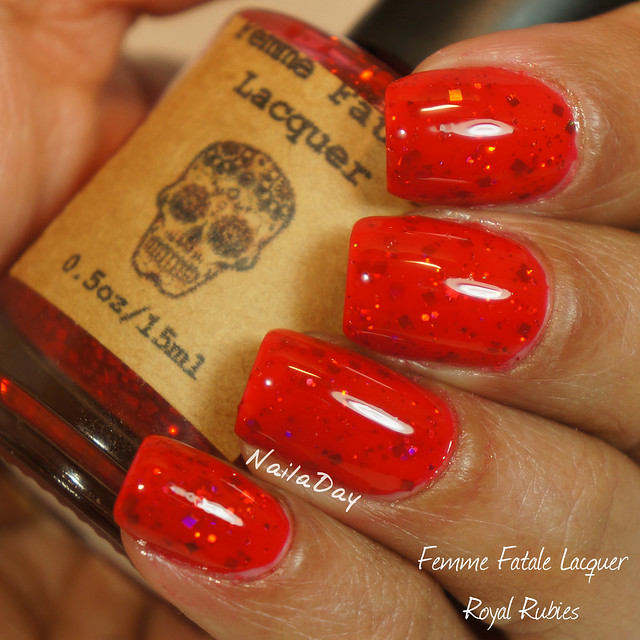
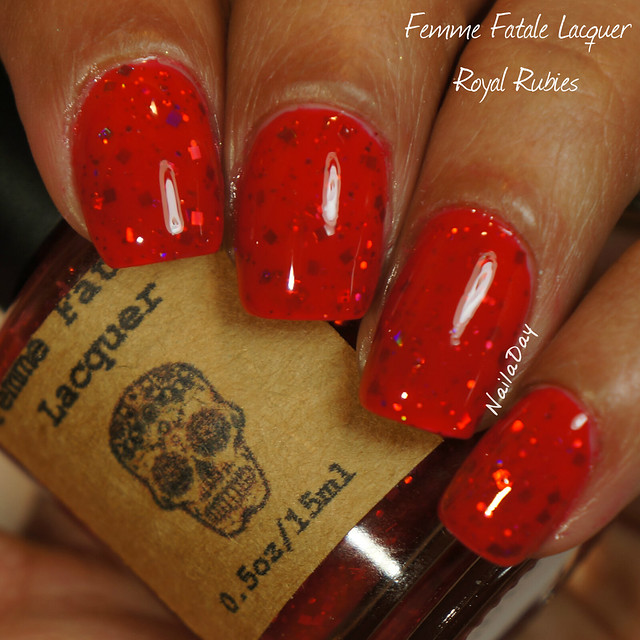
This was a brand that is no longer active. The name always got me confused with Femme Fatale Cosmetics from Australia. I won this polish in a giveaway along with three others and always regretted that there were no more polishes being produced by her. I think they are beautiful. This is Femme Fatale Lacquer Royal Rubies, two coats layered over Love and Beauty Cherry.

NailaDay: Femme Fatale Lacquer Royal Rubies

NailaDay: Femme Fatale Lacquer Royal Rubies


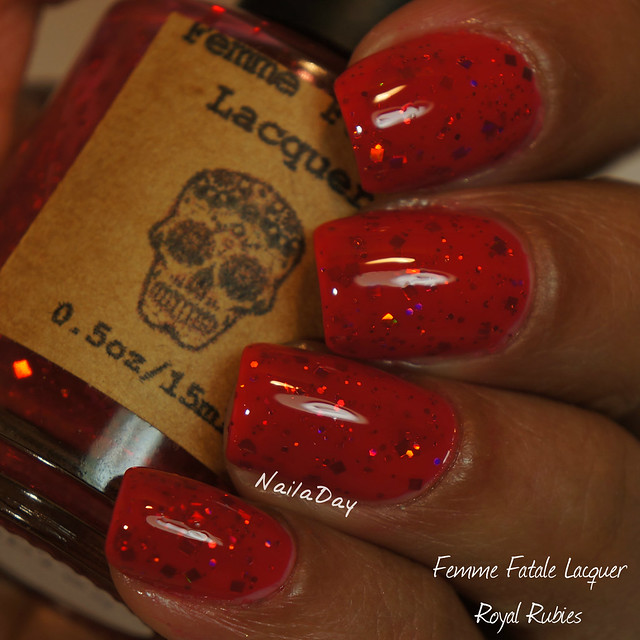
The polish itself has a red jelly base square red holographic glitter and other much smaller red glitter. Those square glitters are EVERYTHING!!  I should have sponged those glitters on because I need more of a payoff of those glitters. 

I took a few pictures with lowered exposure because you could see the holographic glitters much better that way.

NailaDay: Femme Fatale Lacquer Royal Rubies

NailaDay: Femme Fatale Lacquer Royal Rubies


A couple of days into it, I did a design with a stencil from Twinkled_T.

NailaDay: Femme Fatale Lacquer Royal Rubies

Square holo glitters = awesomeness.

Thank you.

Tuesday, May 19, 2015

Barielle Snow Day with holographic sparkle


I'm not usually a fan of silver or grey by itself on my nails but I've found out that if I add a little sparkle or nail art, I like it much better. Barielle Snow Day is a metallic silver color that is the base for this particular mani. I used three coats for complete coverage. It does tend to show brushstrokes which did put me off of it a little bit. I tried to sponge on the last layer to try to get rid of those brushstrokes but it ended up having a speckled look to it that I disliked as well. 


NailaDay: Barielle Snow Day with holographic sparkle

So, what did I do? Love and Beauty "Silver" to the rescue!! This iteration of "Silver" is actually fine holographic particles in a clear suspension base. Much like China Glaze Fairy Dust. Didn't keep me from getting Fairy Dust as well. I think the particles are just the tiniest bit larger in the Love and Beauty polish. It did the trick! I liked it much better all sparkly like this.

NailaDay: Barielle Snow Day with holographic sparkle

NailaDay: Barielle Snow Day with holographic sparkle

I bought the Barielle as part of a set of six from TJ Maxx. You can find them online as well. In future posts I'll show you the swatches of all the Barielle polishes I own so far. The Love and Beauty polishes can be found in Forever 21 stores or on their website.
Again thanks for looking!!

Friday, September 27, 2013

InstaFranken Friday: "Sparkle Merlot" holo glitter franken

Hi all! Time to show another one of my frankens. I should not be given a job naming polishes. It's really gorgeous though!! I recommend clicking on the pictures to really see the awesomeness.

NailaDay: Red holo glitter franken

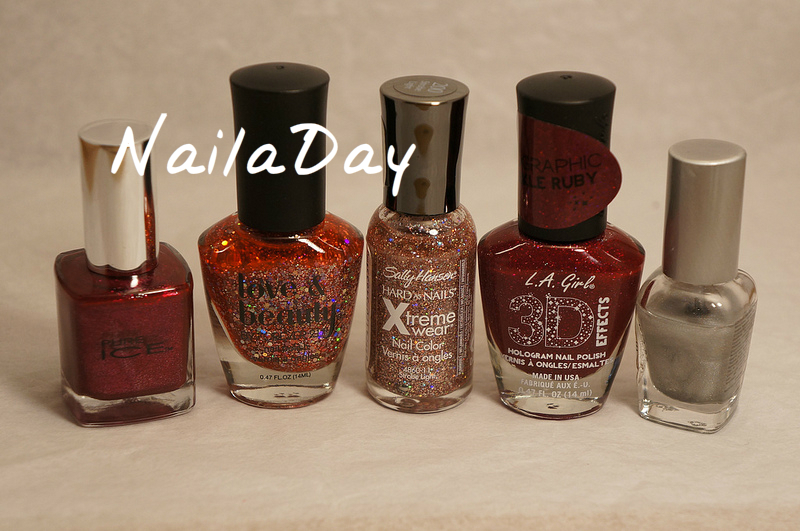
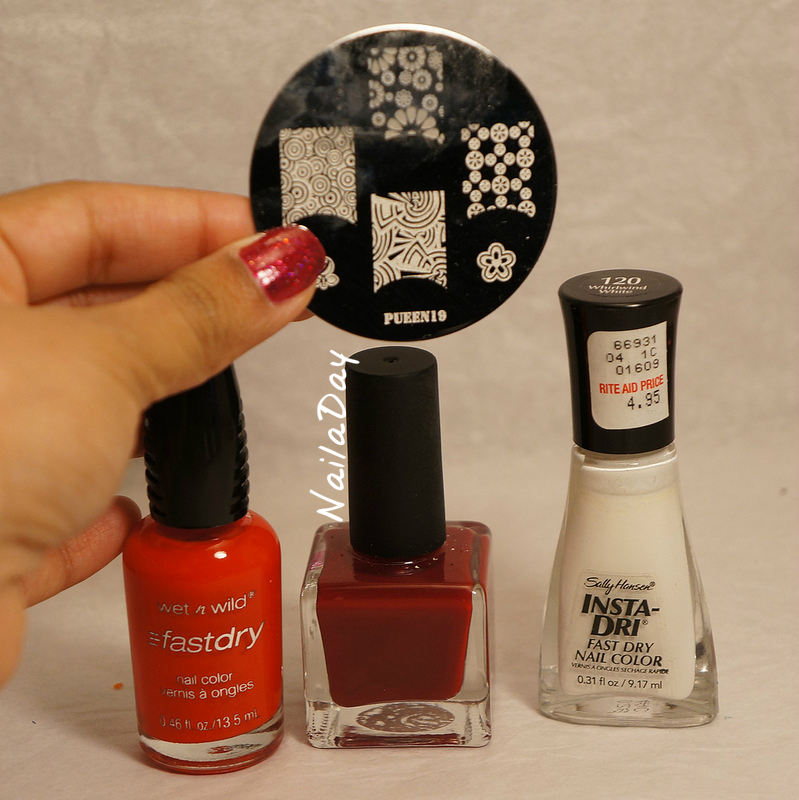
Here are the polishes I used for this.
Pure Ice Iced Merlot
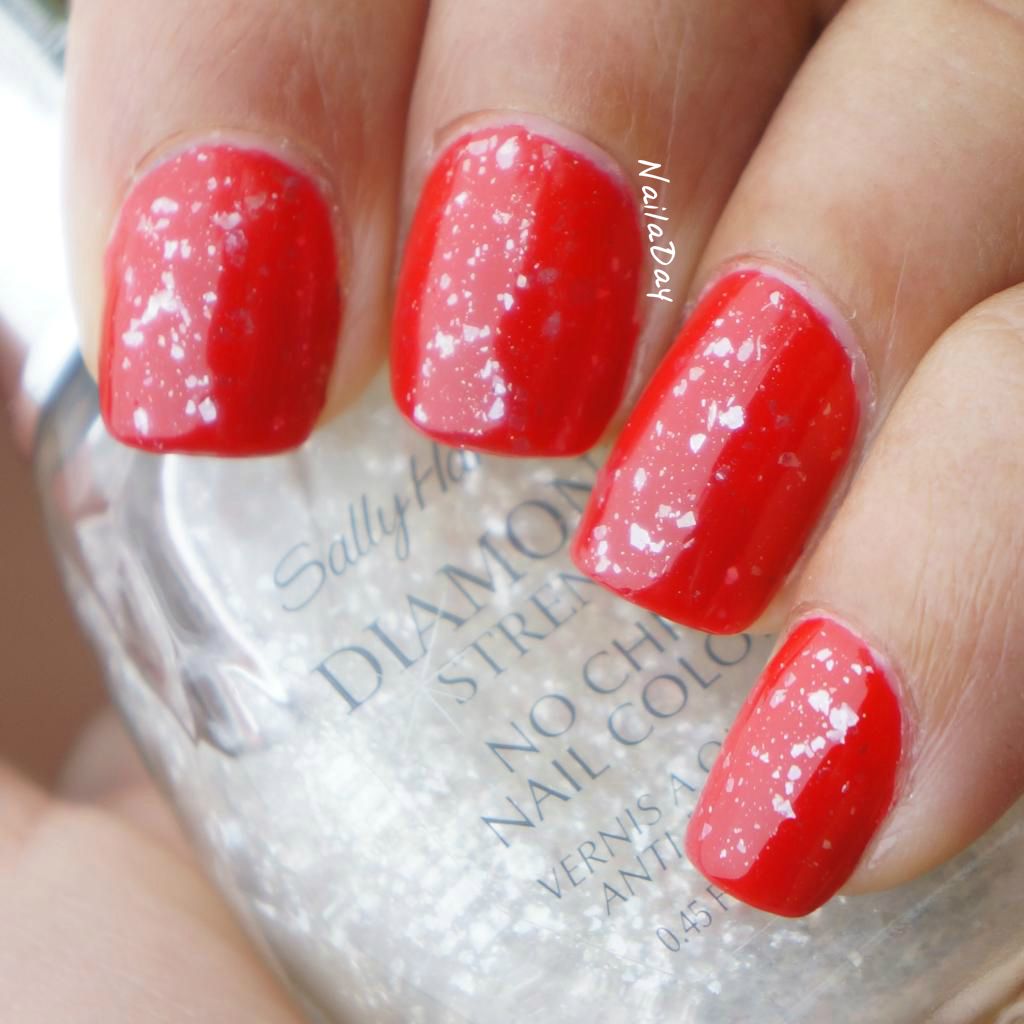
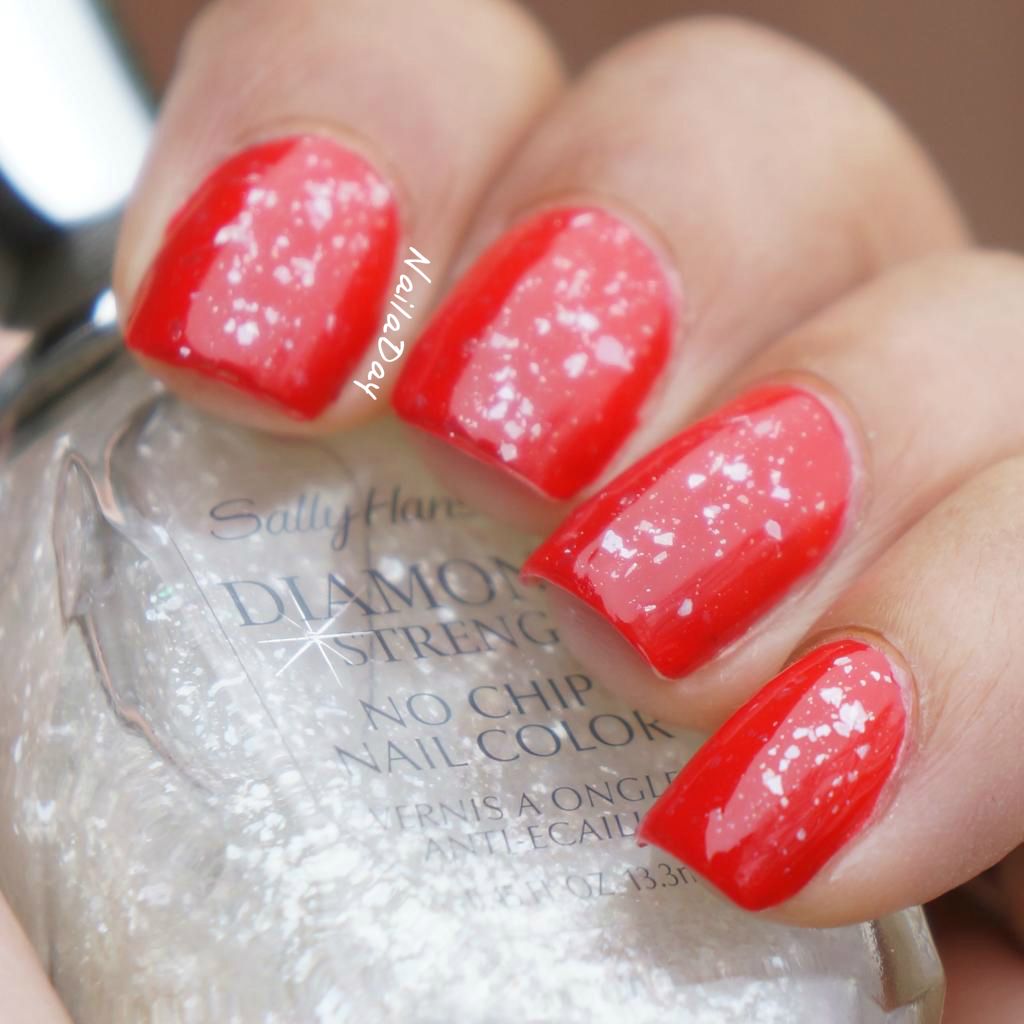
Sally Hansen Strobe Light
L.A. Girls 3D Sparkle Ruby
Love and Beauty Faded Rose/Multi
Spectraflair Franken but this didnt do much

NailaDay: Red holo glitter franken

I made it in the same fashion as the others. Single use batch in a little foil cup. I'm going to show you more pictures in different lights. The one above was in sunlight. The next one is in shade.

NailaDay: Red holo glitter franken

And in the lightbox...

NailaDay: Red holo glitter franken

Then inspired by Lisa from Polished Elegance by this post, I added a cut out stamped design with hand placed glitter borders. Design is from the Pueen plate 19. For that red base, I used a mix of WnW Everybody Loves Redmond and Urban Outfitters Blood.

NailaDay: Red holo glitter franken with cut out stamp design


NailaDay: Red holo glitter franken with cut out stamp design


NailaDay: Red holo glitter franken with cut out stamp design

Friday, September 20, 2013

Instafranken Friday: Sation Super Nail-tural Powers based franken

So, I know I suck at coming up with creative titles for my posts. By the time I'm done taking the pictures, uploading, cropping, watermarking and putting together the post, my thinking power is shot in terms of the post title. Where I do like to get creative is thinking of combination of polishes that come together to create something unique and interesting. I completely understand why there are so many indie polish makers out there now. Frankening is awesome!! I'll never get into it to the point where I'd mass produce and sell my creations. (I'm not sure they are really sell worthy anyway). I just love knowing that for a time, I had something completely unique on my nails. 


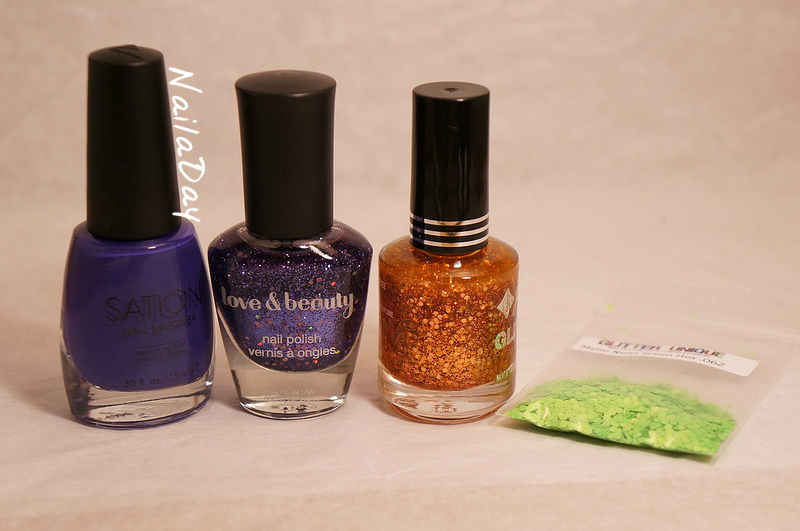
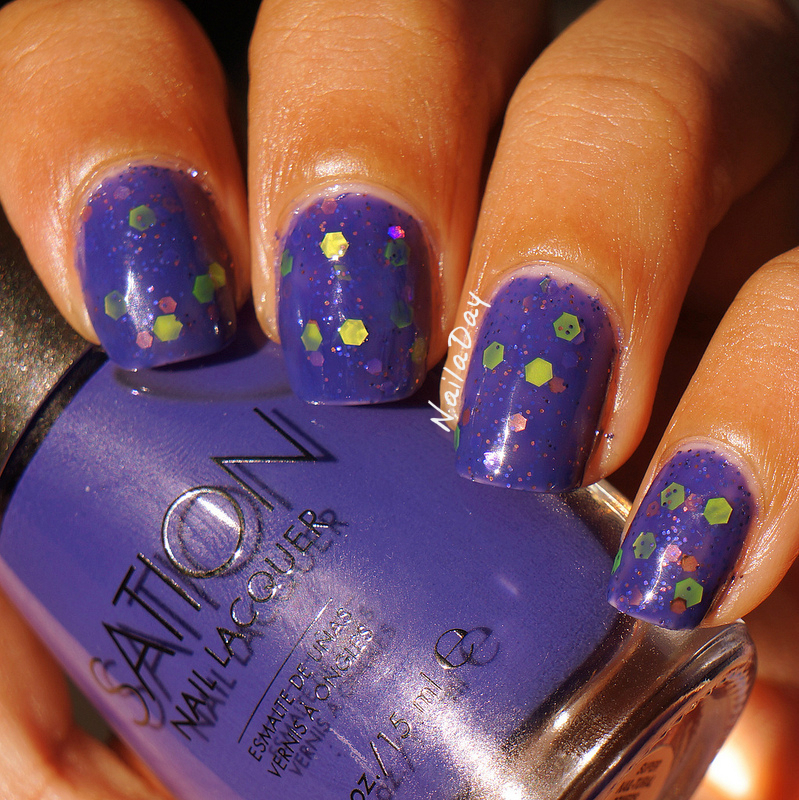
To create this look, I mixed the following polishes in a little foil cup. Sation Super Nail-tural Powers, Jordana Copper Blaze, Love and Beauty Purple Holo glitter and matte neon hex glitter. I would add more drops of polish if I ran low, thinner if it got too goopy. To see a summary of the process, go to this blog post. I haven't included pictures of what the mixed product looks like in the foil cup. If you guys are interested in that, let me know!! This is two coats.


Here it is in sunlight.


This is my first Sation polish and it did not disappoint. I can't comment on it as worn by itself because this is my first time using it. I got it on discount from TJ Maxx sometime recently. I love these colors that are a cross between blue and purple. They make me feel happy :-) In this particular franken, the addiction of neon green glitters make me extra happy!


Wednesday, July 31, 2013

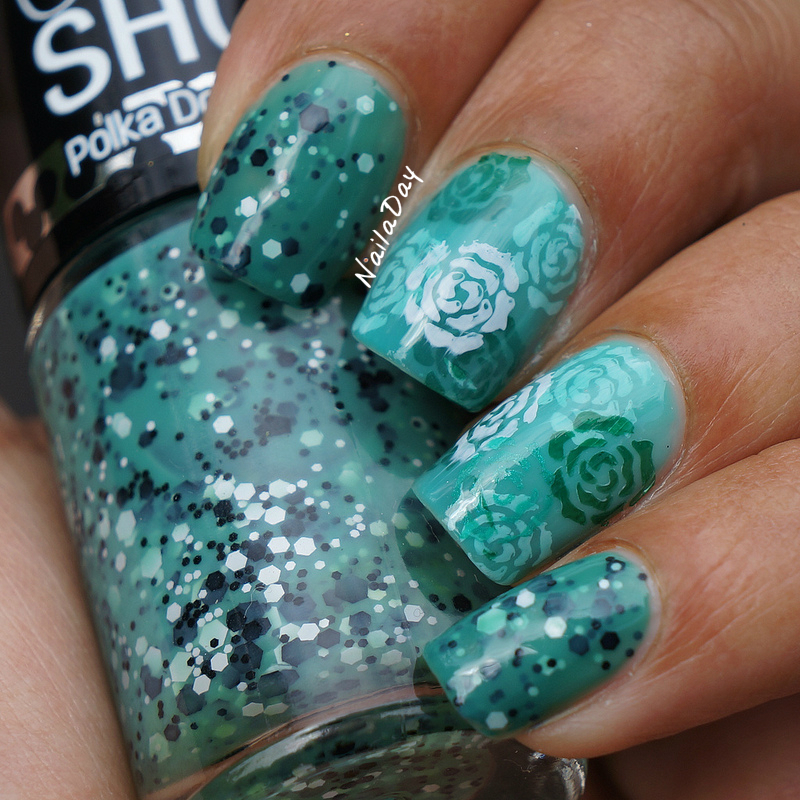
The pond mani, with Maybelline Drops of Jade and Love and Beauty Jade

Hi everyone!

Excuse me for being brief but I don't think I'm going to put a lot of words into this post today. I've tossed around the idea of using stamping instead of glitter in a jelly sandwich forever but never got around to doing it. Then I saw this amazing manicure by Reddit user motorcityvicki and I knew it was only a matter of time before I had to try it myself. Then I purchased Maybelline Drops of Jade, looked at my jelly franken of Love and Beauty Jade, and this mani came together.

NailaDay: The pond mani, with Maybelline Drops of Jade and Love and Beauty Jade

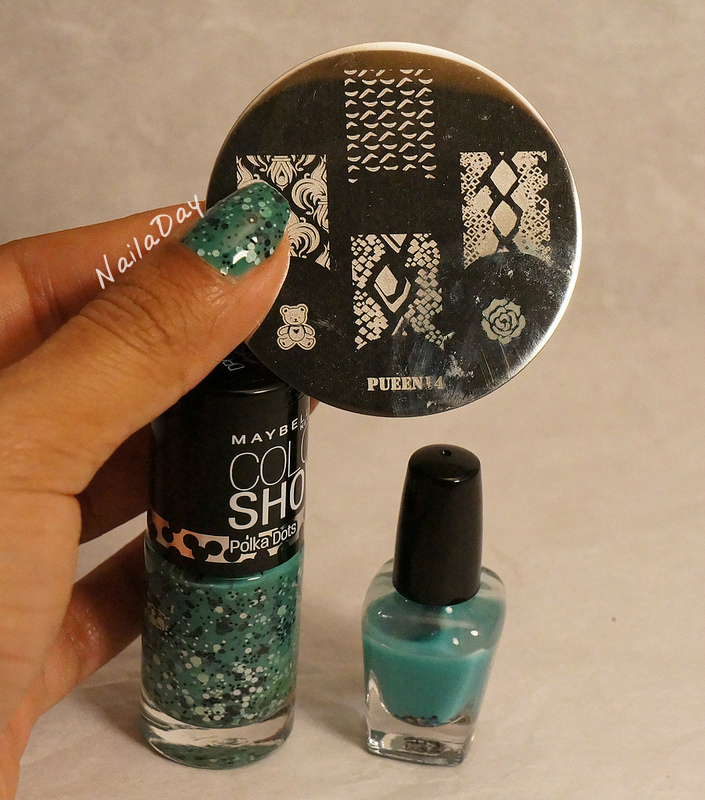
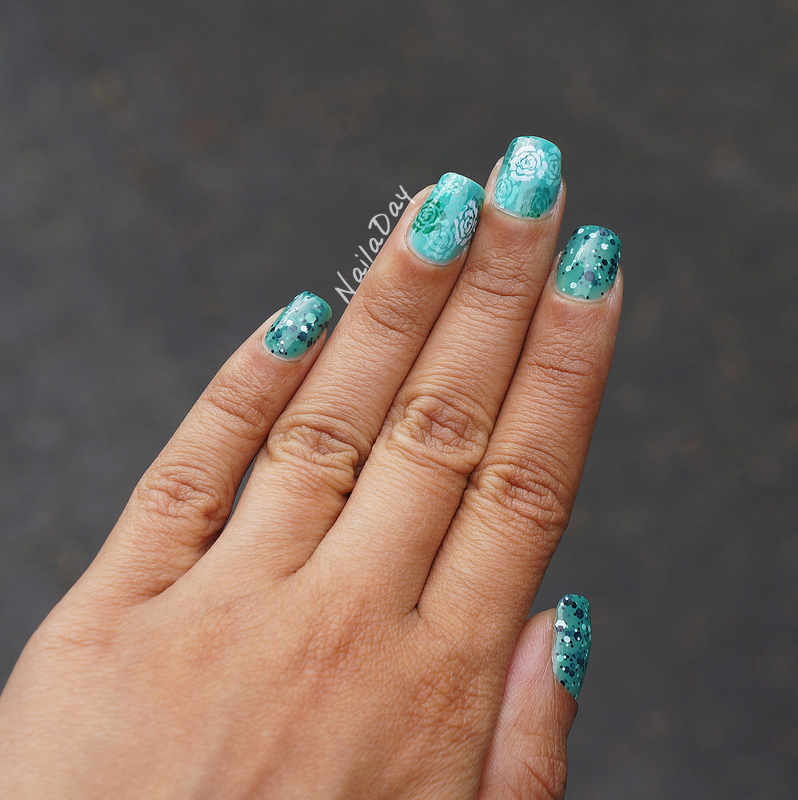
The thumb, index and pinky fingers are 3 coats of Maybelline Drops of Jade. The middle and ring finger accents are done by using my frankened jelly of Love and Beauty Jade, and sandwiching the rose stamp from the plate PUEEN 14 seen below.

NailaDay: The pond mani, with Maybelline Drops of Jade and Love and Beauty Jade

I actually used a couple of different colors for the stamping. I used SH Insta-Dri Whirlwind White and Sinful Colors last chance for the dark green.

NailaDay: The pond mani, with Maybelline Drops of Jade and Love and Beauty Jade

Outside pics, more color accurate, I think.

NailaDay: The pond mani, with Maybelline Drops of Jade and Love and Beauty Jade

NailaDay: The pond mani, with Maybelline Drops of Jade and Love and Beauty Jade

Enjoy and thanks for visiting!!

Sunday, May 26, 2013

L&B Cherry with SH Glass Slipper and last weekend update!

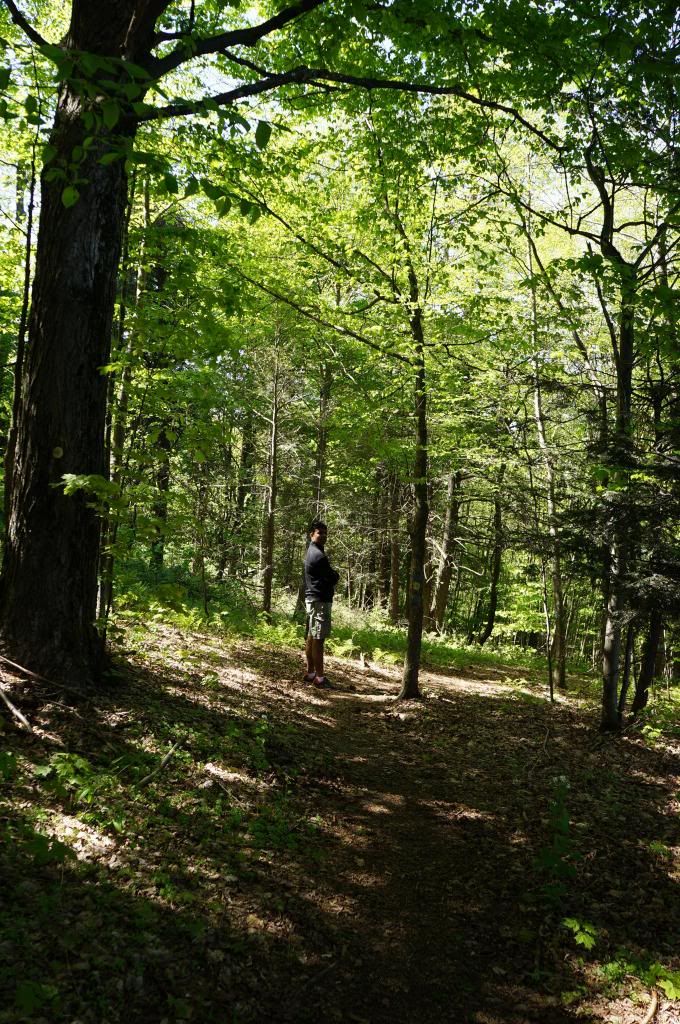
Hiya folks! How is everyone's Memorial Day weekend going? I've had a good weekend so far but I'm on call tomorrow so we'll see how the rest of it goes. In today's post, I want to show you guys not only my mani from last weekend but I'm going to get personal again and show you some photos of my weekend away in the Pocanos mountains :-) We decided that with the baby on the way, we need to do something that felt like a true vacation because who knows when we would be able to do that again! The place we picked to go to was a small chalet/B&B/spa type place somewhere in the Pocanos. This place was so isolated!! The nearest village looked like it had maybe 200 people in it.


The first full day we were there was really nice. Sunny and warm but not too hot. We went hiking in the woods. Of course I got tired way earlier than I would have normally so it wasn't an extensive hike by any means.

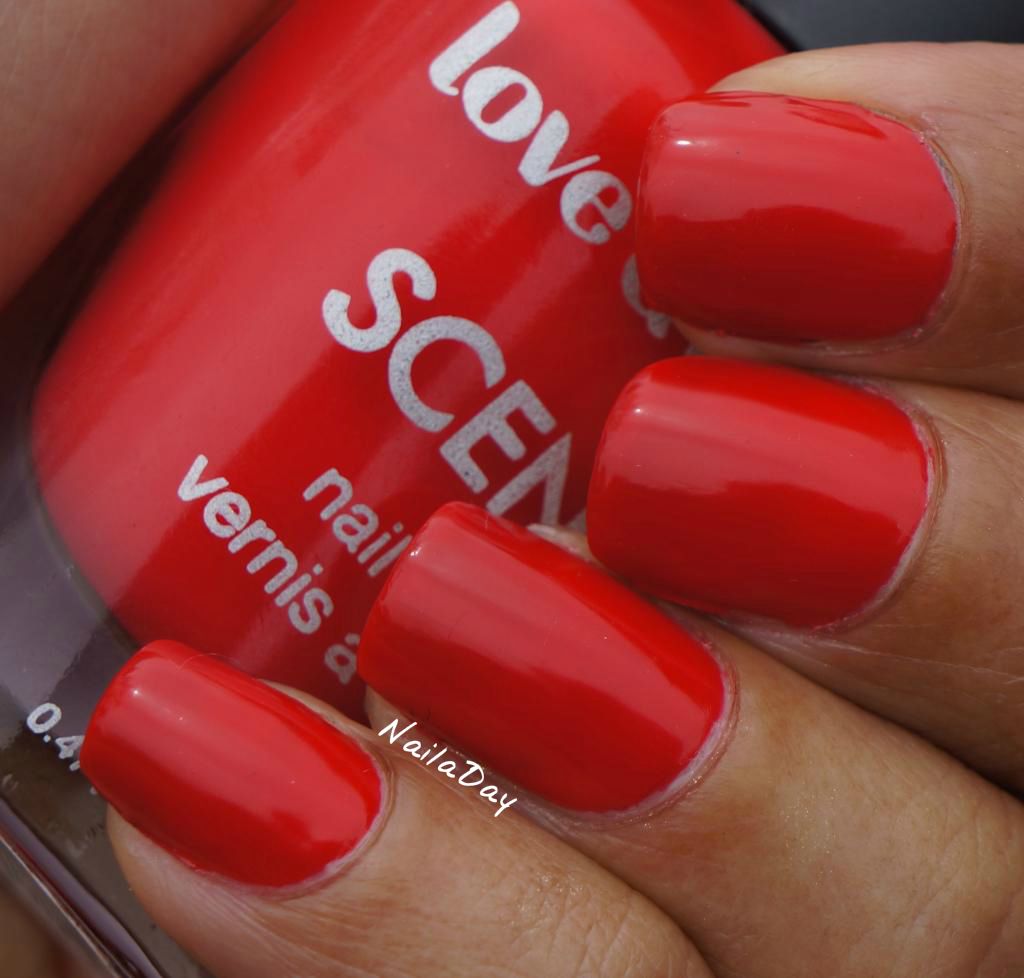
Of course, before getting started on the hike, my first priority was doing my nails! We drove there so I had no problems bringing a few shades along with me. I chose a classic bright red color, something I haven't worn since pre-blogging days. This is Love and Beauty Cherry. It is a scented polish but it didn't a particularly smell like cherries to me.

NailaDay: Love and Beauty Cherry

NailaDay: Love and Beauty Cherry


The sun was peeking in and out at this point so some of these pictures are in full sunlight and some are more shaded. This is two coats, could have probably gone with three for the pictures. The formula itself was pretty easy to work with. This is me entertaining myself while taking pictures of my nails.


I love how my nails showed up as the only pop of color in a sea of neutrals. That night we had a somewhat formal dinner at a french restaurant that was part of this place.


The next day, I happened to catch the Polishcart's post on Sally Hansen Glass Slipper so when we went driving around that day into town, I took the chance to nab that beautiful polish. We also saw this on the way back. A touristy knickknacks store with a lot of metal lawn art in the front...


A lot.....

This is one of the truly better belly pictures of this time. And....I have my eyes closed.


This is my mani with Glass Slipper on it.

NailaDay: Love and Beauty Cherry and Sally Hansen Glass Slipper


NailaDay: Love and Beauty Cherry and Sally Hansen Glass Slipper


NailaDay: Love and Beauty Cherry and Sally Hansen Glass Slipper

Hope this post wasn't too long for you! Usually I'm kind of too lazy to put a lot of pictures up but this weekend had been really fun!!

Wednesday, May 22, 2013

Seven Deadly Sins Challenge: Day 9 - Wrath (My first water spotted nails!!)
Hi guys! So, it's time for another challenge post. The details of this challenge are explained in this post.  Today's challenge prompt is Wrath. "Get mad trying, again, that technique you know it's going to be a fail."

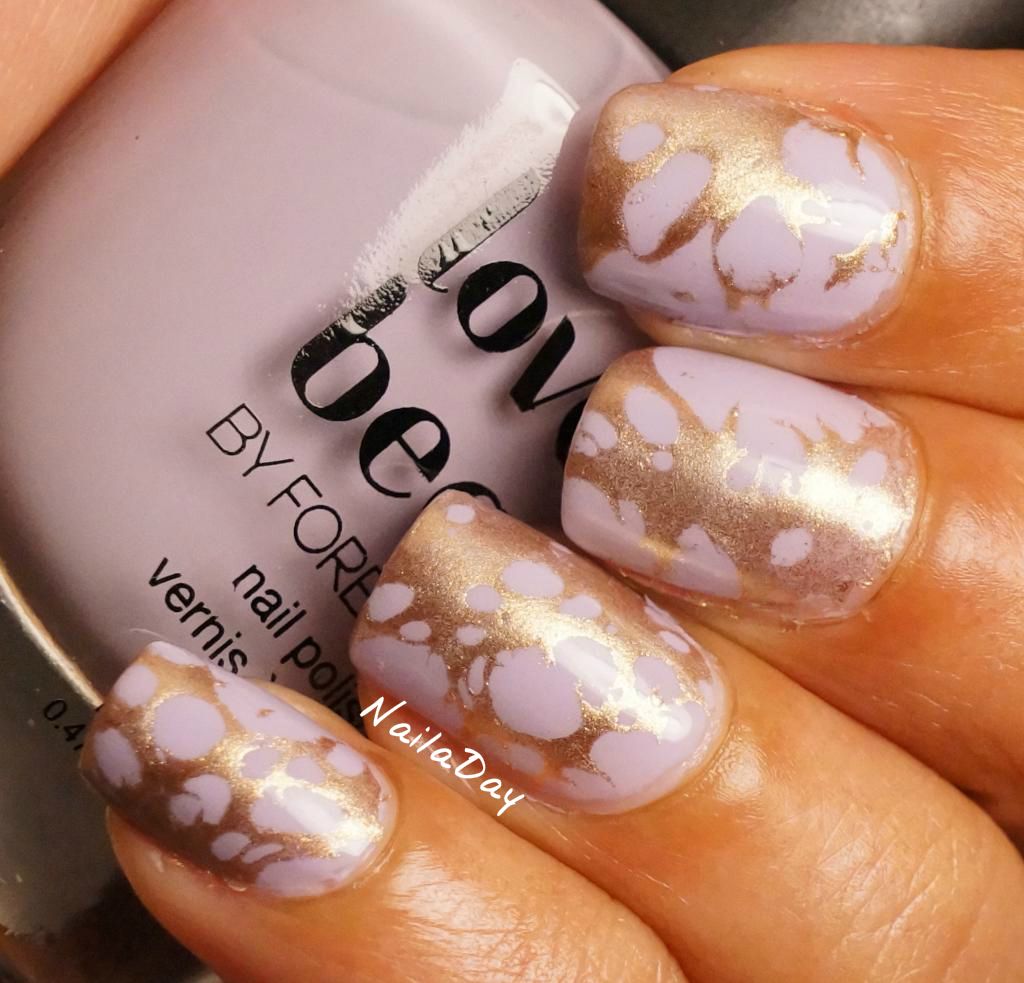
So, for my wrath mani I decided to tackle a technique that has made me pretty angry in the past, the water spotted technique. To know what I'm talking about, here is the tutorial I first saw by cutepolish and then some brilliant examples of this by Spektor's Nails. My initial problem was that I kept trying to use hand sanitizer and could not find the right one. I would keep getting one giant spot in the middle which was not at all useful. Then, on instagram, where I vented about this, someone suggested I try using hairspray. Two dollar Suave hairspray and a few attempts later, I think I got the hang of it! So here are my water spotted nails.

NailaDay: Love and Beauty Lavender with Gold water spotted design

For the base I used Forever 21 Love and Beauty Lavender and the gold is L'Oreal Because You're Worth It. To tell you the truth, I'm a little meh about the mani right now. Maybe it's because of my color choices or maybe I need to add a third color. I'm not writing the technique off at all. I just need to try it with other colors, I think.

NailaDay: Love and Beauty Lavender with Gold water spotted design

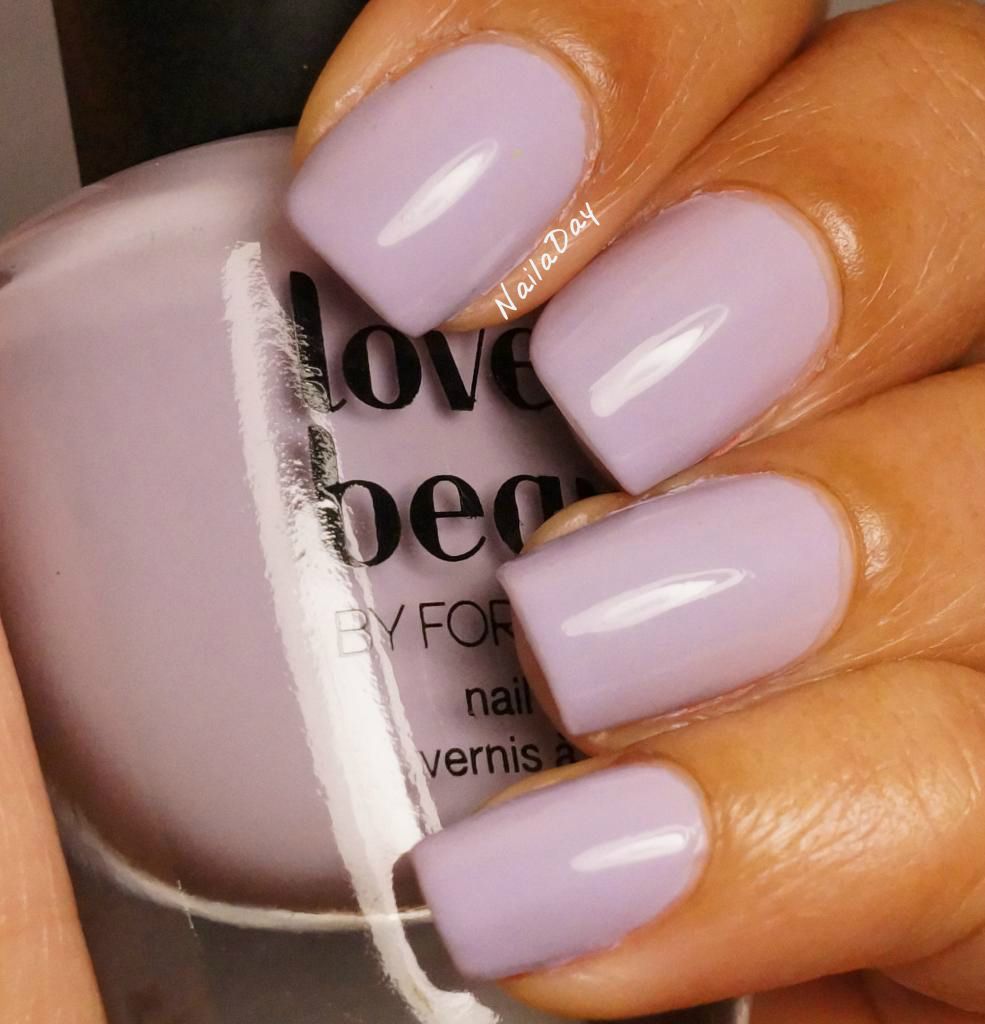
Here is Love and Beauty Lavender all by itself. Isn't it pretty?

NailaDay: Love and Beauty Lavender

Friday, March 1, 2013

Love and Beauty Red Glitter

I'm not going to be too talkative in today's post. I'm showing you a mani that I wore for a while despite it's relatively plain status. This is Forever 21 Love and Beauty Red Glitter. I am a sucker for glittery red polishes like this one and I do have a few. It's certainly not very unique but still a very pretty color. I wore it over a coat of a no-name red I had from ages ago but I'm not really sure that an underwear is needed with this polish.

NailaDay: Love and Beauty Red Glitter

The camera does show a slight hint of visible nail line which was undetectable in real life. Worn by itself, it would probably take three coats for coverage. Here, I used two coats. It is a bit top coat hungry so I have two layers of top coat on it. I usually do one coat of Revlon Colorstay topcoat followed by a quick dry top coat once that's dry. 

NailaDay: Love and Beauty Red Glitter


NailaDay: Love and Beauty Red Glitter

I am certainly looking forward to stamping on this in the future. Till next time...

Thursday, February 14, 2013

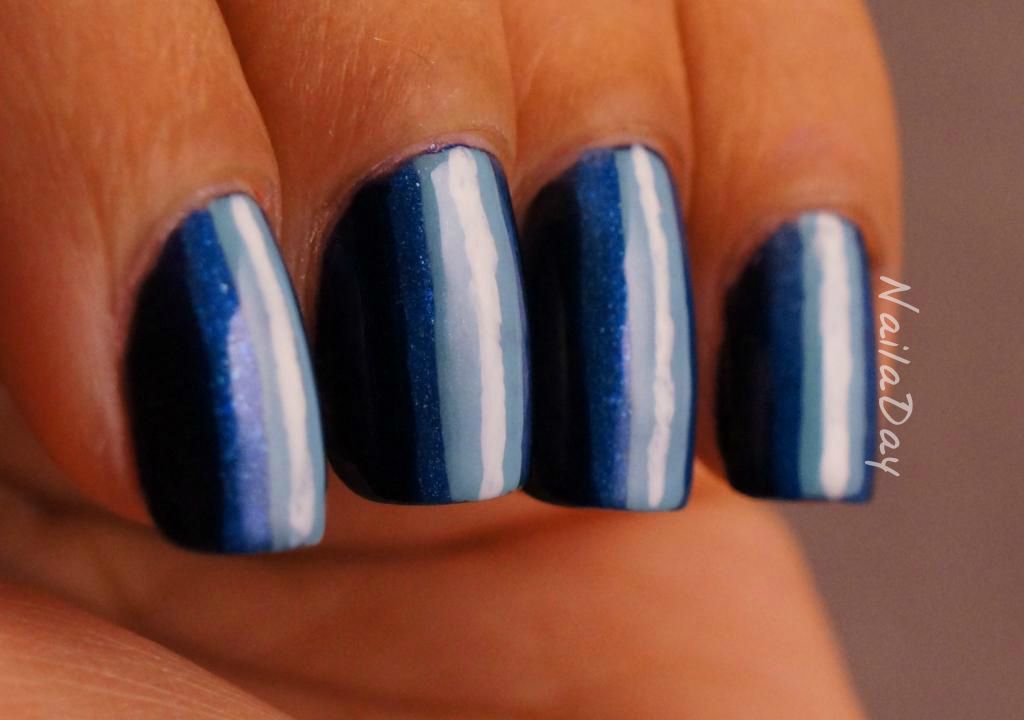
CQ Deep Blue Sea Illusion Stripes

Hi Everyone!!  Happy Valentine's Day! I feel so much better today! I got over a nasty cold and overall, I think things are looking up. I have some big personal news coming up in a little while that I can't reveal yet but I'll entertain guesses!

In the meantime, I have a very un-Valentine mani for you. Not because I don't like the holiday or anything. My husband and I are just not making a very big deal of it this year. Which is fine with me because I am ready to go to sleep and we haven't even eaten dinner yet. Dinner that my husband made, though, so I guess that was rather sweet of him :-)

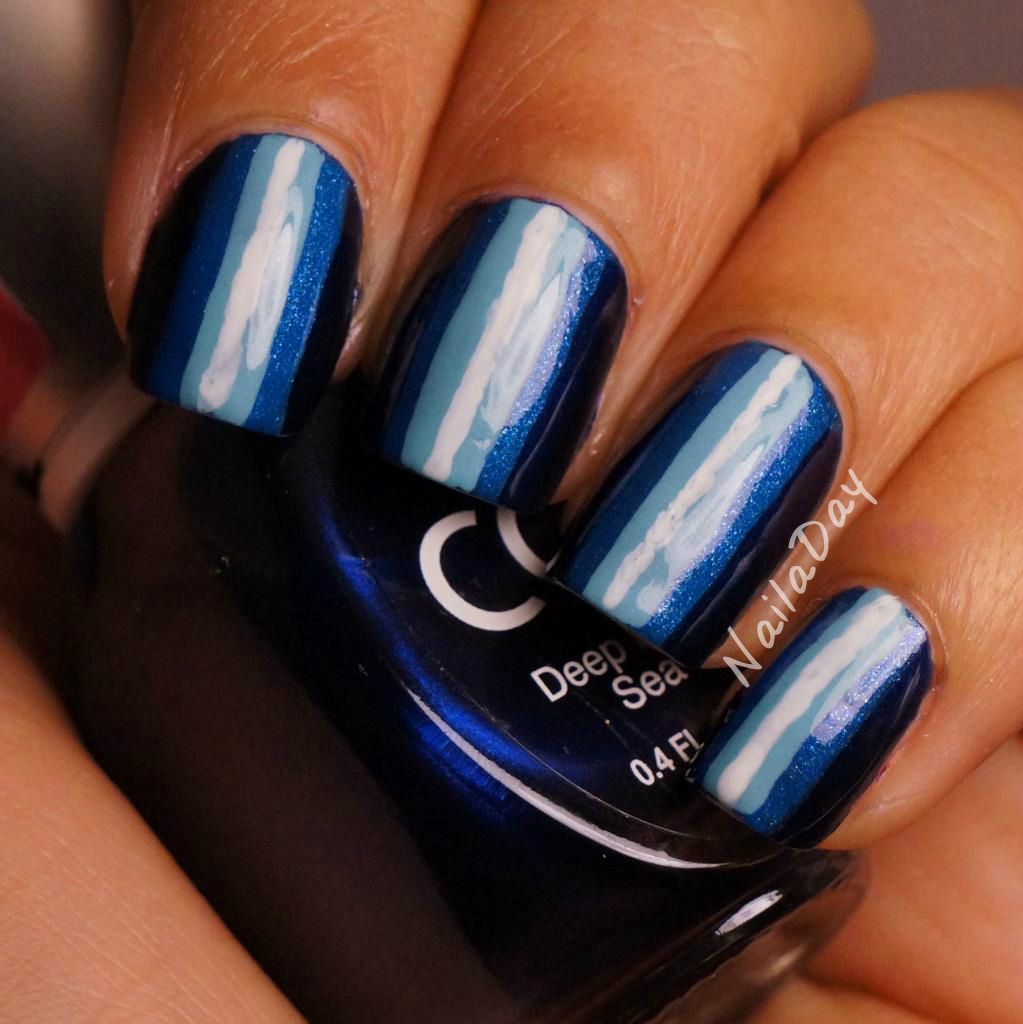
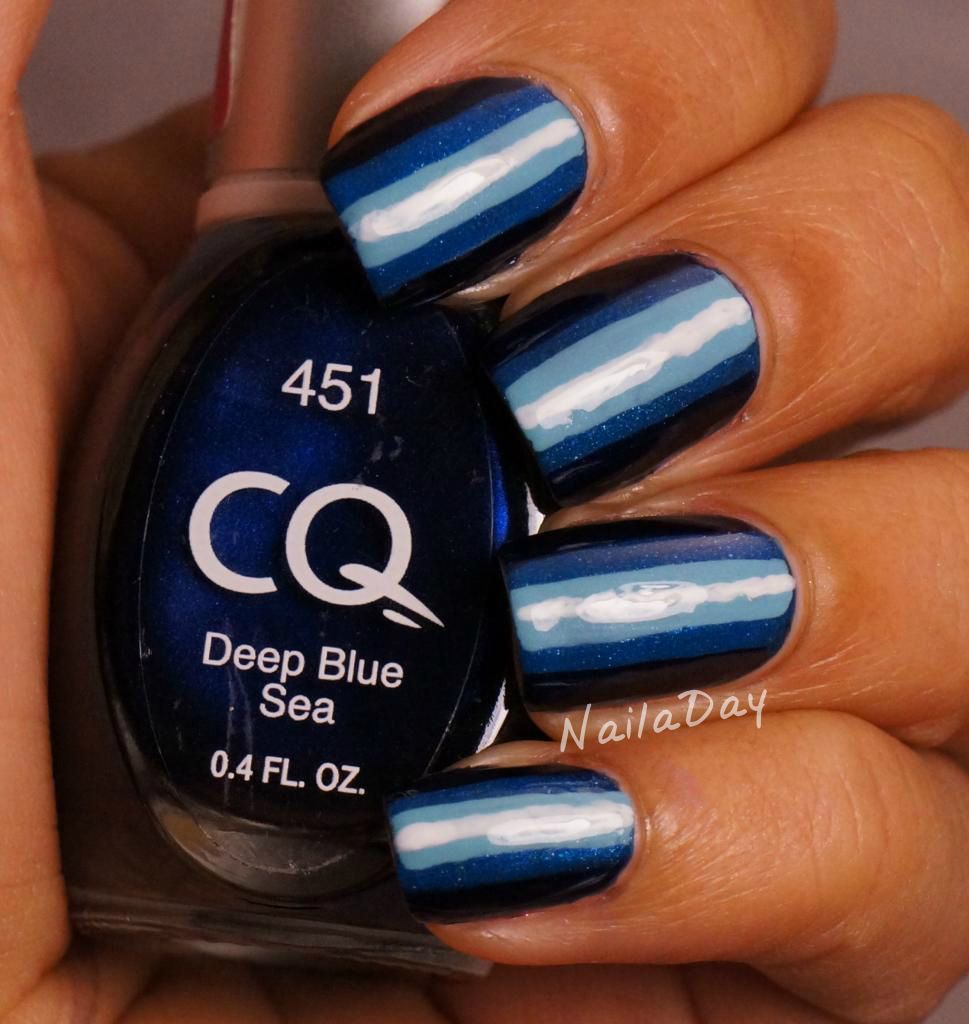
NailaDay: CQ Deep Blue Sea Illusion Stripes

I think I saw something similar on Pinterest with different colors and I had always wanted to try the look myself. It's all done freehand with nothing more than the brush from the polish bottle itself. I started with the darkest color and then just painted the lighter colors in narrower and narrower bands ending with the lightest color, the white.

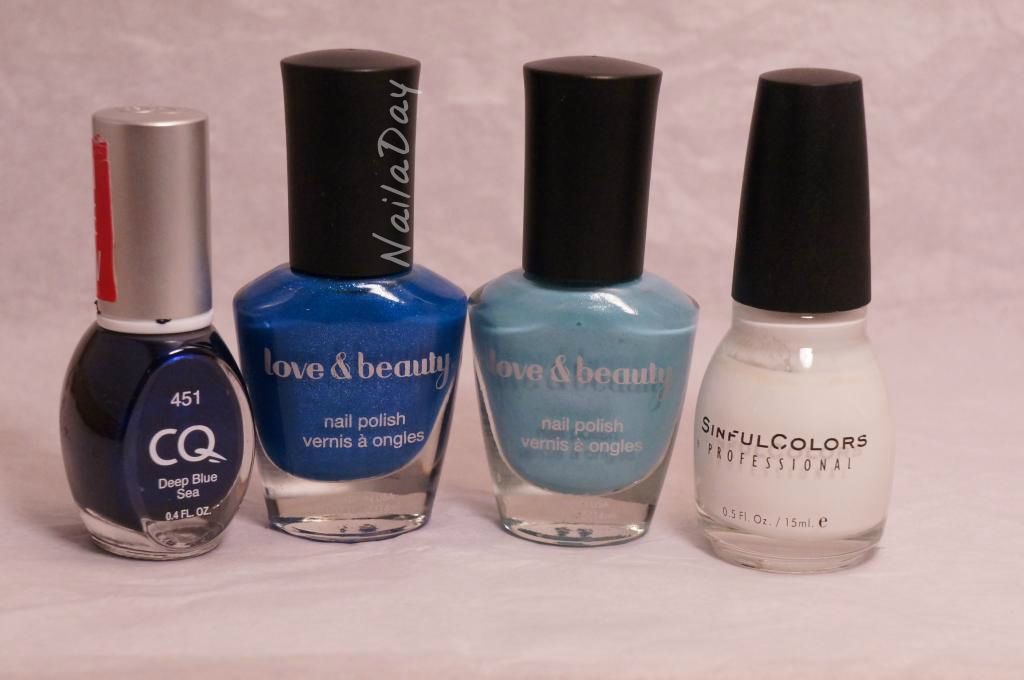
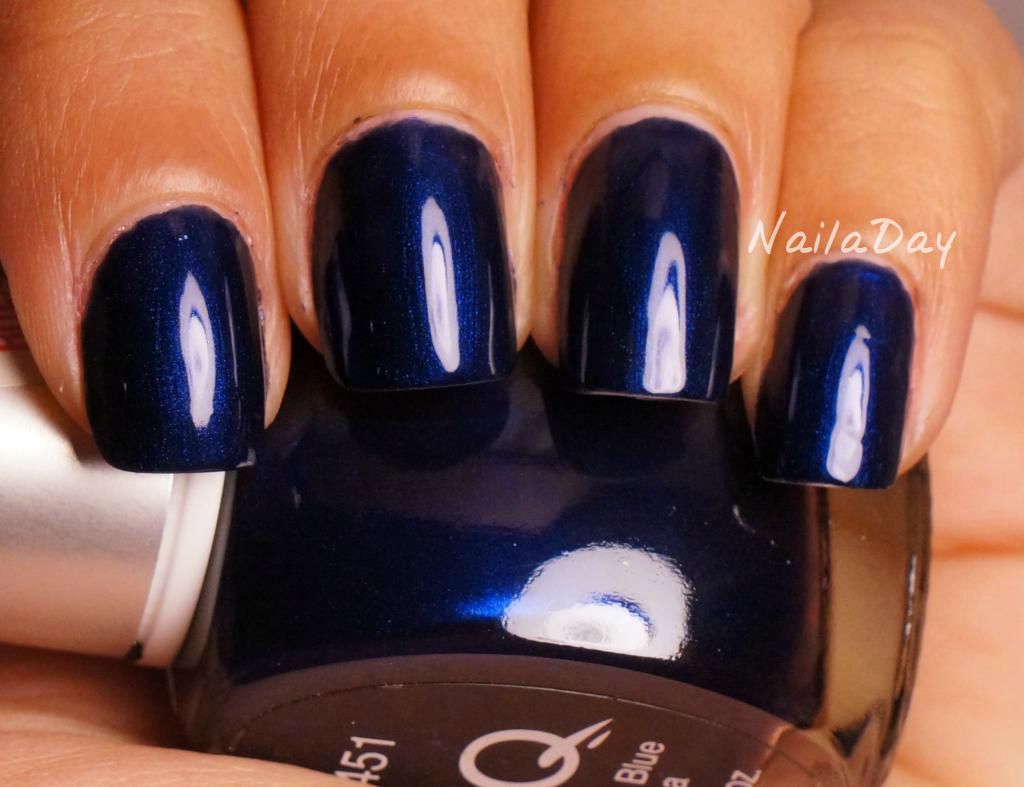
The colors I used are shown below. The darkest blue is CQ Deep Blue Sea. I love blues like this. So simple but with so much depth. The next two are Love & Beauty Blue and Aqua. The white is from Sinful Colors.

NailaDay: CQ Deep Blue Sea Illusion Stripes

I love the look of the stripes because it gives such an illusion of reflecting a bright light from further away. 

NailaDay: CQ Deep Blue Sea Illusion Stripes


NailaDay: CQ Deep Blue Sea Illusion Stripes

NailaDay: CQ Deep Blue Sea Illusion Stripes

This is Deep Blue Sea by itself:

NailaDay: CQ Deep Blue Sea


Related Posts Plugin for WordPress, Blogger...