Showing posts with label freehand. Show all posts

Saturday, February 14, 2015

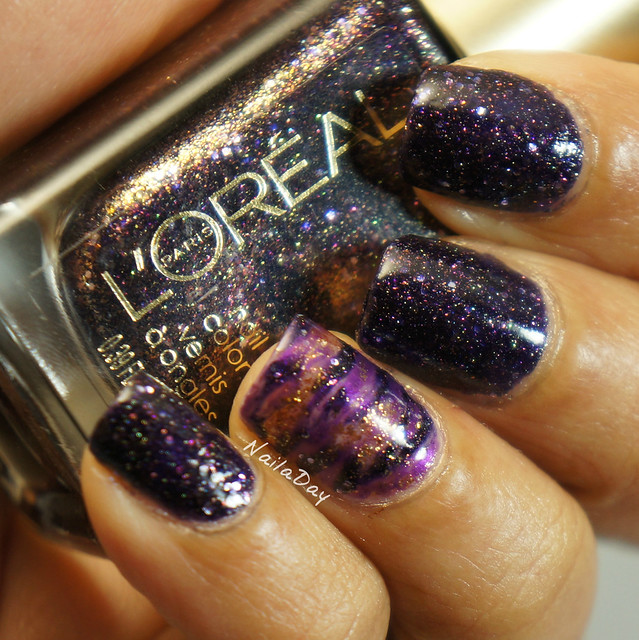
L'Oreal Sexy in Sequins with freehand stripes accent

Hi everybody,

I'm going to go against the grain today and do a non-Valentine's Day mani. Historically, anytime I try to do a Valentine's Day mani, it just blows up in my face. So this year, despite evidence of it all around me, I didn't do a Valentine's mani. I actually even forgot it was Valentine's Day until my husband came home with a bunch of roses after grocery shopping. It was so sweet of him!!

What am I going to show you instead? One of the L'Oreal textured polishes called Sexy in Sequins. I didn't take a photo of it in the textured state. I honestly forgot but I do remember that it took three coats of topcoat and still had a slight bumpiness to it.
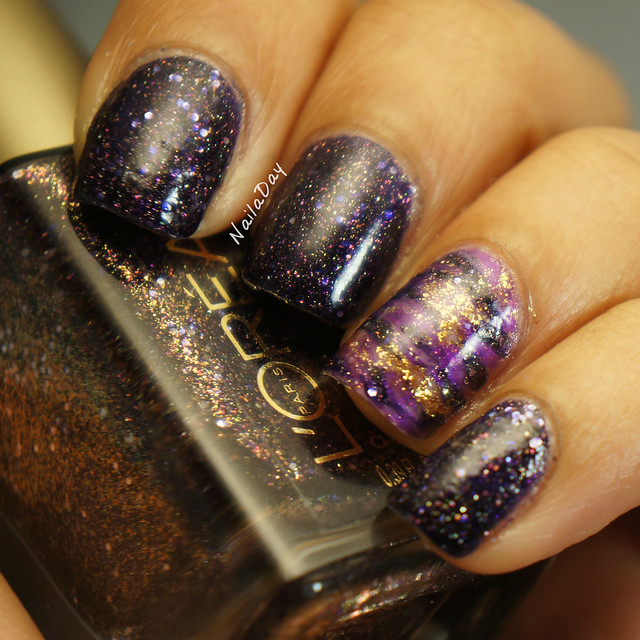
NailaDay: L'Oreal Sexy in Sequins with freehand stripes accent

NailaDay: L'Oreal Sexy in Sequins with freehand stripes accent


 I was actually kind of disappointed because all that lovely gold shimmer in the bottle was hiding on the nail. It ended up looking darker and less shimmery than I thought it would be.

Anyway, happy Valentine's Day to you all and thanks for looking!

Thursday, January 23, 2014

OPI Congeniality is my Middle Name with leopard print accent

Here we go! Another week, another mani. Ok, more like a couple of weeks! I was in sunny AZ last week, getting my study on at a board review course. I took my son and husband with me and I think both of us came away from that trip feeling more pooped than usual! My son turned out to be a decent traveler though. As long as he could nurse, he was fine. He slept on all of the plane trips there and back. What a relief!

On to the mani. This is OPI Congeniality is my Middle Name. I love love this color. The brightness of this fuschia is just right. Jewel toned and vibrant. The only weird thing about this polish is that all the shimmer seems to want to settle in the bottle. I always have to give it a good shake prior to application. This is two coats, easy application. 

NailaDay: OPI Congeniality is my Middle Name with leopard print accent


I jazzed this one up with my first ever freehand leopard spots. I loved it!! It felt just right.

NailaDay: OPI Congeniality is my Middle Name with leopard print accent


NailaDay: OPI Congeniality is my Middle Name with leopard print accent

Saturday, July 20, 2013

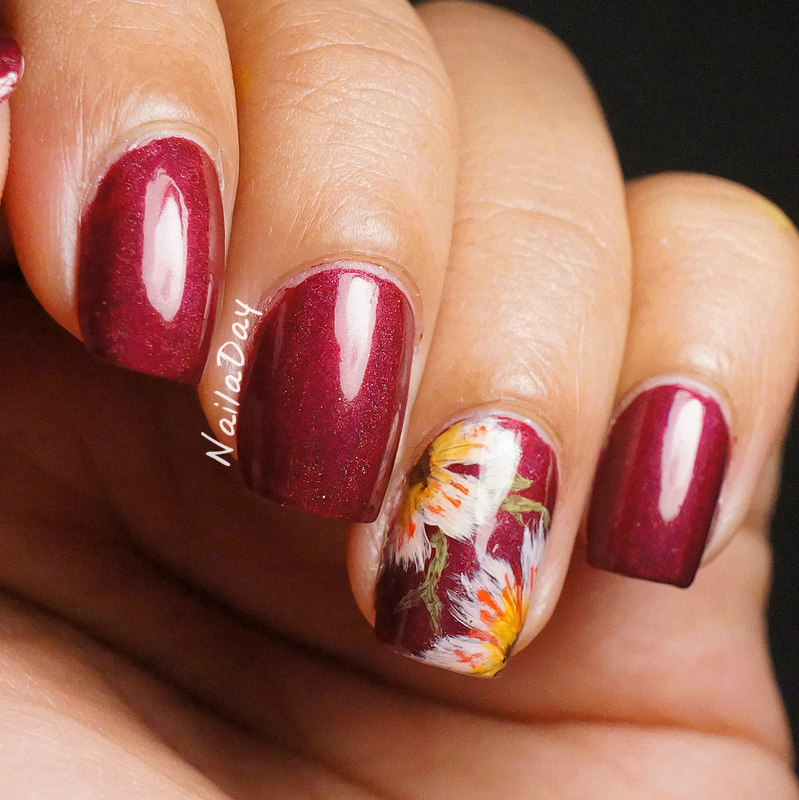
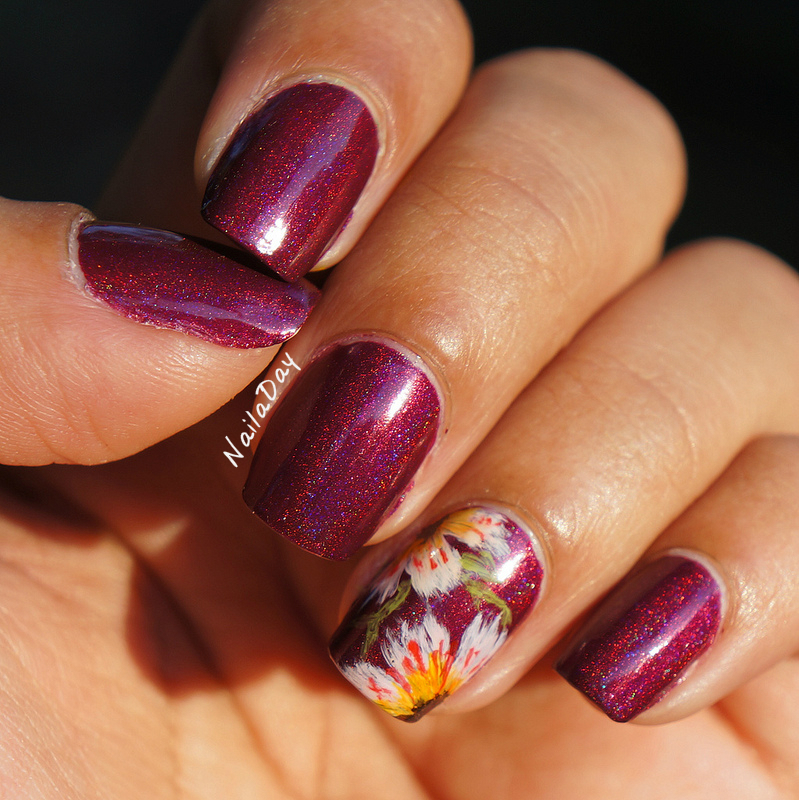
Borghese Sonata Berry Franken with freehand acrylic flowers

Hi guys!
This is a big weekend for me. I had my Seemantham today, which is a religious function for expectant mothers with their first child. Tomorrow is going to be my baby shower! Of course this weekend needs two manis, one for each function, right? I'll show you what I ended up wearing today and if I manage to find the time to change my mani for tomorrow's shower, I'll show you that in my next post.

NailaDay: Borghese Sonata Berry Franken with freehand acrylic flowers

Once upon a time when holographic nail polish was still hard to get, I had heard about a pigment called spectraflair that gave the elusive beautiful holographic rainbows finish to any polish it was added to. I got myself a packet of it, back when it was more easily available and this is the first polish I made with it. It's Borghese Sonata Berry with a ton of spectraflair pigment in it. I had no idea how to do it right and I think that was evident with this polish. I didn't get as strong of a rainbow with this as I wanted so it sat in the drawer until now. Now I'm kicking myself for holding off. I actually love the subtlety of the polish. And I'm kicking myself for not taking advantage of the China Glaze Hologlams clearance at Sally's. It never ends.

NailaDay: Borghese Sonata Berry Franken with freehand acrylic flowers

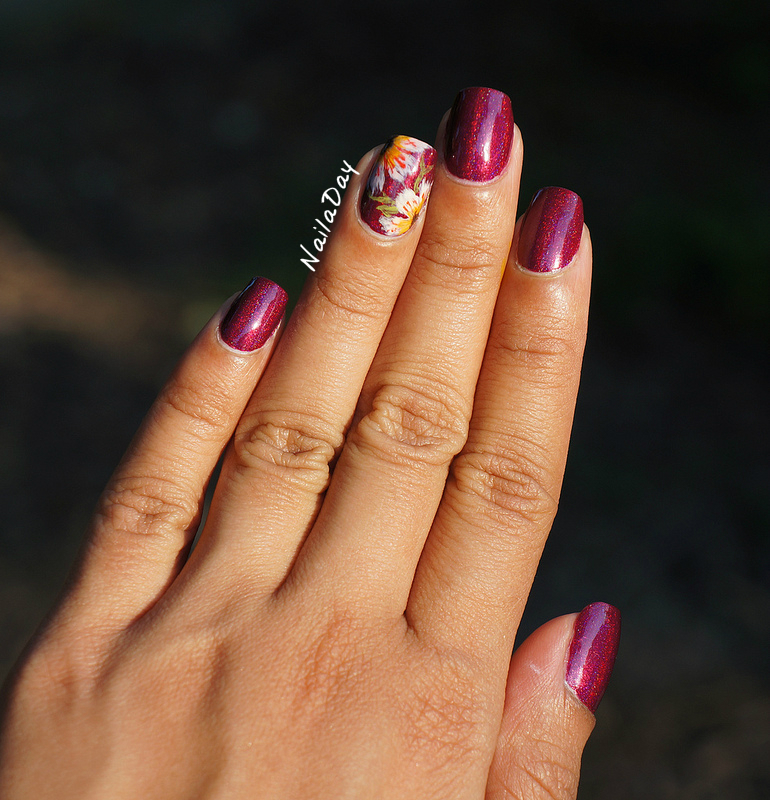
Inside or cloudy weather, it looks like your standard burgundy. Under the lightbox, it has a lovely sheen to it, because of the spectraflair pigment. In the sunlight, the rainbows come out!!

NailaDay: Borghese Sonata Berry Franken with freehand acrylic flowers

What I really love about this mani are the flowers. With the recent brushstroke manis, I became a little more comfortable using the nail art brushes and thought I could do little ragged flowers. They are my first attempt at freehand acrylic painting and I think they came out pretty well! It took a lot less time than I thought it would too, probably because I just did one nail.

NailaDay: Borghese Sonata Berry Franken with freehand acrylic flowers


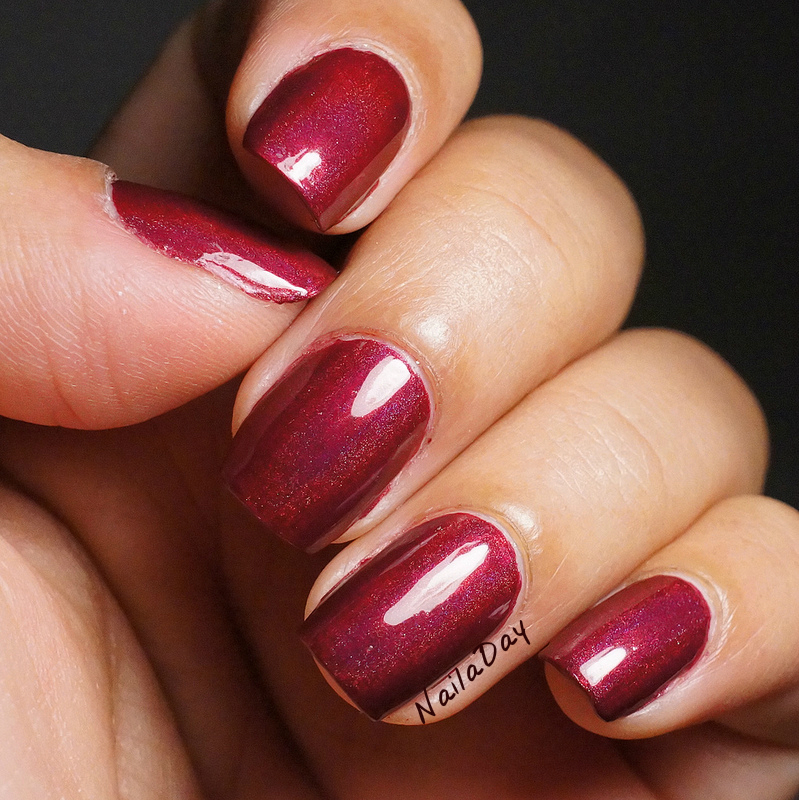
Here are some pictures of the frankened polish by itself.

NailaDay: Borghese Sonata Berry Franken

NailaDay: Borghese Sonata Berry Franken

For a spectraflair franken, it's not that impressive. I love the color though and I am in love with the flowers!!

Tuesday, July 16, 2013

Another tutorial! My raggedy brushstroke design.

Hi folks! What? Another post by me already? This is sort of a quick and dirty post. I have a tutorial for you based on my recent two manis here and here using the raggedy brushstroke technique.


NailaDay: Raggedy Brushstroke design tutorial

A couple of tips:
1. Make sure each color is mostly if not all the way dry before going to the next color. Shouldn't take long.
2. Don't have the brush too heavily laden with polish because you want it to run out and fade as you get to the end.
3. Use a light hand when stroking the colors down the nail. You can lean a little heavier on the brush close to the base but lighten up as you get to the end of the stroke.
4. It actually helped me to have a cheap brush that didn't give me perfect straight thin lines. It helped with the raggedy look.

I got my brush as part of a set on Ebay.

I truly don't know if there is much that is completely original regarding simple nail art anymore because so many of us arrive at the same technique and design independently. So, of course, during an internet search, I found a YouTube video of something similar to this done by SimpleNailArtDesigns. I would be remiss if I didn't show you this video because I think it's fantastic for those who want to see it being done.


How did I do with my tutorial? Was it a flub or actually helpful?

Monday, July 15, 2013

Now for something totally different. Neon Brushstroke Mani!

Hi everyone! Hope you all had a good weekend! Mine was...eeeh. That belly of mine that people love to talk about has been giving me a bit of pain issues and it got to the point where I couldn't do much besides sit on a couch and put my feet up all Sunday (so sad, right?). Well, after so much of catching up on work, what else could I do but watch TV and paint my nails! I decided to try my hand at the raggedy brushstroke technique again (I need a good name for this) and decided to go with completely different colors. I haven't done a neon mani this summer yet so that's what I went with!

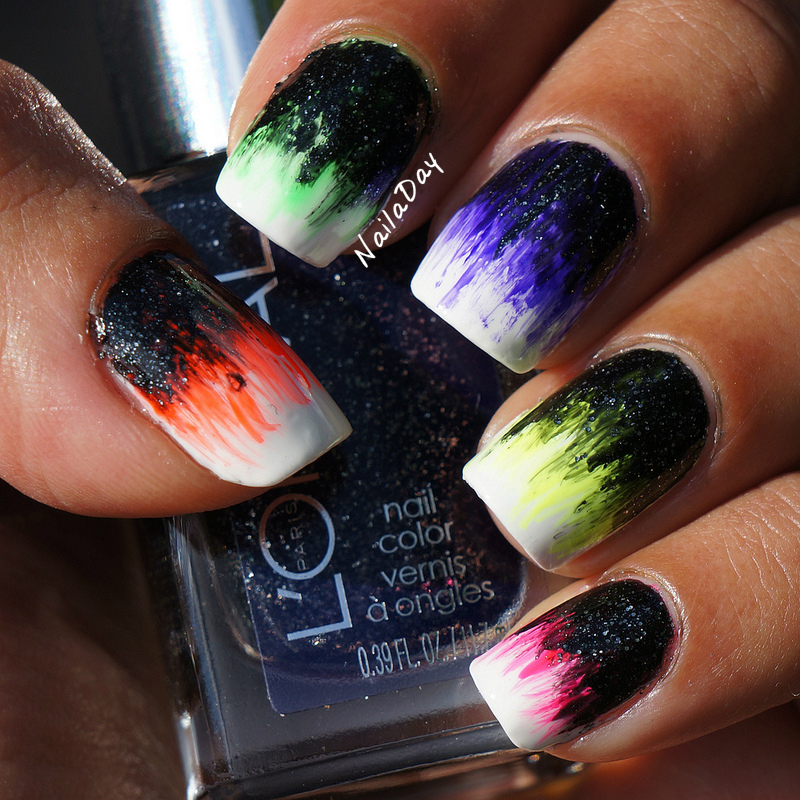
NailaDay: Neon Brushstroke skittles mani

Um...crazy right? What a difference from the last one! The colors I used for this one are:
Sinful Colors Snow me White (base)
Sinful Colors Neon Melon (highlighter yellow)
Sinful Colors Summer Peach (orange)
Sinful Colors Pink
Sinful Colors Irish Green
Studio M Grape Escape
L'Oreal The Queen's Ambition (glittery black)

NailaDay: Neon Brushstroke skittles mani


NailaDay: Neon Brushstroke skittles mani


So, I surprised myself by actually wearing this to work but it was a light day. I might take it off though. It's a little loud. Too bad. It's growing on me. My hubby, though, not a fan. He gave this a 2/10.

Friday, July 12, 2013

Another dress inspired mani with Salon Perfect Brown Sugar

Hi folks. Survived another week! It's a bittersweet end though because I'm on call this weekend and hauling my 33 week belly around the hospital is going to be a chore.

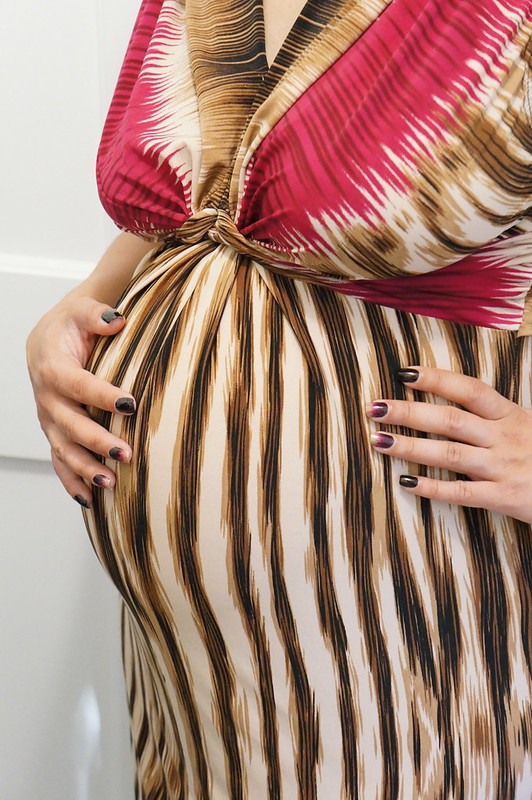
I have a pretty sweet mani and a new to me technique to make up for it though! This mani is the first time I attempted the whole brush stroke nail art look. The verdict: I love it!!!  I actually thought of it in order to match a certain dress I wore this week, which I'm showing you at the bottom of the post.

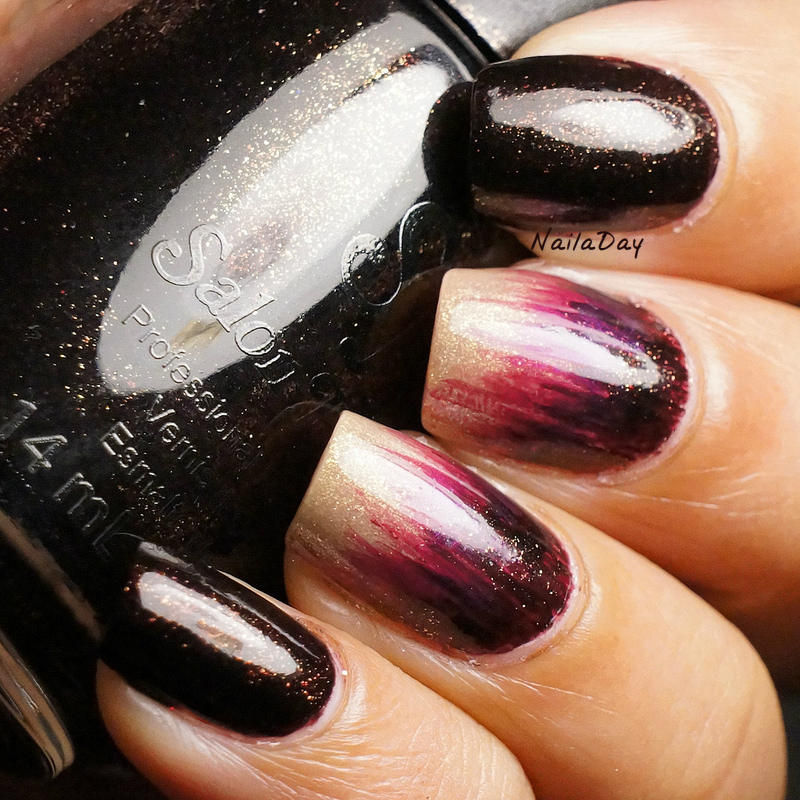
NailaDay: Salon Perfect Brown Sugar with brush stroke accent nails

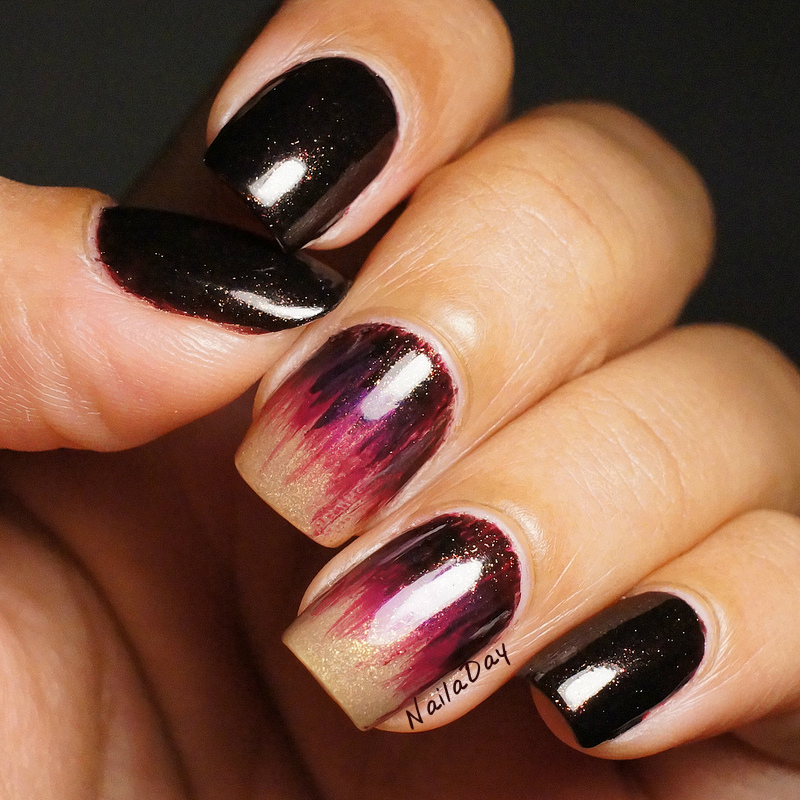
The polishes I used for this are Salon Perfect Brown Sugar, seen above, Salon Perfect Faux Glow, which you saw last in this mani, and Sinful Colors Fig. I used two coats of Brown Sugar on the plain nails and for the accent nails, I used two coats of Faux Glow and then painted freehand strokes with Fig with a small nail art brush randomly starting at the cuticle and ending before I got to the tip. Over that, I did the same thing with Brown Sugar, stopping even earlier to allow Fig to show through. I do believe Brown Sugar is a dupe for China Glaze Midtown Magic. I have both, never worn Midtown Magic but in the bottle they look exactly the same!

NailaDay: Salon Perfect Brown Sugar with brush stroke accent nails

NailaDay: Salon Perfect Brown Sugar with brush stroke accent nails

And here's me, sporting the dress and the mani.

NailaDay: Salon Perfect Brown Sugar with brush stroke accent nails

Why did I get all fancy, you might ask? No? I'll tell you anyway. This week, I got to meet some fellow Cleveland bloggers for the first time! I have been following both Michelle from All Lacquered Up and Andrea from Chickettes for a little while now and it was so nice to realize that we actually lived in the same place! I really started this blog as a way to just talk about and expand a little on my hobby and get a little more interaction from other people just as interested in this hobby as me. I have my own little corner of the internet and it's fun when I get you guys dropping in as visitors to check out what I've been doing. (I love your comments too, hint). Having an actual meetup with other nail bloggers, though, seemed to take it to another level. It was just neat to get out of my usual routine and interact with women from a completely different background from me and be able to share in a common interest! Anyway, can you tell I don't get out much, haha? Most times it really feels like work and baby are my life. I'm really looking forward to more meetups in the future!

Sunday, March 31, 2013

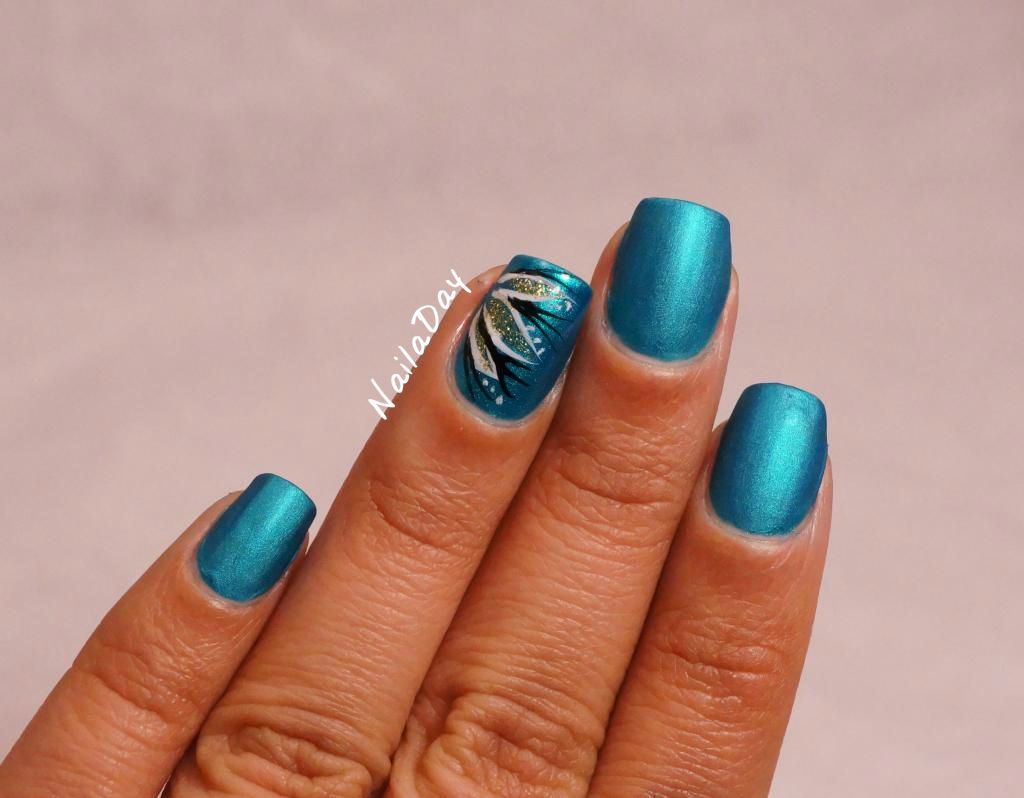
Orly Its Up to Blue update with flower accent

Hi! So as many of you might be aware, Google Reader is getting phased out. That's a bummer but I tend to use Blogger to catch up on all my blogs, anyway. Hopefully that doesn't get affected. For those of you looking for an alternate way to keep track of my posts, I have been on Bloglovin for some time now, as well as Hello Cotton. If you look over to the right, you will see the other ways in which you can follow me including Instagram and Tumblr. It doesn't matter how you choose to follow your blogs, just remember to add mine to your list if you are transferring out of Reader!!

Today, I'm going to show you one of my favorite manis ever!! This is the update to the mani I posted in my last post, where I showed you Orly It's Up to Blue mattified. That shiny ring finger was begging for some kind of detail so I ventured into the realm of freehand nail art. I took my inspiration from this pinterest photo. (Uh, a lot of inspiration) I just thought it looked so simple and pretty!

NailaDay: Orly Its Up to Blue mattified with flower accent


I think I could have used a little more practice to make the line and dots look better but I was pretty happy with the way it turned out!

NailaDay: Orly Its Up to Blue mattified with flower accent


NailaDay: Orly Its Up to Blue mattified with flower accent


What do you all think? Should I continue my exploration of freehand art? I think so! I love the results!

Thursday, February 14, 2013

CQ Deep Blue Sea Illusion Stripes

Hi Everyone!!  Happy Valentine's Day! I feel so much better today! I got over a nasty cold and overall, I think things are looking up. I have some big personal news coming up in a little while that I can't reveal yet but I'll entertain guesses!

In the meantime, I have a very un-Valentine mani for you. Not because I don't like the holiday or anything. My husband and I are just not making a very big deal of it this year. Which is fine with me because I am ready to go to sleep and we haven't even eaten dinner yet. Dinner that my husband made, though, so I guess that was rather sweet of him :-)

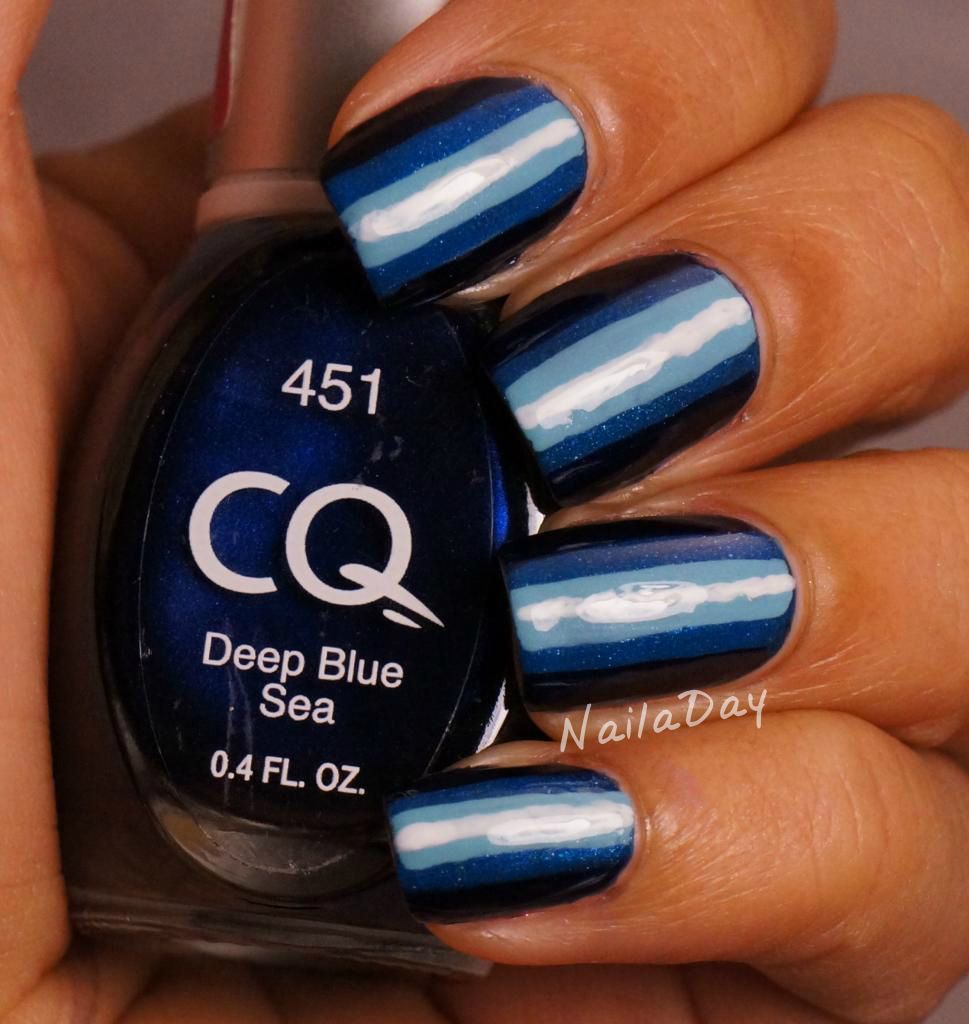
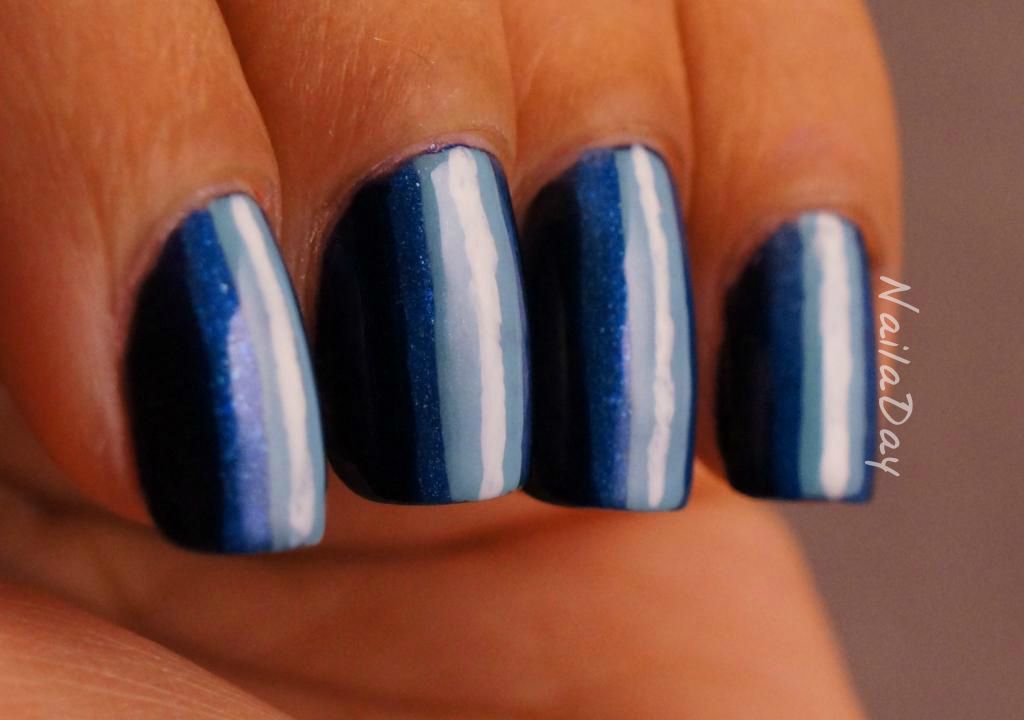
NailaDay: CQ Deep Blue Sea Illusion Stripes

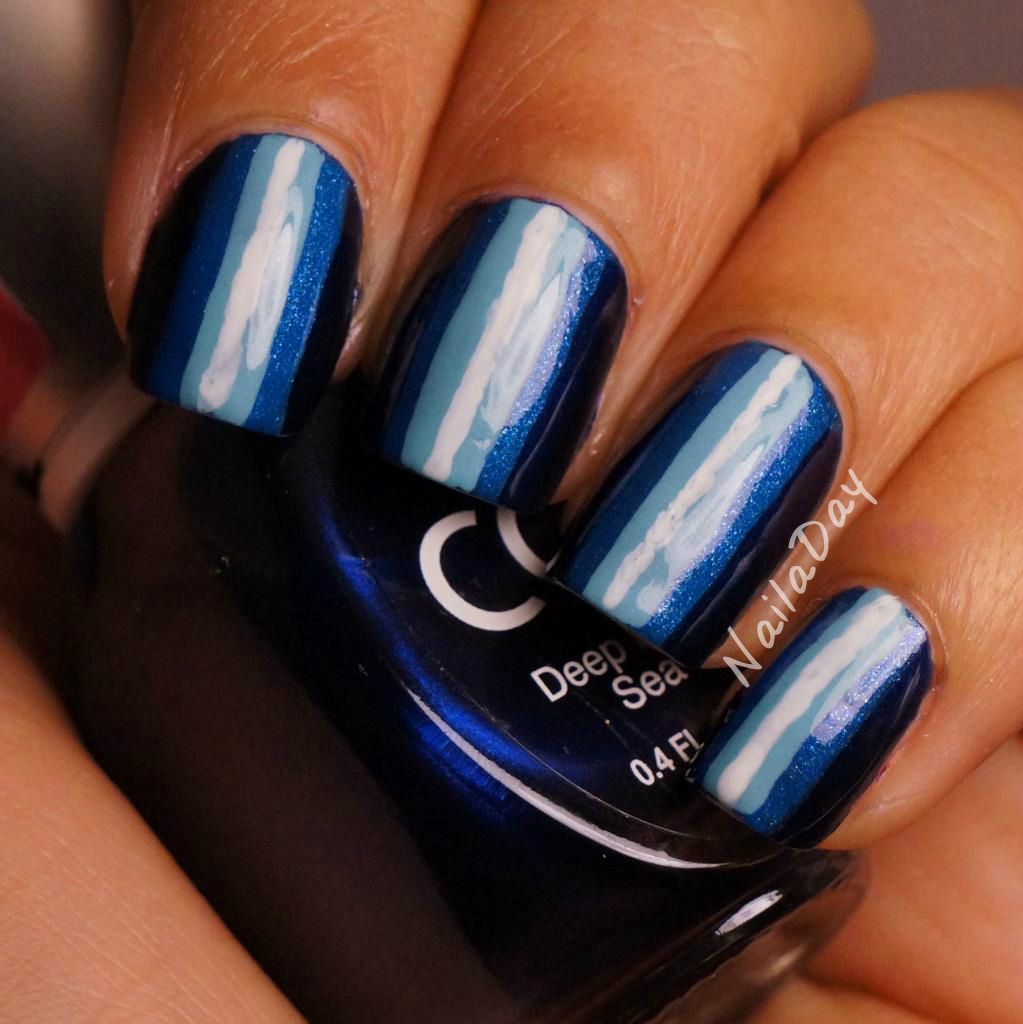
I think I saw something similar on Pinterest with different colors and I had always wanted to try the look myself. It's all done freehand with nothing more than the brush from the polish bottle itself. I started with the darkest color and then just painted the lighter colors in narrower and narrower bands ending with the lightest color, the white.

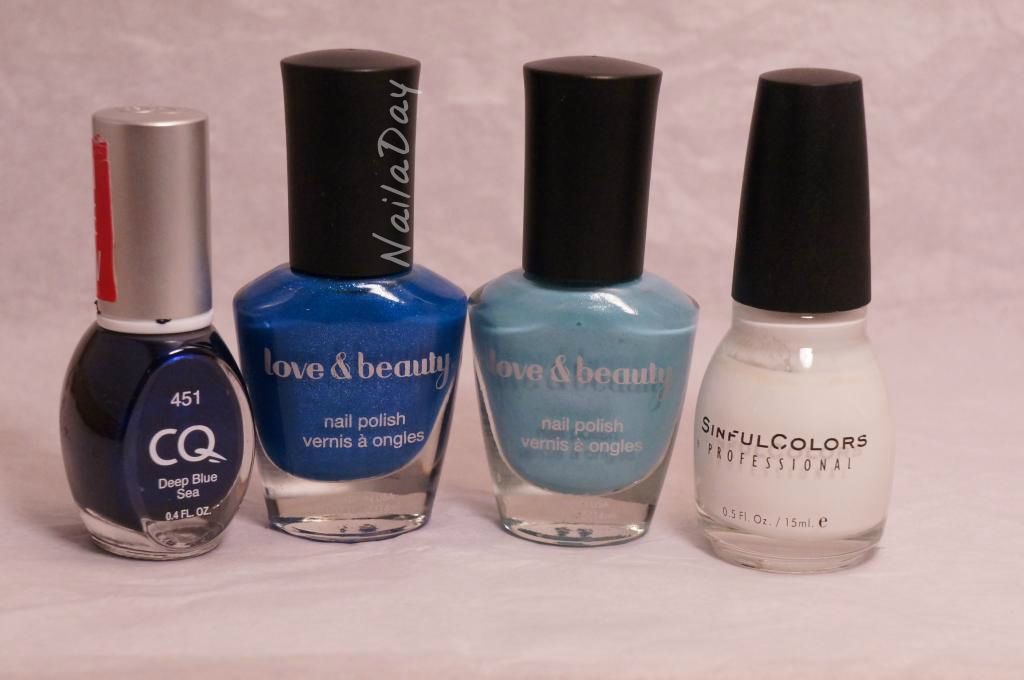
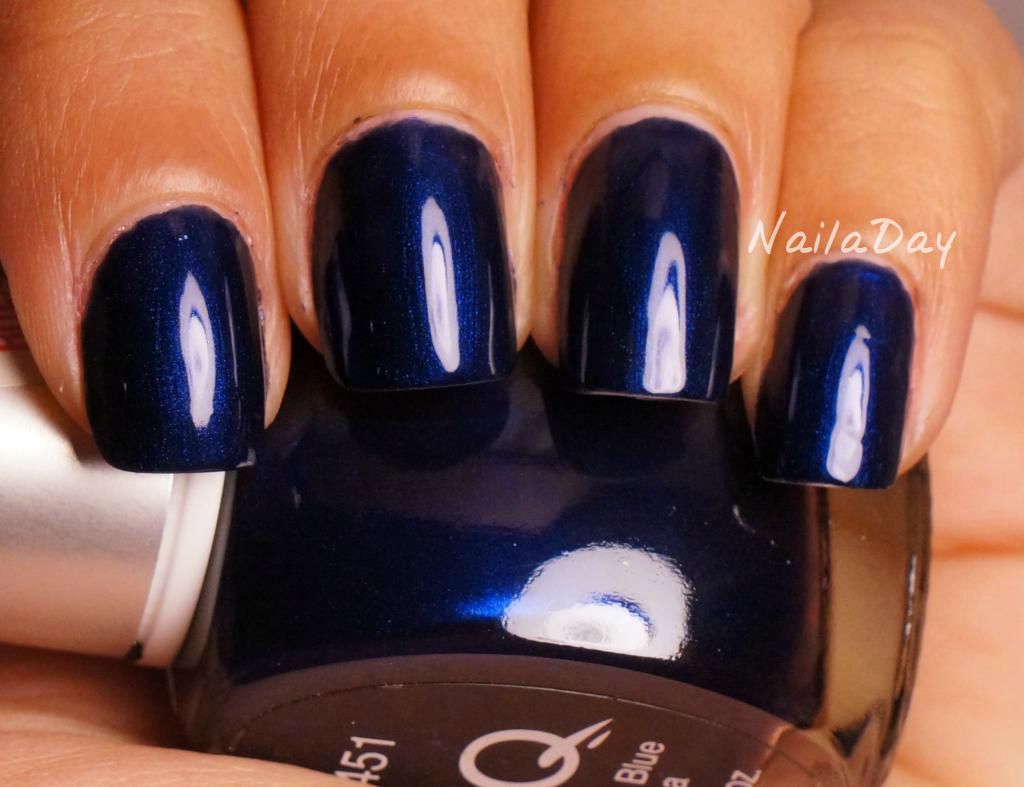
The colors I used are shown below. The darkest blue is CQ Deep Blue Sea. I love blues like this. So simple but with so much depth. The next two are Love & Beauty Blue and Aqua. The white is from Sinful Colors.

NailaDay: CQ Deep Blue Sea Illusion Stripes

I love the look of the stripes because it gives such an illusion of reflecting a bright light from further away. 

NailaDay: CQ Deep Blue Sea Illusion Stripes


NailaDay: CQ Deep Blue Sea Illusion Stripes

NailaDay: CQ Deep Blue Sea Illusion Stripes

This is Deep Blue Sea by itself:

NailaDay: CQ Deep Blue Sea


Monday, February 4, 2013

Verity Brilliant Violet Stained Glass mani

Hi everyone. Here is another yet another mani I did just before the holidays. I'm sure I'll start posting some current ones soon but I still have a back log. Hmm..I wonder why.

NailaDay: Verity Brilliant Violet Stained Glass Mani


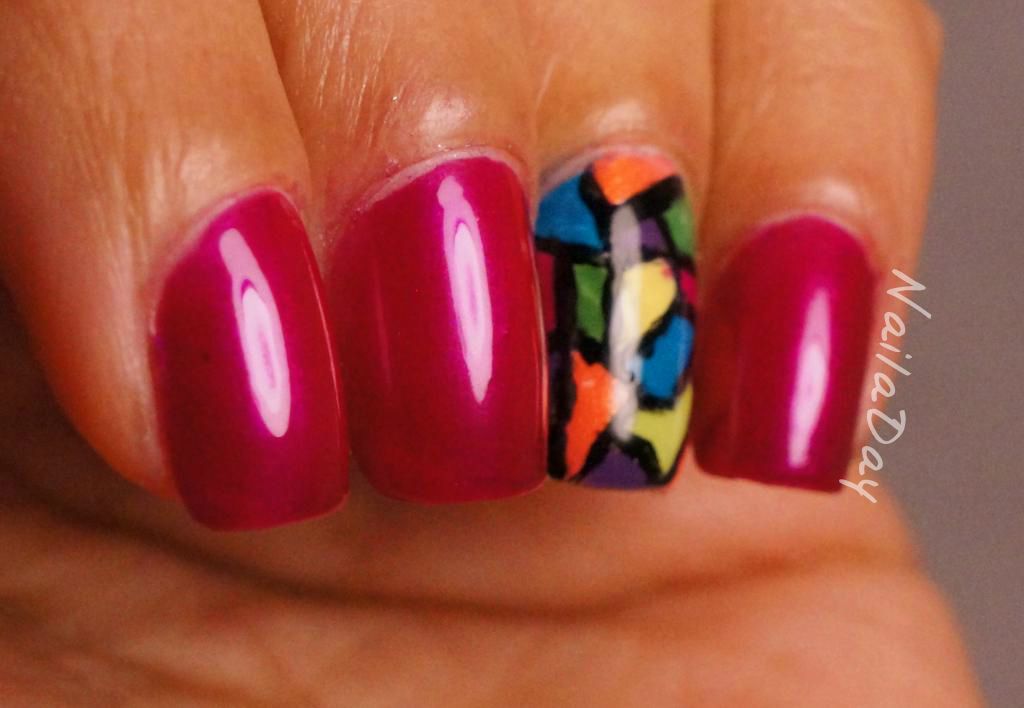
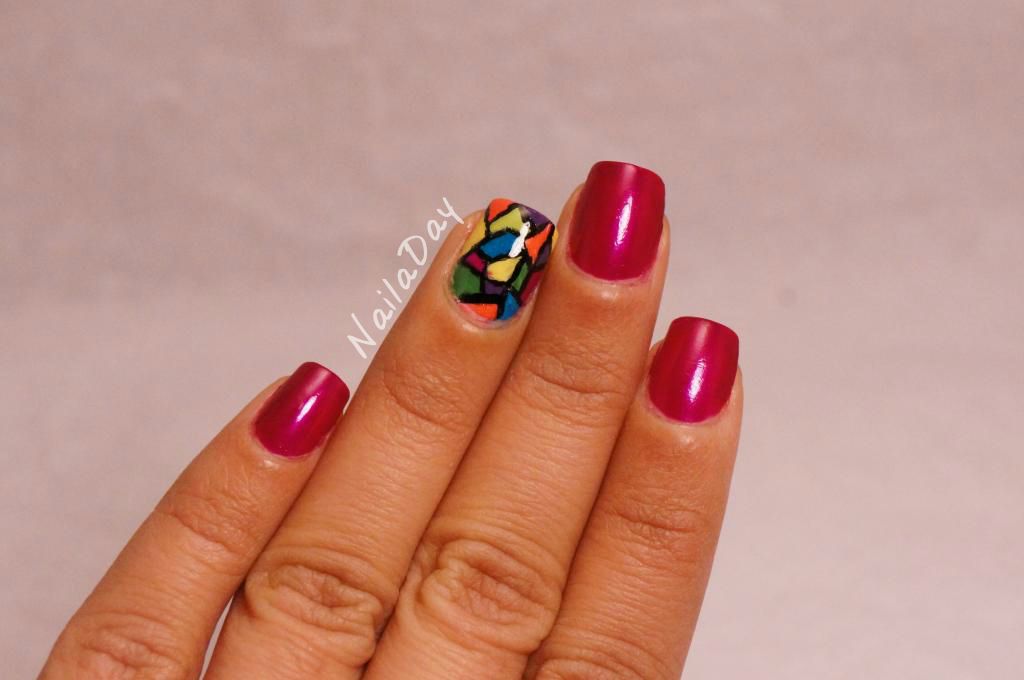
This mani was done with what is now one of my favorite fushcias, Verity Brilliant Violet. I bought this the same time I bought Verity Deep Violet and I love them both!

NailaDay: Verity Brilliant Violet Stained Glass Mani

For the "stained glass" look on the accent nail, I used a thin nail art brush, painted the black lines on a white base, then painted each individual color with a nail art brush and went over the black lines one last time. For my first effort, I really loved how it came out. The camera shows a lot of imperfections but it looked pretty cool in real life. It was really time consuming but I want to try it again.

NailaDay: Verity Brilliant Violet Stained Glass Mani


Related Posts Plugin for WordPress, Blogger...