Tuesday, May 28, 2013

Seven Deadly Sins Mani: Day 11 - Envy (aka. My first quilted nails, with Urban Outfitters Smush)

Hello everyone!

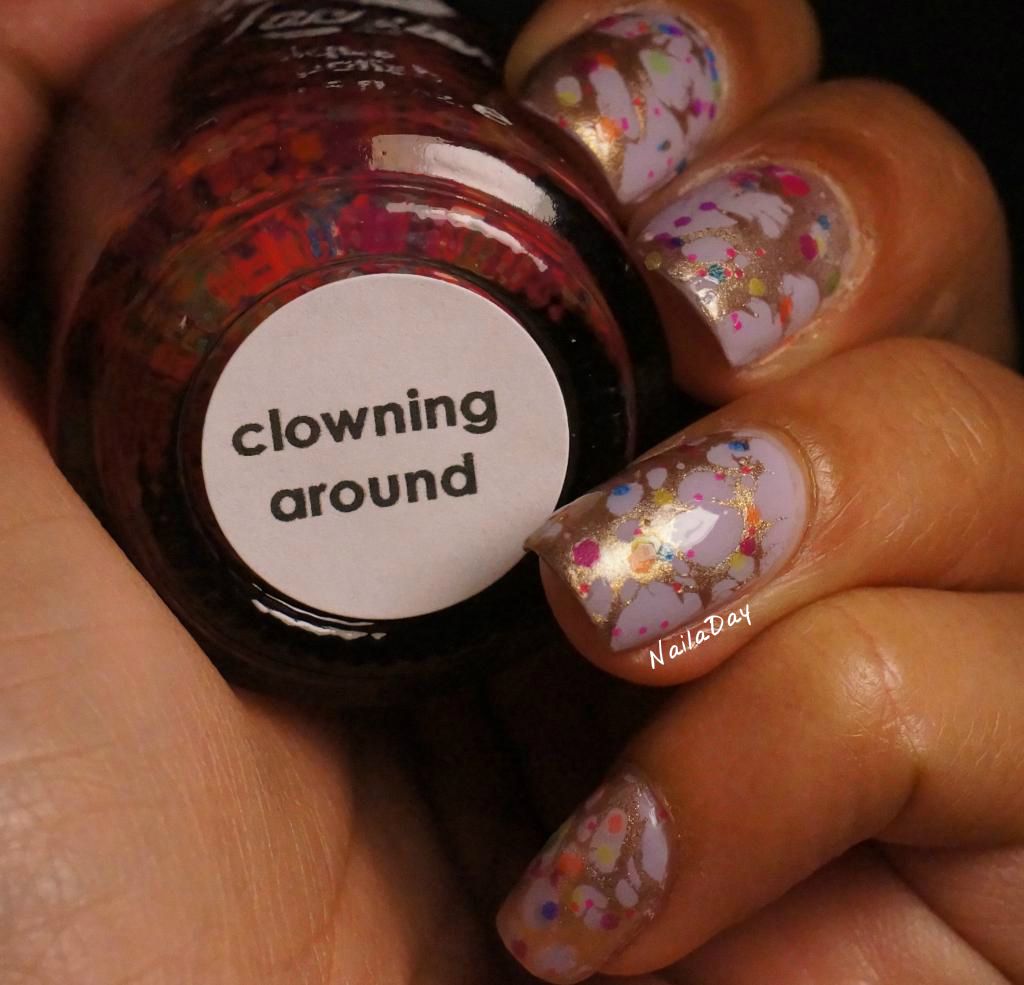
Time for another Deadly Sins Challenge mani. The prompt for this one is Envy. "Who would you like to be? Let us know recreating another challenger's work." When I first saw this manicure by Nail Wish, one of the creators of this challenge, I knew I had to do it for this week. It's a technique that I had been wanting to do ever since I saw the first one on Instagram but it was her mani and this challenge that clinched it for me.

NailaDay: Urban Outfitters Smush quilted mani

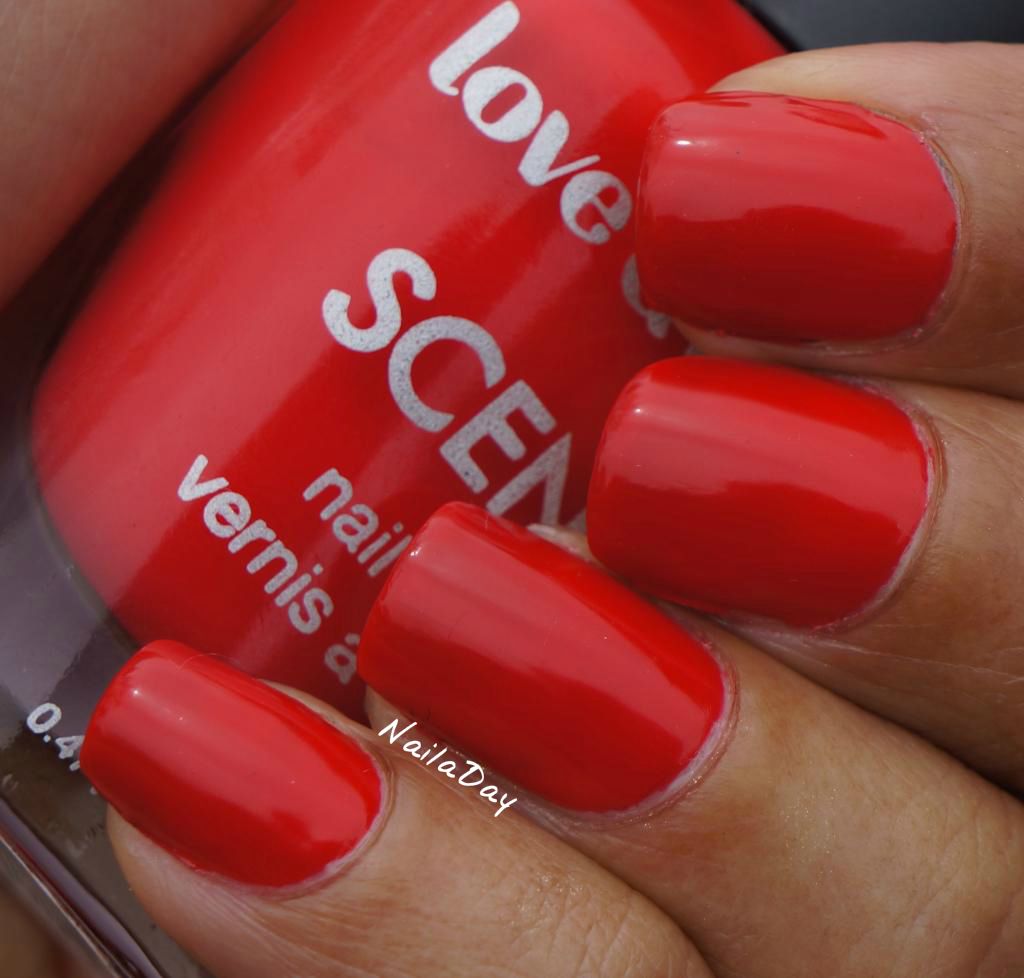
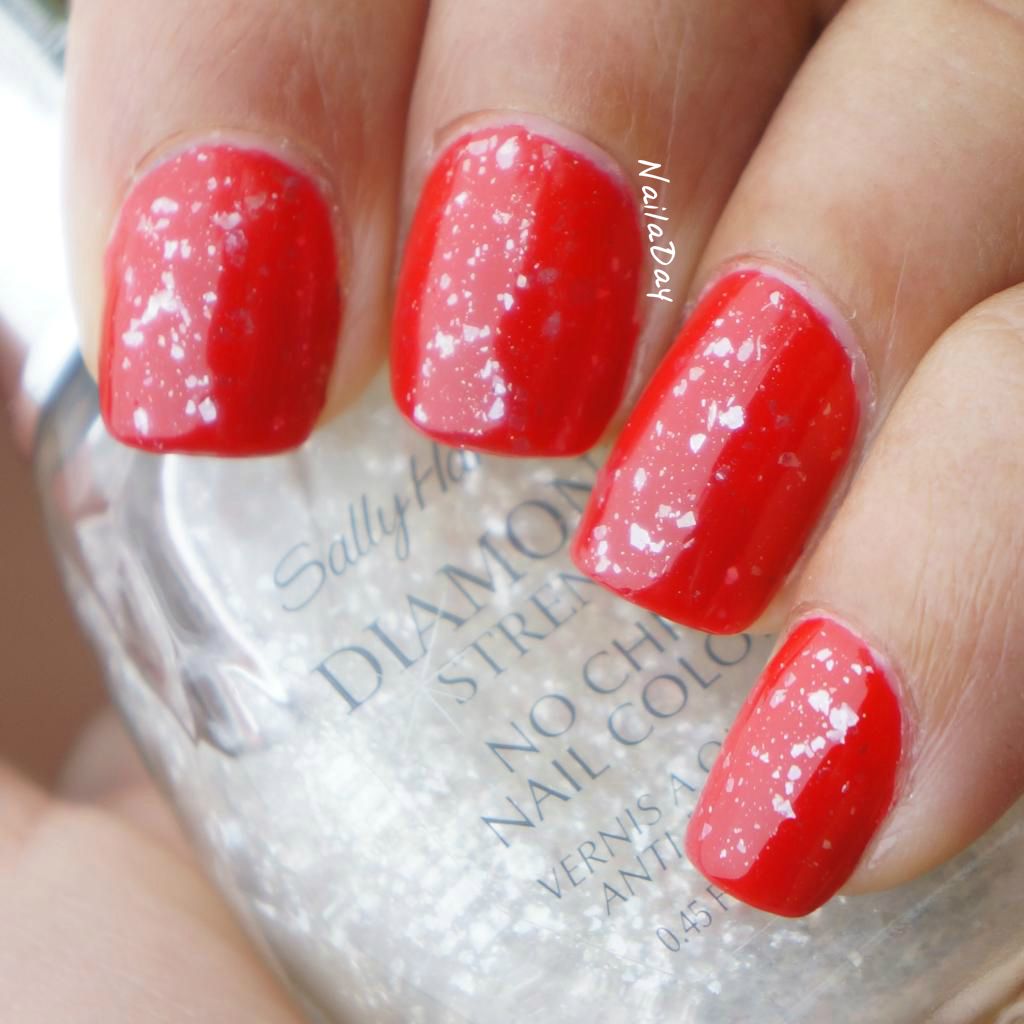
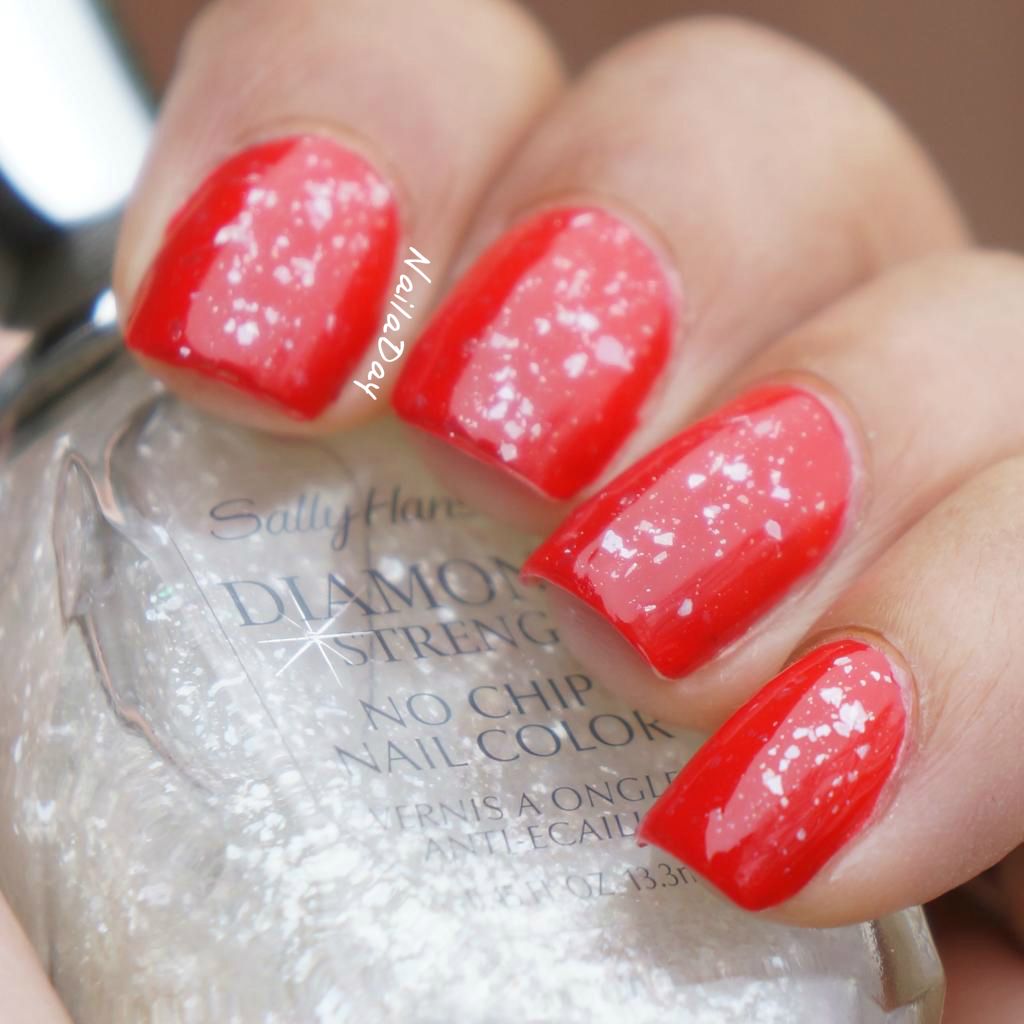
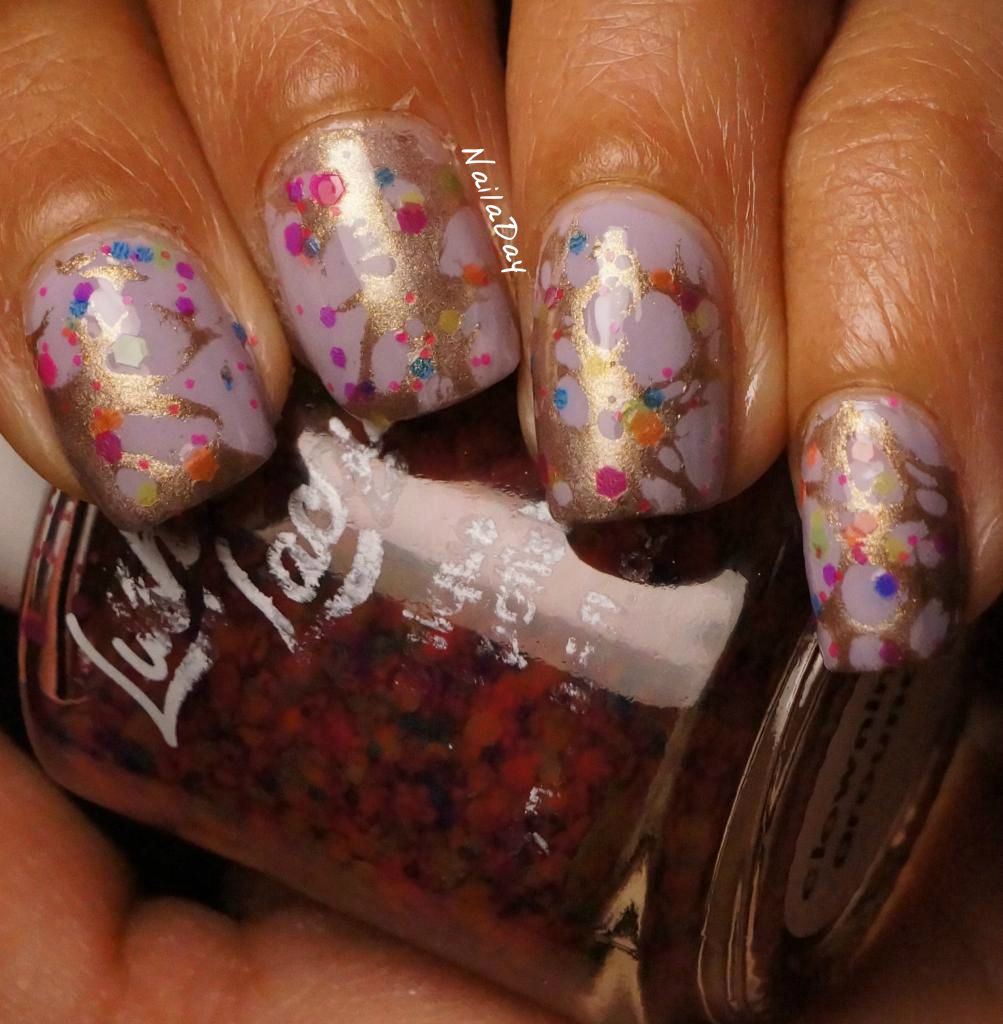
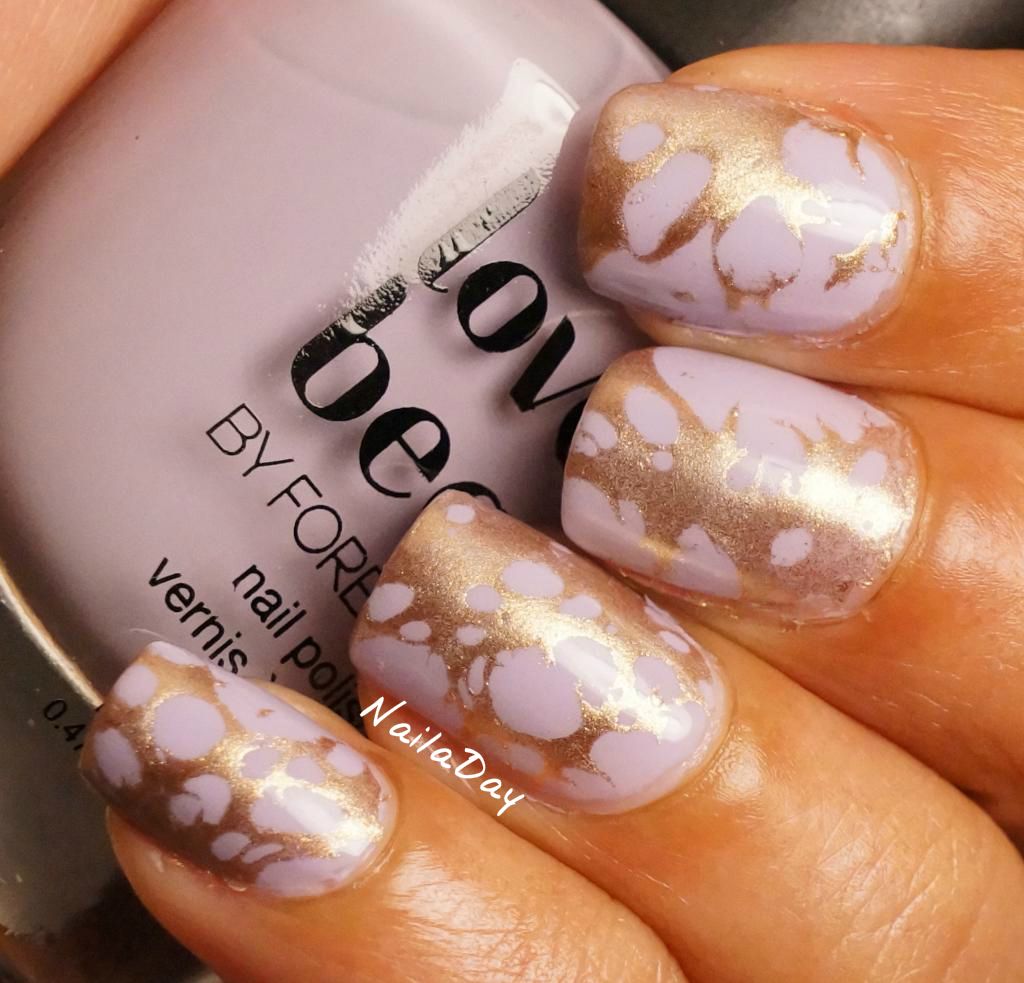
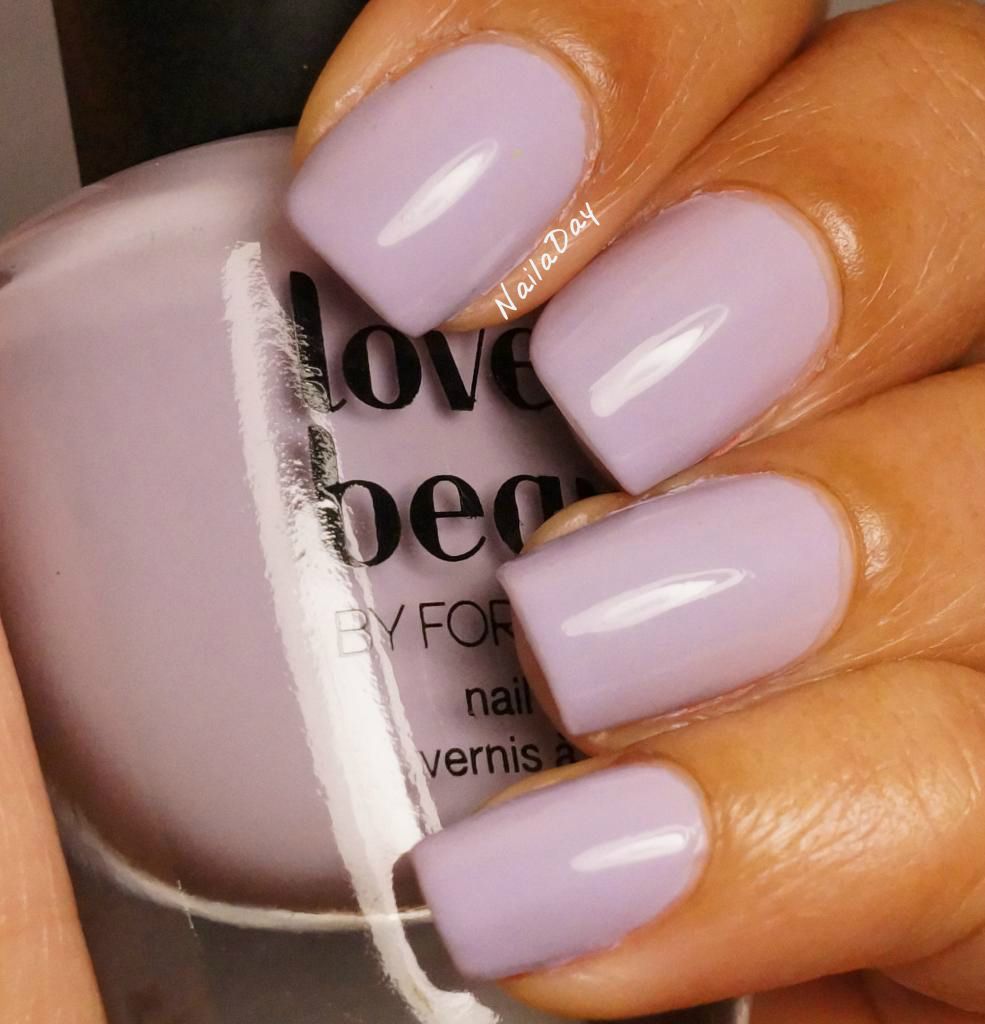
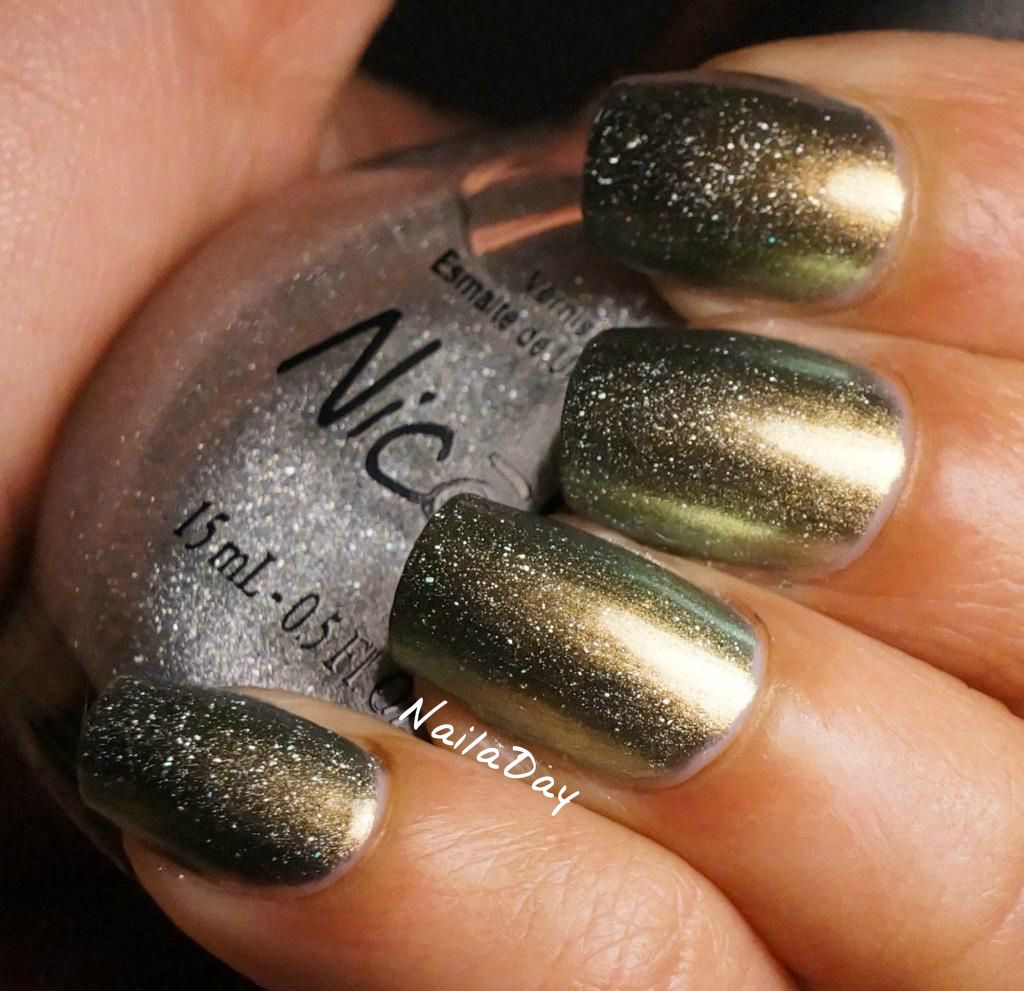
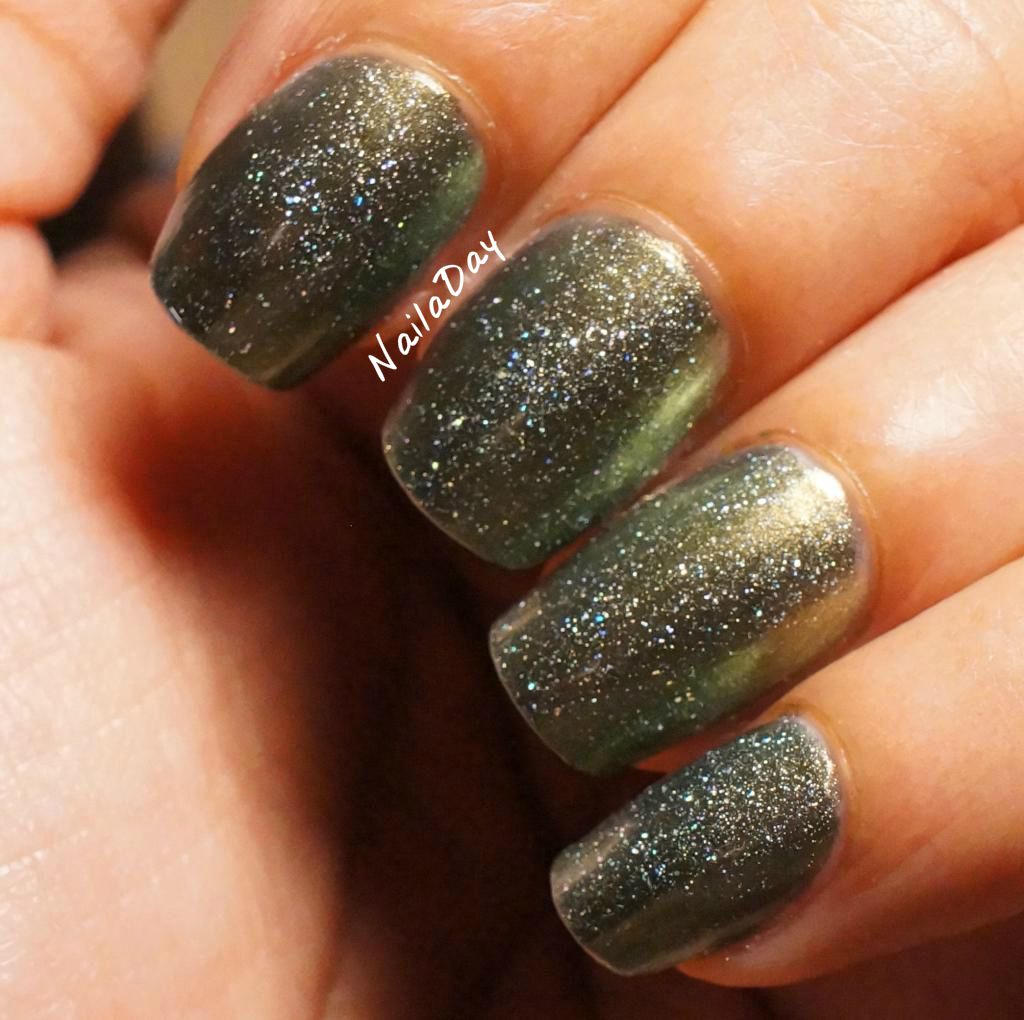
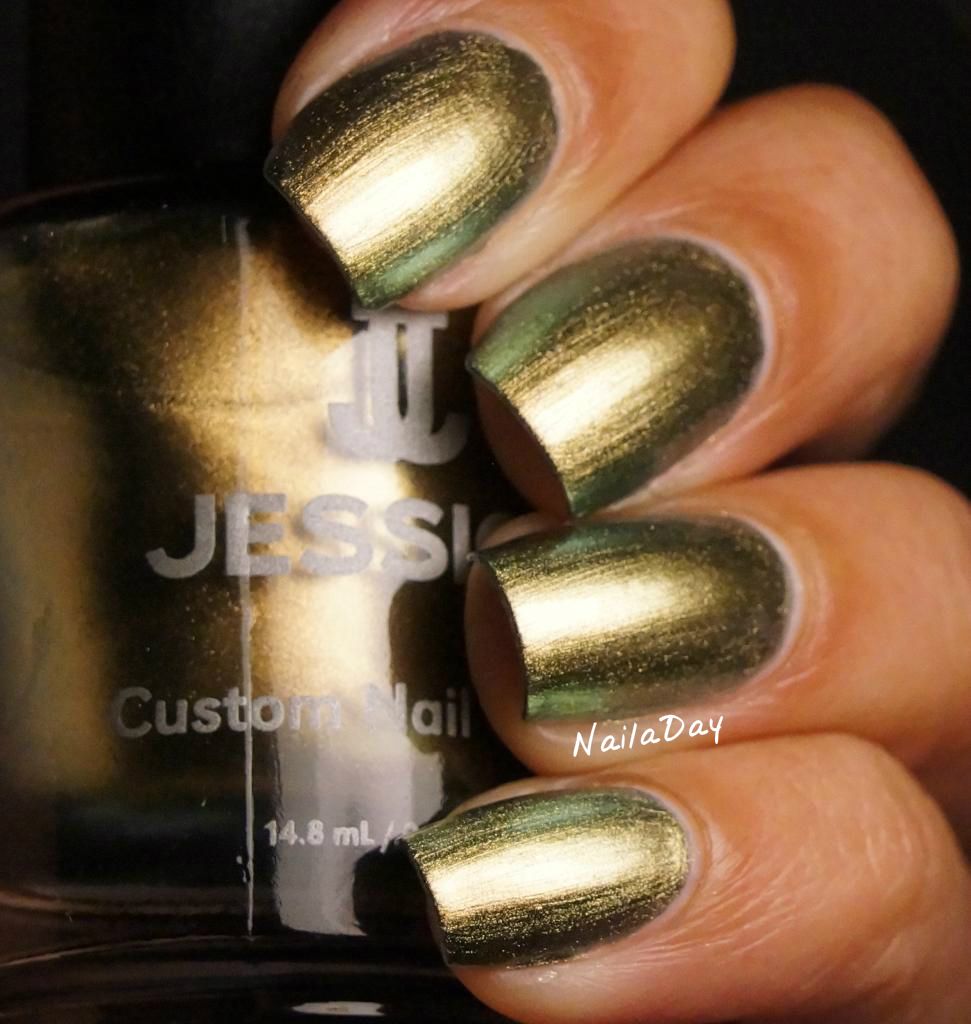
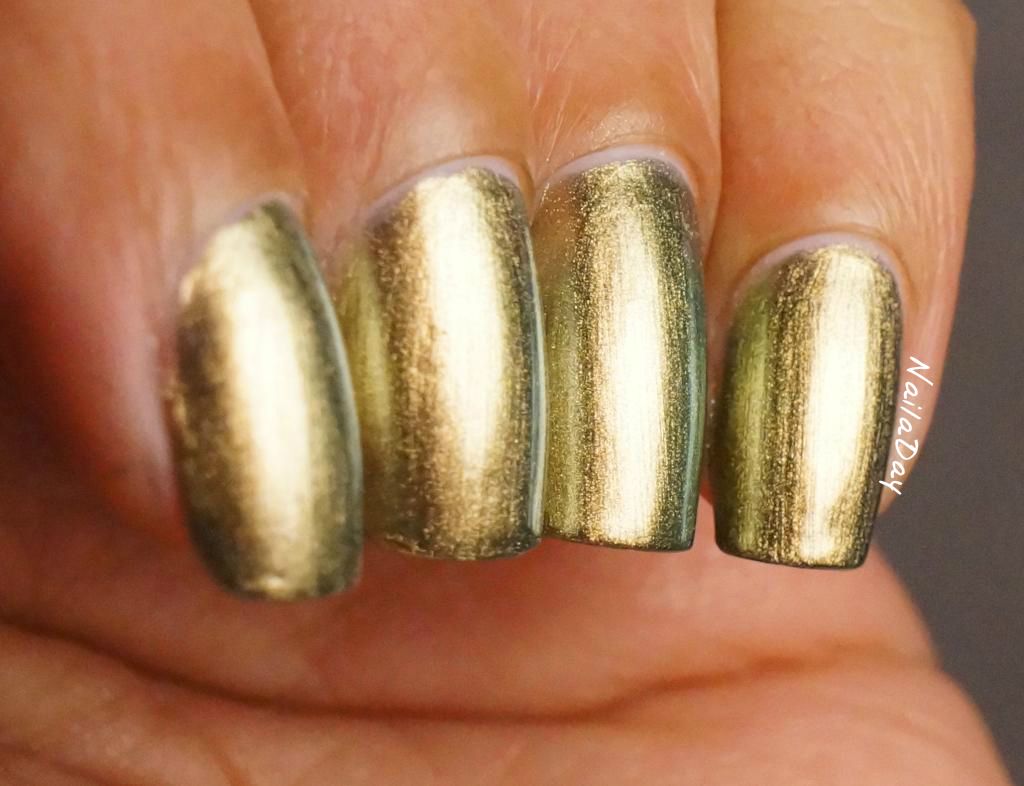
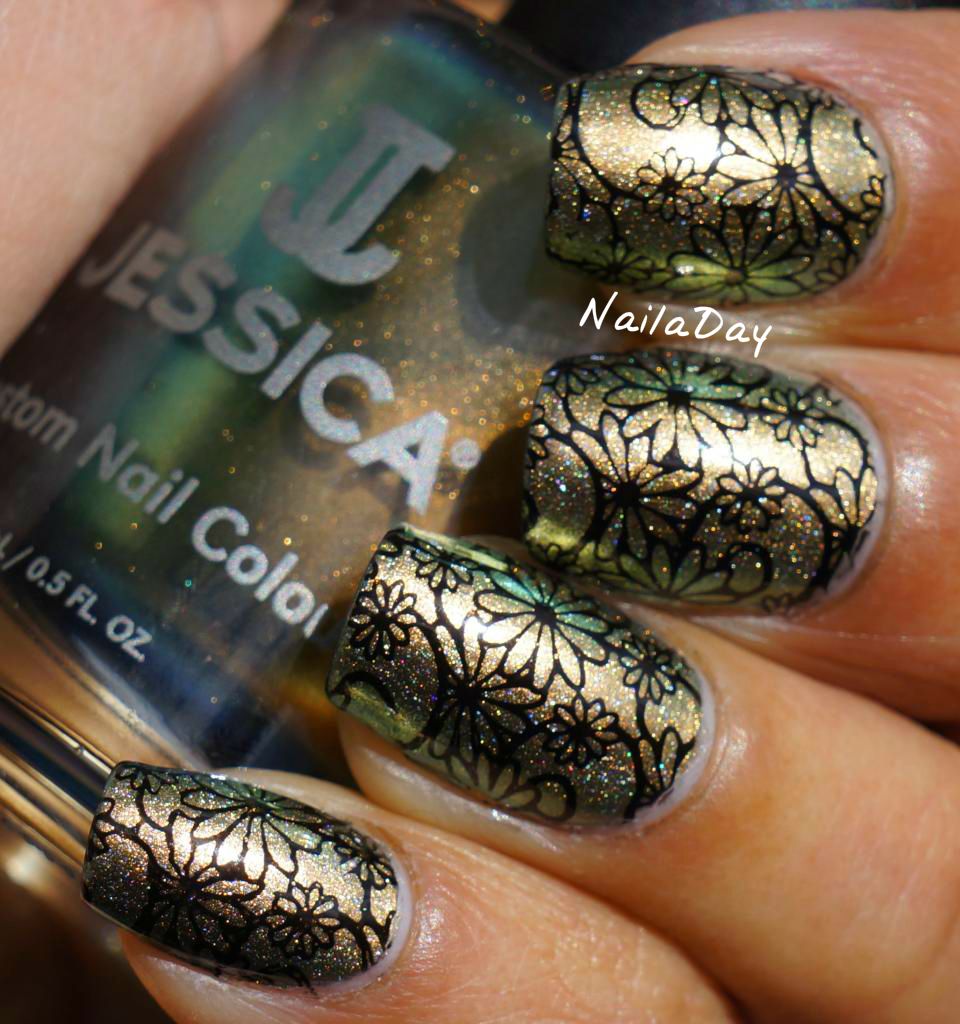
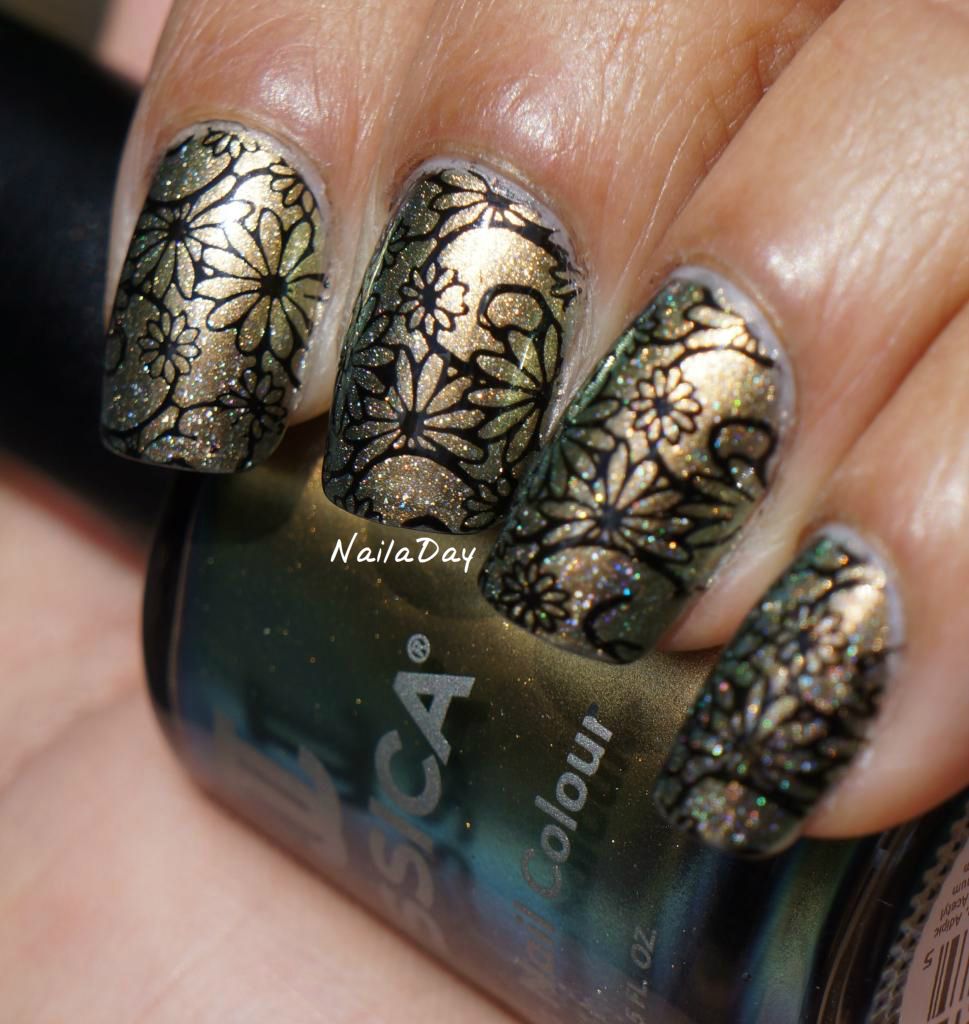
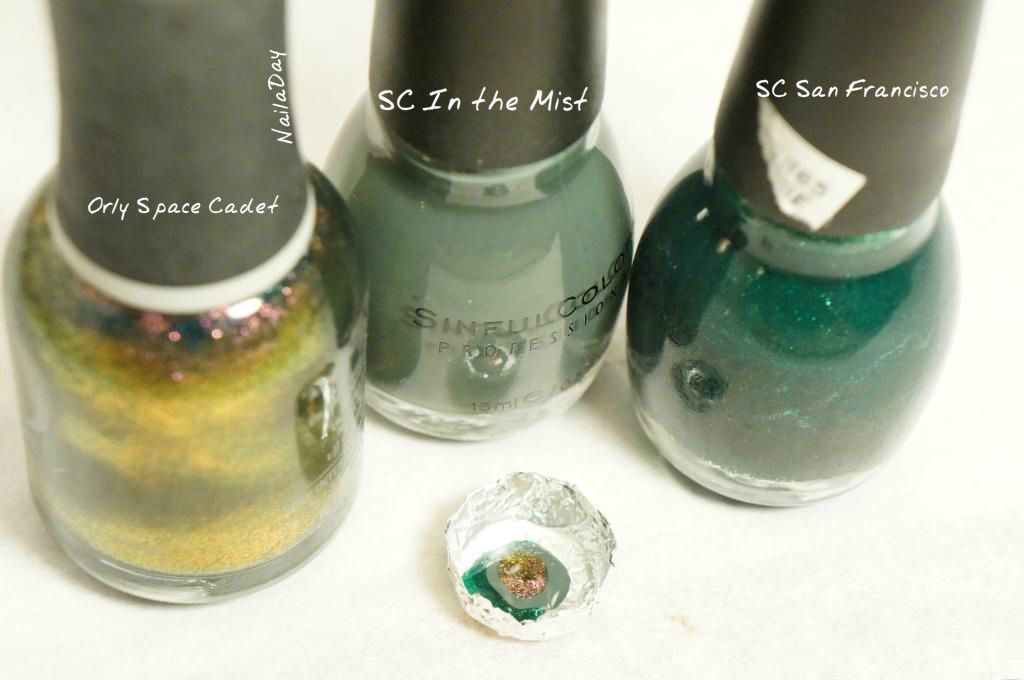
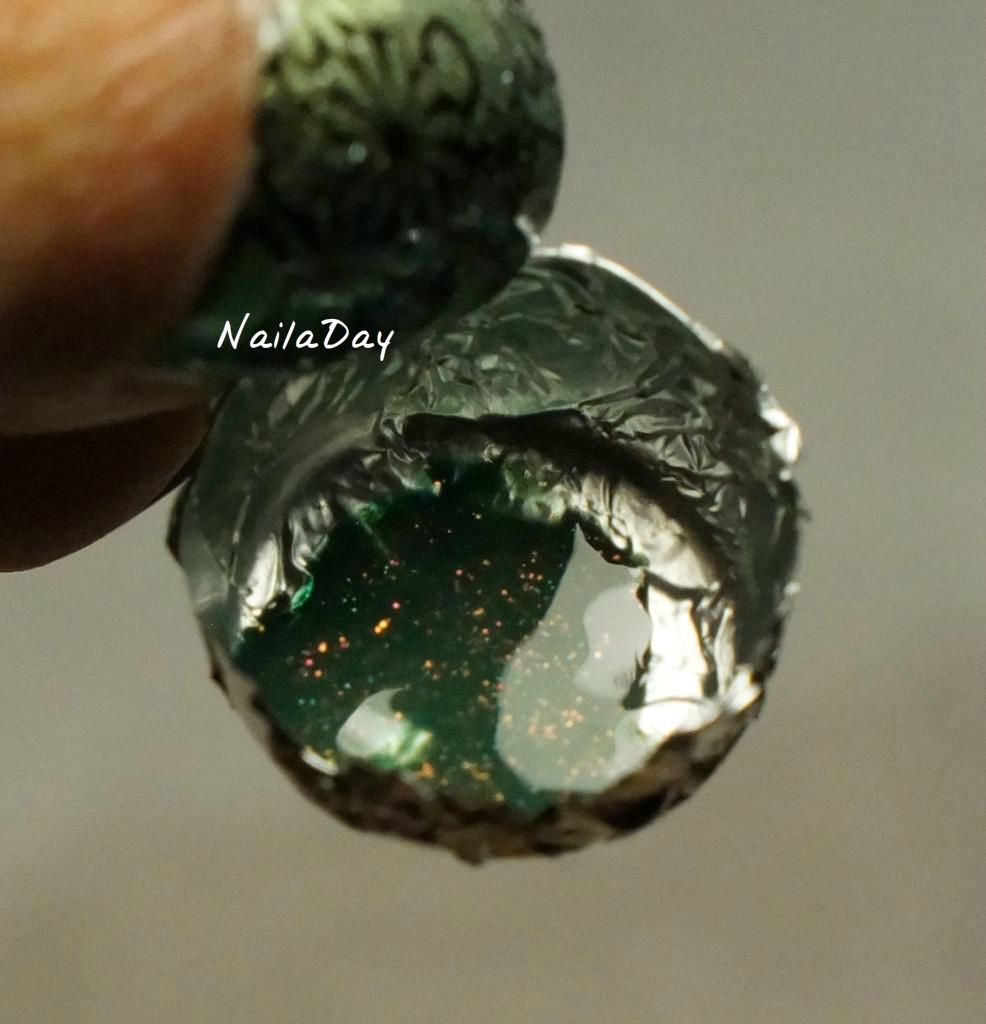
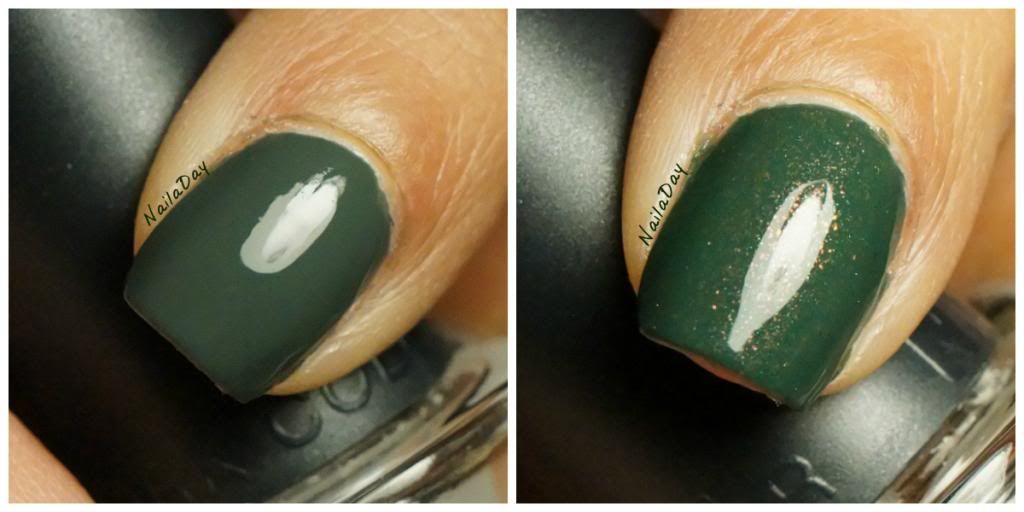
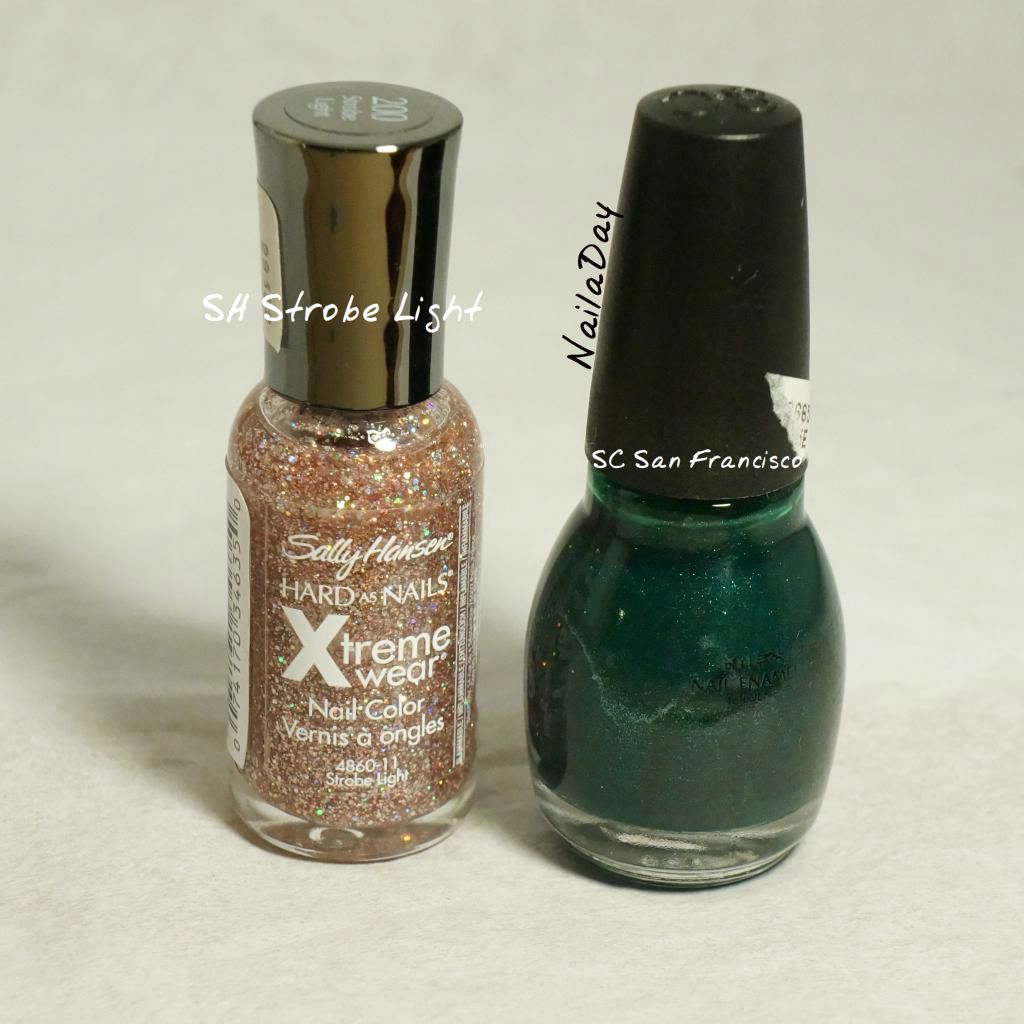
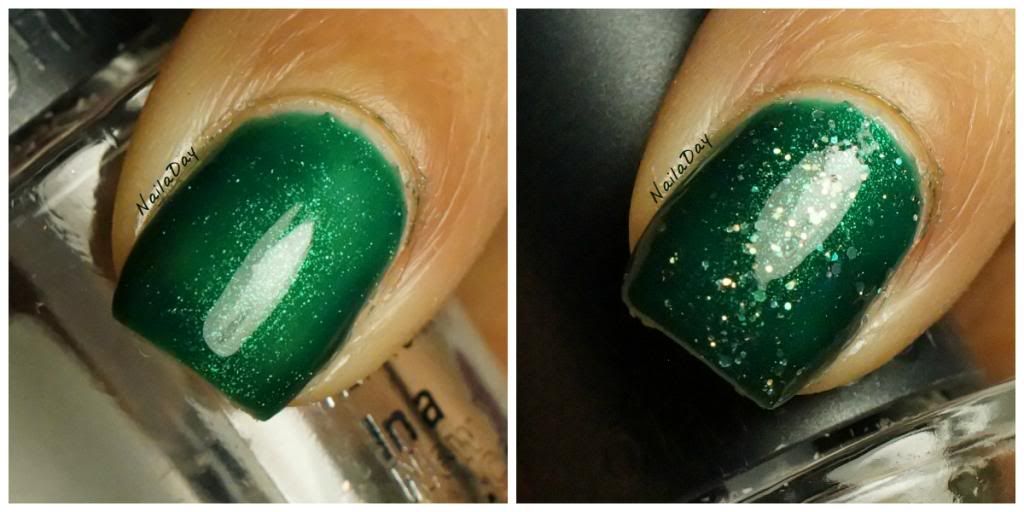
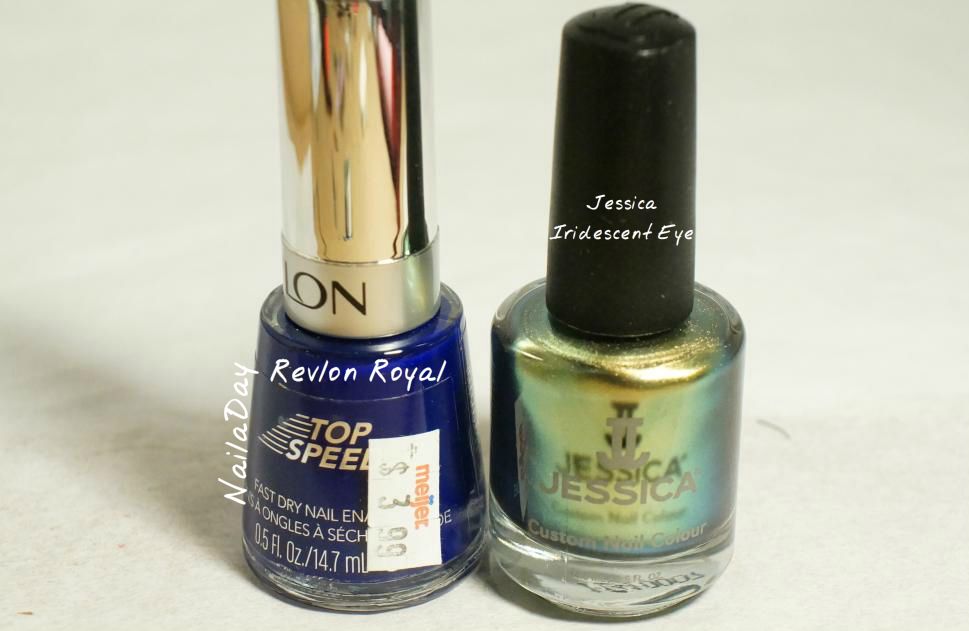
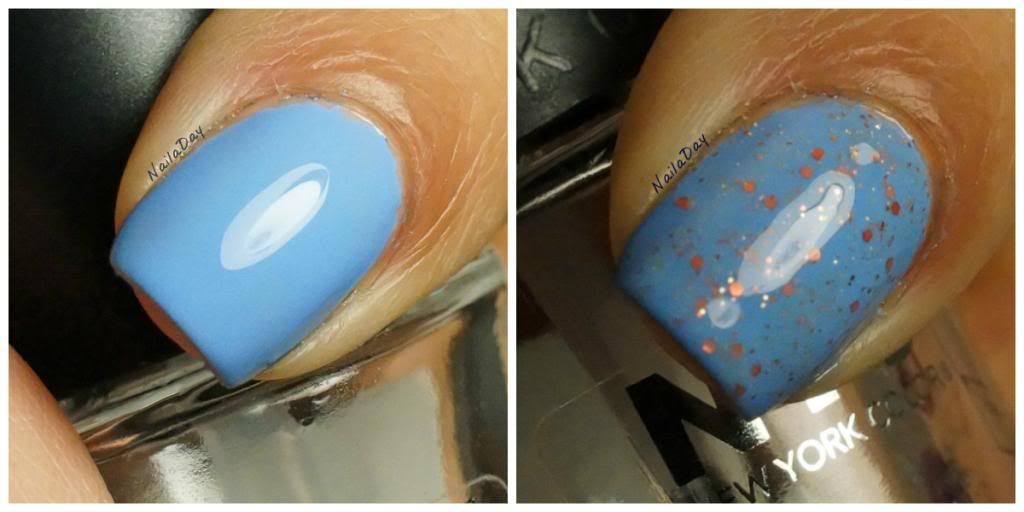
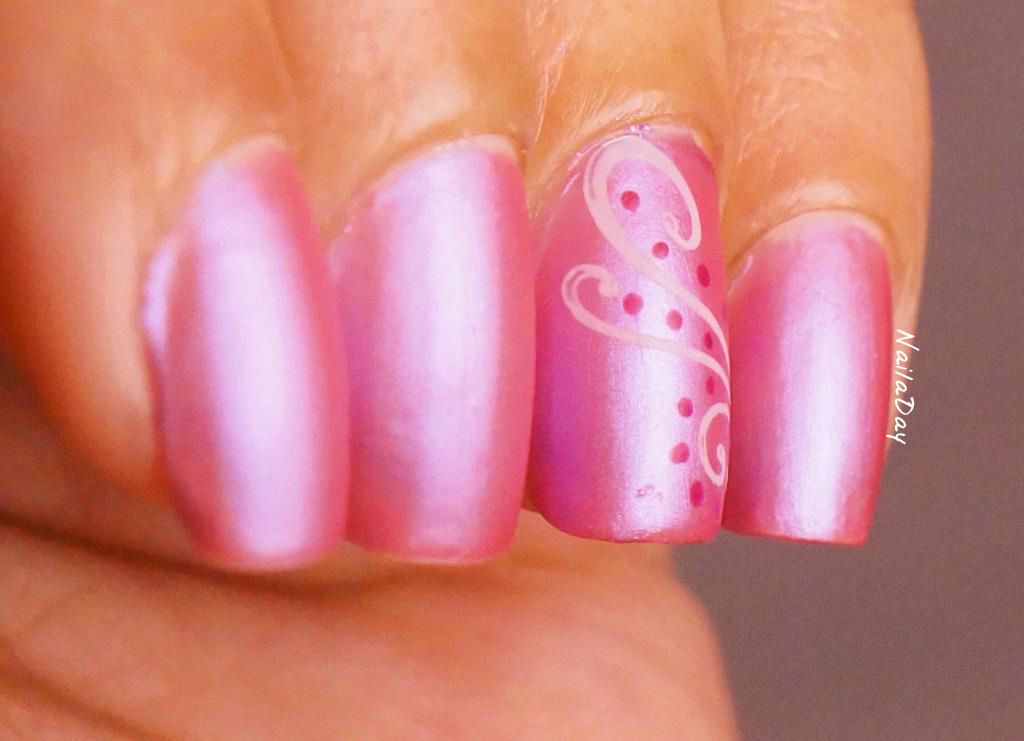
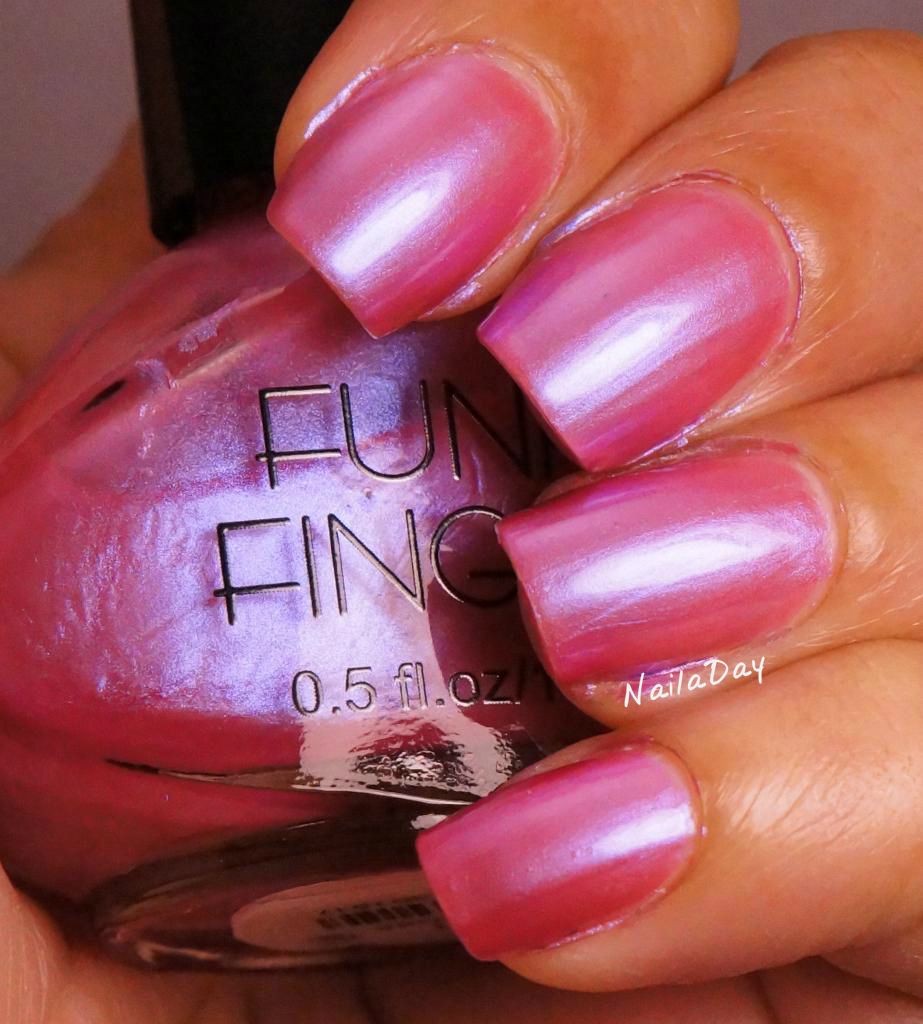
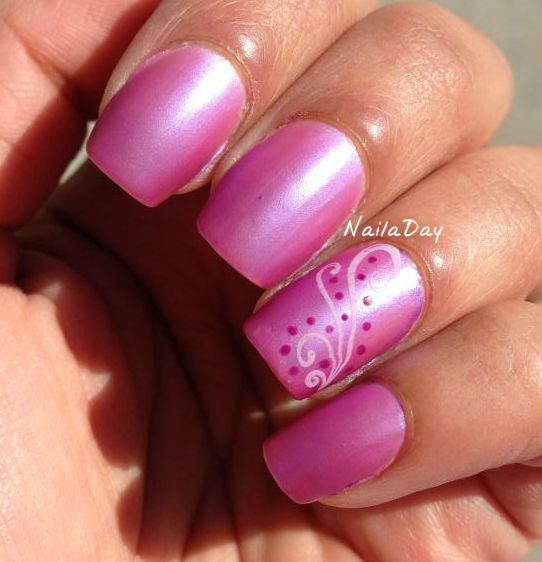
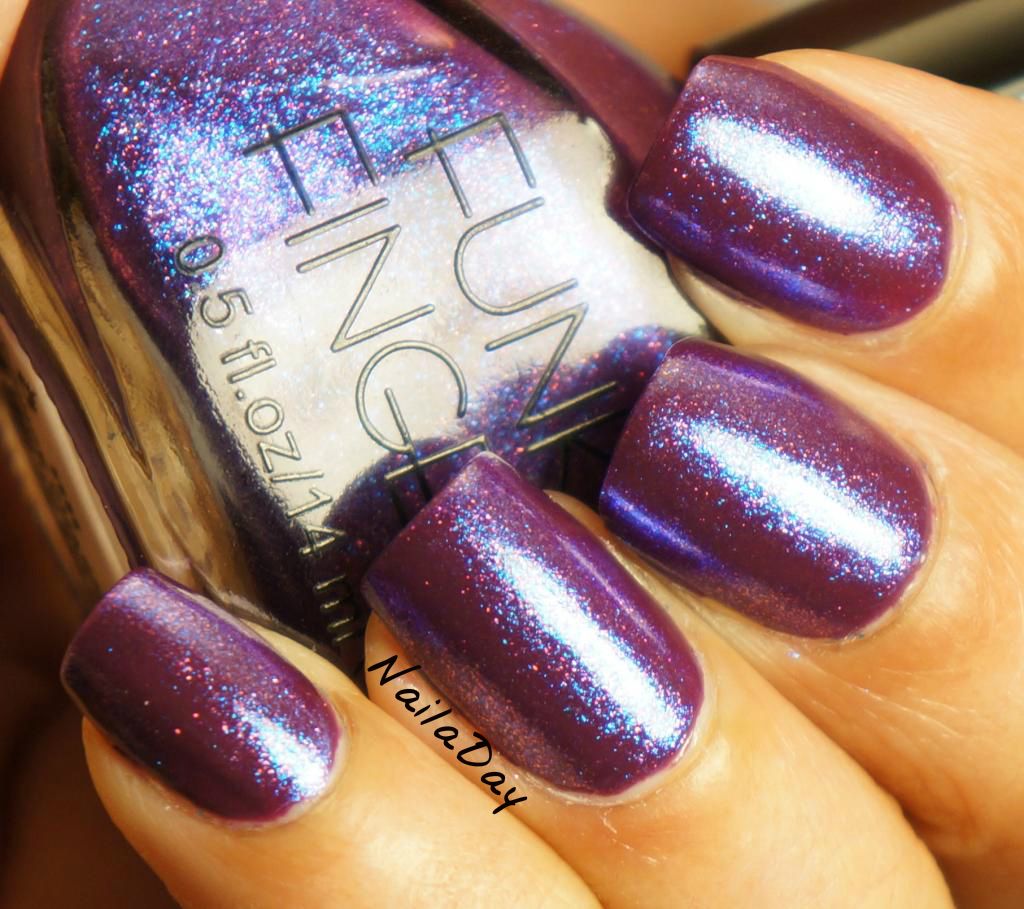
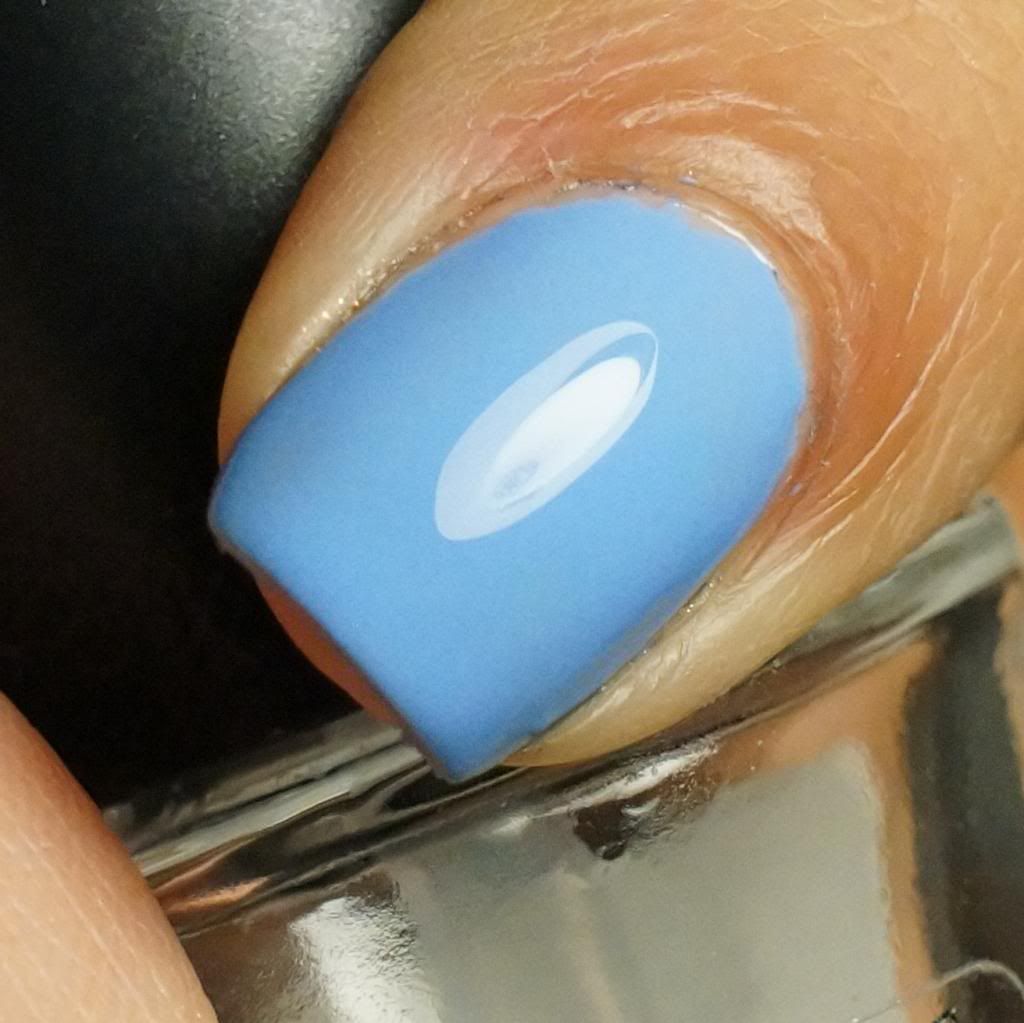
The color I used is Urban Outfitters Smush. I obviously didn't recreate her mani exactly...(her's is better). I didn't want yet another purple mani but I wanted something in the pastels so I chose this. I also didn't have the little tiny pearls so I used Revlon Metallic for the intersections of the lines. This is three coats of Smush, followed by a coat of Sinful Colors Over the Top topcoat, then Hard Candy matte topcoat. I waited for it to mostly dry then I used the edge of my scraper to create the lines. The angle is all wrong on the ring finger. I'll just pretend it's an accent :-)

NailaDay: Urban Outfitters Smush quilted mani

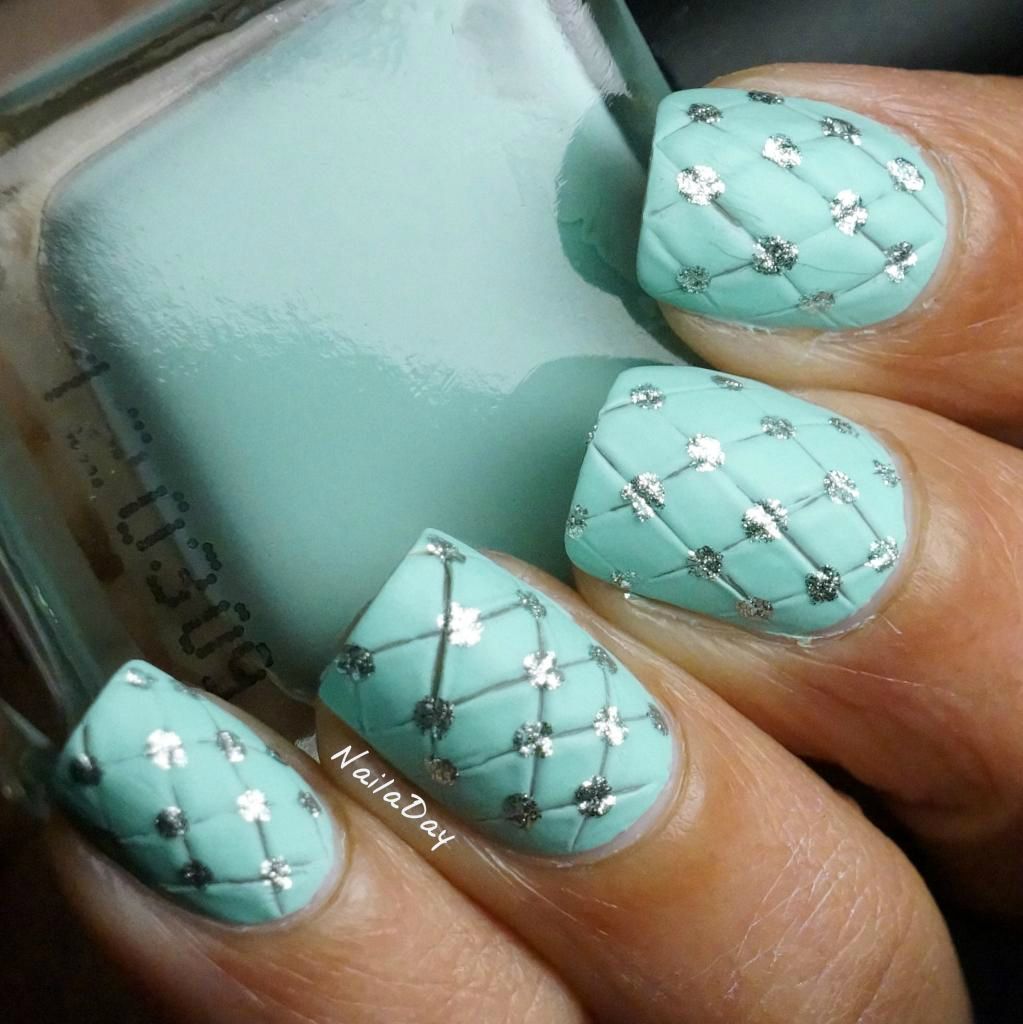
I really did like the end result, even though I need practice and it could be more refined. Maybe a less matte matte topcoat next time.... What do you guys think?

Oh, also, there is this thing I do with my husband for every manicure I do. I ask him to rate it on a scale of 1-10 based on his opinions and preferences. His answer usually surprises and amuses me. For instance, hubby rated this initially a 9/10 for uniqueness. Then when he found out that I wasn't going to be putting a glossy topcoat over it, it became a 2/10 because "it's not finished until you put the shiny stuff on top. I can't give a good rating to something you don't finish." :-D

Sunday, May 26, 2013

L&B Cherry with SH Glass Slipper and last weekend update!

Hiya folks! How is everyone's Memorial Day weekend going? I've had a good weekend so far but I'm on call tomorrow so we'll see how the rest of it goes. In today's post, I want to show you guys not only my mani from last weekend but I'm going to get personal again and show you some photos of my weekend away in the Pocanos mountains :-) We decided that with the baby on the way, we need to do something that felt like a true vacation because who knows when we would be able to do that again! The place we picked to go to was a small chalet/B&B/spa type place somewhere in the Pocanos. This place was so isolated!! The nearest village looked like it had maybe 200 people in it.


The first full day we were there was really nice. Sunny and warm but not too hot. We went hiking in the woods. Of course I got tired way earlier than I would have normally so it wasn't an extensive hike by any means.

Of course, before getting started on the hike, my first priority was doing my nails! We drove there so I had no problems bringing a few shades along with me. I chose a classic bright red color, something I haven't worn since pre-blogging days. This is Love and Beauty Cherry. It is a scented polish but it didn't a particularly smell like cherries to me.

NailaDay: Love and Beauty Cherry

NailaDay: Love and Beauty Cherry


The sun was peeking in and out at this point so some of these pictures are in full sunlight and some are more shaded. This is two coats, could have probably gone with three for the pictures. The formula itself was pretty easy to work with. This is me entertaining myself while taking pictures of my nails.


I love how my nails showed up as the only pop of color in a sea of neutrals. That night we had a somewhat formal dinner at a french restaurant that was part of this place.


The next day, I happened to catch the Polishcart's post on Sally Hansen Glass Slipper so when we went driving around that day into town, I took the chance to nab that beautiful polish. We also saw this on the way back. A touristy knickknacks store with a lot of metal lawn art in the front...


A lot.....

This is one of the truly better belly pictures of this time. And....I have my eyes closed.


This is my mani with Glass Slipper on it.

NailaDay: Love and Beauty Cherry and Sally Hansen Glass Slipper


NailaDay: Love and Beauty Cherry and Sally Hansen Glass Slipper


NailaDay: Love and Beauty Cherry and Sally Hansen Glass Slipper

Hope this post wasn't too long for you! Usually I'm kind of too lazy to put a lot of pictures up but this weekend had been really fun!!

Thursday, May 23, 2013

Mani update with Lush Lacquer Clowning Around

So, you know how I told you guys I was feeling a little unfinished, a little unsatisfied with my mani yesterday. On a pure whim I decided to put on a coat of Lush Lacquer Clowning Around just because it happened to be staring at me sitting on my table last night. Instant love!! 


NailaDay: Lush Lacquer Clowning Around Topcoat

There are so many many indie glitter mixes out there now and I've been very picky about which ones to actually get. Mostly because if I let myself get suckered into the indie polish madness, I'd go broke very very fast. When I first saw pictures of this crazy polish, however, it really stood out and I had to have it. I'm so glad I did. I don't think I've seen anything else quite like it out there!

NailaDay: Lush Lacquer Clowning Around Topcoat


This polish is made up of multi-sized, multi-colored matte neon hexes that really pop over lighter colors. I'm totally in love with the way it looks over my current mani. I had no idea it would pop over the gold as well! The bottle is packed with so much glitter that it does not take much of an effort to get enough glitter on the nail. The pictures you see show one coat applied with a little bit of dabbing to encourage the glitters to lay in the proper spots for even coverage. This is about as sparse as I like it for these glitters.

NailaDay: Lush Lacquer Clowning Around Topcoat

So, do you guys think this makes a good combo? I got my bottle of Clowning Around on Etsy at their website.

Wednesday, May 22, 2013

Seven Deadly Sins Challenge: Day 9 - Wrath (My first water spotted nails!!)

Hi guys! So, it's time for another challenge post. The details of this challenge are explained in this post.  Today's challenge prompt is Wrath. "Get mad trying, again, that technique you know it's going to be a fail."

So, for my wrath mani I decided to tackle a technique that has made me pretty angry in the past, the water spotted technique. To know what I'm talking about, here is the tutorial I first saw by cutepolish and then some brilliant examples of this by Spektor's Nails. My initial problem was that I kept trying to use hand sanitizer and could not find the right one. I would keep getting one giant spot in the middle which was not at all useful. Then, on instagram, where I vented about this, someone suggested I try using hairspray. Two dollar Suave hairspray and a few attempts later, I think I got the hang of it! So here are my water spotted nails.

NailaDay: Love and Beauty Lavender with Gold water spotted design

For the base I used Forever 21 Love and Beauty Lavender and the gold is L'Oreal Because You're Worth It. To tell you the truth, I'm a little meh about the mani right now. Maybe it's because of my color choices or maybe I need to add a third color. I'm not writing the technique off at all. I just need to try it with other colors, I think.

NailaDay: Love and Beauty Lavender with Gold water spotted design

Here is Love and Beauty Lavender all by itself. Isn't it pretty?

NailaDay: Love and Beauty Lavender

Monday, May 20, 2013

Jessica Iridescent Eye with Nicole by OPI Wink of Tink


Hi everyone! Alright, I told you I would show you the base of my last mani in this post and here it is. This is two coats of Jessica Iridescent Eye with a final coat being a mixture of NOPI Wink of Tink and Iridescent Eye.

NailaDay: Jessica Iridescent Eye with NOPI Wink of Tink


NailaDay: Jessica Iridescent Eye with NOPI Wink of Tink


NailaDay: Jessica Iridescent Eye with NOPI Wink of Tink

This is Iridescent Eye by itself. This is the first time I'm wearing this or any of the colors like this. This is a known dupe of the wildly popular Chanel Peridot. It looks amazing in the photos. In real life, it looks good but I liked it even better with the stamping. I definitely had some asking me why it looked gold and then looked green, lol.

NailaDay: Jessica Iridescent Eye


NailaDay: Jessica Iridescent Eye


NailaDay: Jessica Iridescent Eye


Saturday, May 18, 2013

Deadly Sins Challenge: Day 8 - Jessica Iridescent Eye Frankened with stamping

Hi all! I published this post then I had to come back and edit it to say, it's my 100th post! I can't believe it! I started this blog not knowing how I was going to maintain it over time. I started it at a time when my schedule was relatively light but just the act of blogging has been so much fun that it hasn't been all that hard to keep up! I try not to let myself feel any pressure about how often to blog and I think it really helps! I also want to thank all the followers I have so far. It's far more fun when the whole process becomes interactive and it's great knowing that there are people out there that are just as into this hobby as I am and actually want to see what I'm up to!

Today's post is kind of a segue from my last post because the base of this manicure is actually a mix of Jessica Iridescent Eye and Nicole by OPI Wink of Tink. Because it would have involved a lot of pictures, I'll show the base color by itself in my next post.

NailaDay: Jessica Iridescent Eye with NOPI Wink of Tink and stamping

 The prompt for this challenge is "(Only if you want) Create a manicure inspired on your laziness... or whatever... I'm so tired..." For me, stamping is one of the lazy forms of nail art these days. Everything else like gradient, marble, freehand etc all seem to take so much more time than stamping. These days, it almost feels like cheating!! The image comes from the Cheeky plate CH 44.

NailaDay: Jessica Iridescent Eye with NOPI Wink of Tink and stamping


NailaDay: Jessica Iridescent Eye with NOPI Wink of Tink and stamping

Wednesday, May 15, 2013

Deadly Sins Challenge - Day 7: Sloth (Insta-franken tutorial)

Hello lovelies! How are you? I'm writing this post kinda late for me (10:55 pm) so who know what mistakes I'll find when I wake up in the morning. Today's post is yet another installment of the Deadly Sins Challenge. Details explaining this challenge are in this post. This week's theme is Sloth. Day 7 theme is "Don't try too hard but explain everyone how to do something really easy...(tutorial). There are tutorials for a million and one things out there but I wanted to share with you guys something that maybe a lot of you already do, but I haven't really seen being talked about in other blogs. I like to call this insta-frankening. 

The idea came to me when I started wondering one day what would happen if I mixed two very different polishes together. I was curious and I had a fairly good idea that it would work well and be awesome but I didn't want to go through the process of finding an empty bottle, mixing my polishes and then just using it once. It seemed like a waste. So I started insta-frankening and creating single use, one time only polishes. I guess it's my lazy way of frankening. Over time, I've refined my method and wanted to show you guys with a lot of examples of polishes I insta-frankened. In keeping with the theme of sloth, I only swatched on one finger.

NailaDay: Frankening

I start off by creating a tiny little bowl with tinfoil that I molded over the top of a nail polish cap. Then after having picked out which polishes I want to try to blend, I add a drop or so of each polish into the cup. Remember, this isn't supposed to be fine tuned frankening for multiple use. This is just to experiment and come up with one unique manicure. Of course, if you loved the result, you can always make it again!

NailaDay: Frankening

I have a lot of empty top coat bottles by now so I just use the brush from one of those bottles, mix the polishes together and use the same brush to paint my nails so that I'm not contaminating any of the other polishes. I usually paint my nails the base color and use the mix as the last and final coat. When painting all ten nails, I find it handy to keep some thinner around to add a drop whenever the mix gets a little thick.

NailaDay: Frankening

The above on the right is what I get when I mix Orly Space Cadet, Sinful Colors In the Mist and Sinful Colors San Francisco.

Now, again keeping with the sloth theme, I'm going to let the pictures speak for themselves.

NailaDay: Frankening

NailaDay: Frankening

***************
NailaDay: Frankening

NailaDay: Frankening

******************

NailaDay: Frankening


NailaDay: Frankening

*******************

NailaDay: Frankening

NailaDay: Frankening

I hope you found this a fun and interesting post. I'm not sure insta-frankening is everyone's cup of tea but it makes me appreciate my stash that much more! Best part is, when I'm done with one manicure, I've barely made a dent in the polishes I used!
Click below to see what the other ladies have come up with for this challenge.

Sunday, May 12, 2013

Funky Fingers Primrose (How I figured out how to make pearly pinks work for me)

Hi people! As I'm typing this up, I'm listening to the newest album put out by Penn Masala, one of my favorite acapella groups next to Pentatonix. They are out of University of Pennsylvania and these guys create such wonderful acapella mash ups of popular Indian and American songs. They may not be everyone's style but they sure can sing! I'm not at all affiliated to them. I'm just an acapella geek :-)

NailaDay: Funky Fingers Primrose Mattified

The polish I'm showing you in this mani is another Funky Fingers called Primrose. I never thought I'd be drawn to pearly pinks like this but the purple duochrome shift in the bottle kind of decided it for me in the store.

NailaDay: Funky Fingers Primrose Mattified

Once I had it on my nails, I once again started doubting my choice. It was sheer, showed brushstrokes and didn't seem to show the duochrome as much. The picture below shows what it looked like by itself. The color was unique enough on my nails that I didn't want to take it off. So, I put my Sinful Colors matte top coat on it. Instant love!!!

NailaDay: Funky Fingers Primrose

The accent nail design is from the Gals plate GA 44 and the dots are done with Barry M Plum. The two pictures below are iPhone pictures in sunlight and in the shade. I feel like the iPhone pictures are good to show certain true to life characteristics that my actual camera doesn't pick up. Plus, it's so handy when I'm out and about!

NailaDay: Funky Fingers Primrose Mattified


NailaDay: Funky Fingers Primrose Mattified

What do you guys think of pinks like this? I can see myself getting a lot of wear out of this one as long as I don't wear it by itself.

Friday, May 10, 2013

Sally Hansen CSM Trouble Maker with Funky Fingers Prince Charming

Hey, hey! It is a perfect spring day today. Soft morning dew, warm temperature, cool breeze, and color bursting everywhere! Quick post today. This was going to be my last post but I wanted to put up my Deadly Sins Challenge mani too. Decisions, decisions....

NailaDay: Sally Hansen CSM Trouble Maker with Funky Fingers Prince Charming

This is Sally Hansen Trouble Maker now with a lovely coating of Funky Fingers Prince Charming. One of the places I work at is right across the street from a Five Below and every few months, I mosey on over there to see what new goodies Funky Fingers has come up with. They always feel very unique to me and they are not that expensive!

NailaDay: Sally Hansen CSM Trouble Maker with Funky Fingers Prince Charming

Just look at it in the bottle. It's a mix of fine blue, purple and I think even pink shimmer particles in a purple jelly base. Looks great over Trouble Maker!

NailaDay: Sally Hansen CSM Trouble Maker with Funky Fingers Prince Charming

Then I went and, in my opinon, ruined it by adding some stamping. This image is taken from PUEEN Stamp 13. The colors used are China Glaze Harmony and Sally Hansen Chrome Pink Pearl. I also mattified it with Sinful Colors Matte Top Coat. I wasn't too happy with it but I did get compliments. I don't know. What do you think? Did the stamping ruin it?

NailaDay: Sally Hansen CSM Trouble Maker with Funky Fingers Prince Charming
Related Posts Plugin for WordPress, Blogger...