Wednesday, July 31, 2013

The pond mani, with Maybelline Drops of Jade and Love and Beauty Jade

Hi everyone!

Excuse me for being brief but I don't think I'm going to put a lot of words into this post today. I've tossed around the idea of using stamping instead of glitter in a jelly sandwich forever but never got around to doing it. Then I saw this amazing manicure by Reddit user motorcityvicki and I knew it was only a matter of time before I had to try it myself. Then I purchased Maybelline Drops of Jade, looked at my jelly franken of Love and Beauty Jade, and this mani came together.

NailaDay: The pond mani, with Maybelline Drops of Jade and Love and Beauty Jade

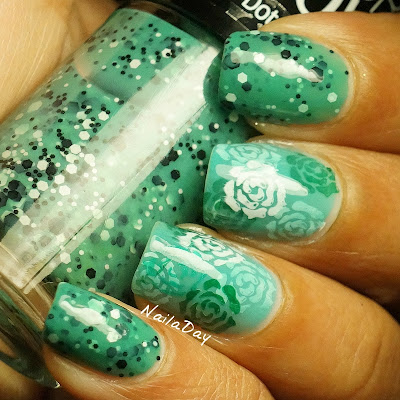
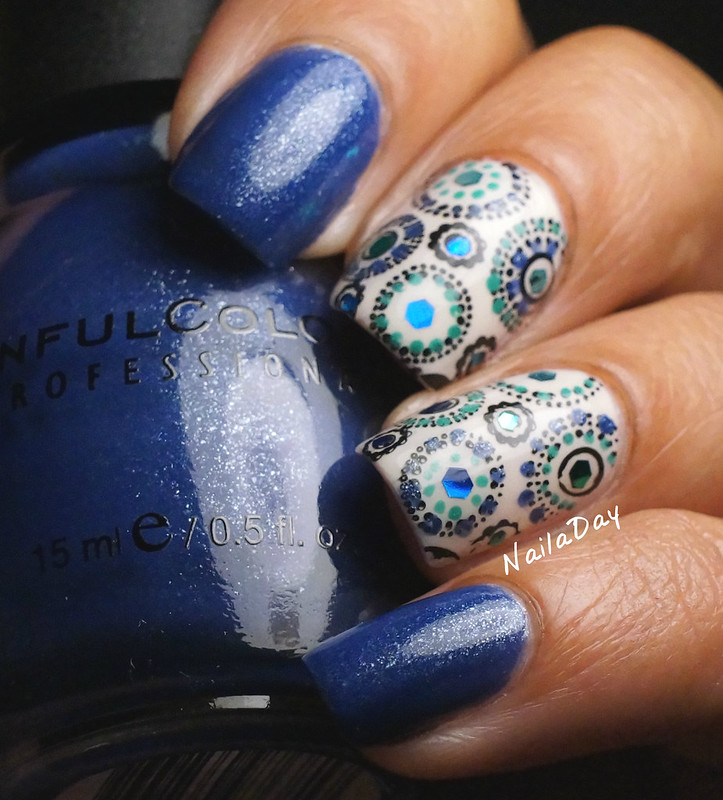
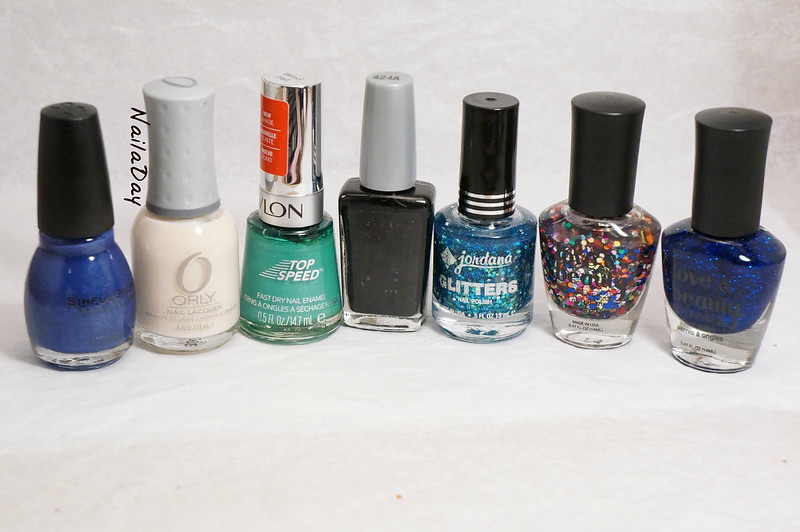
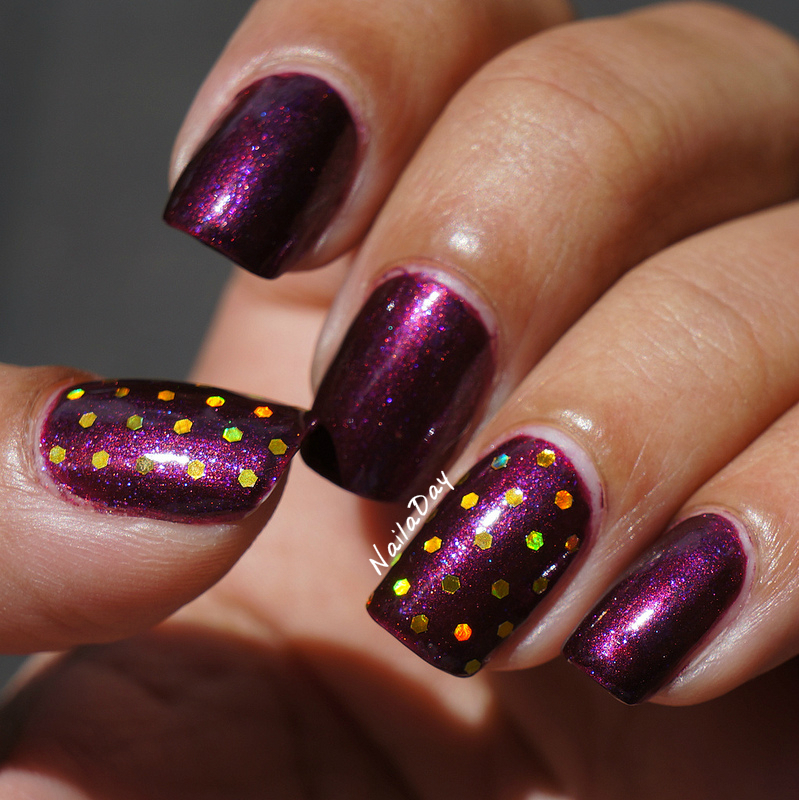
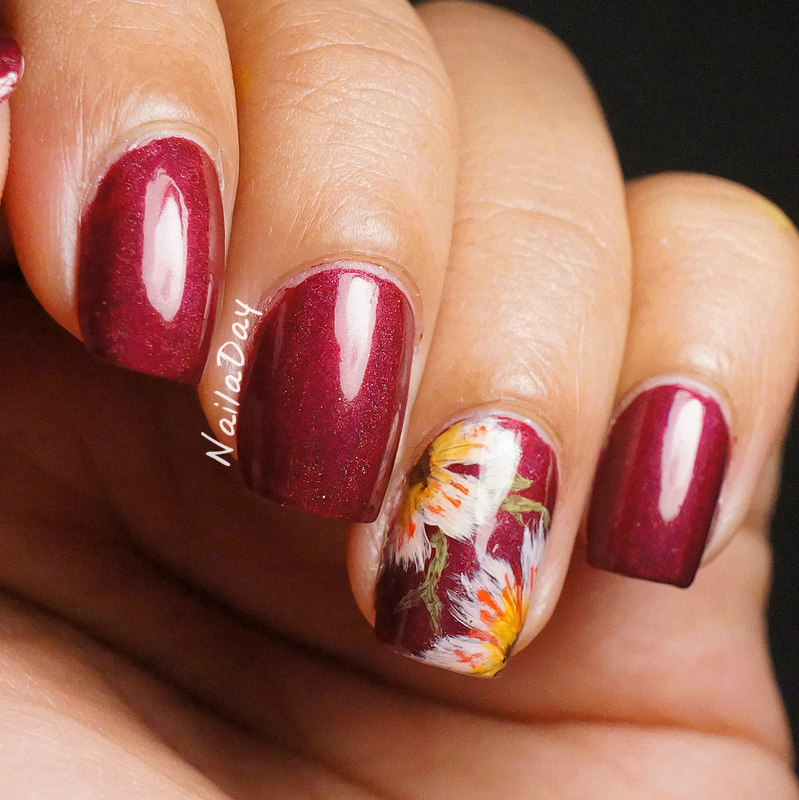
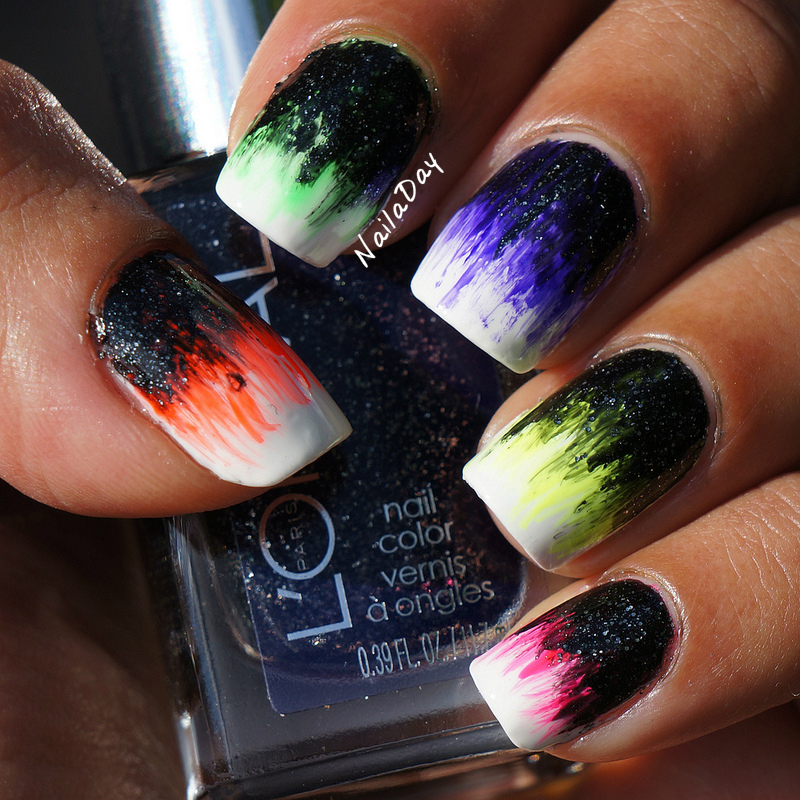
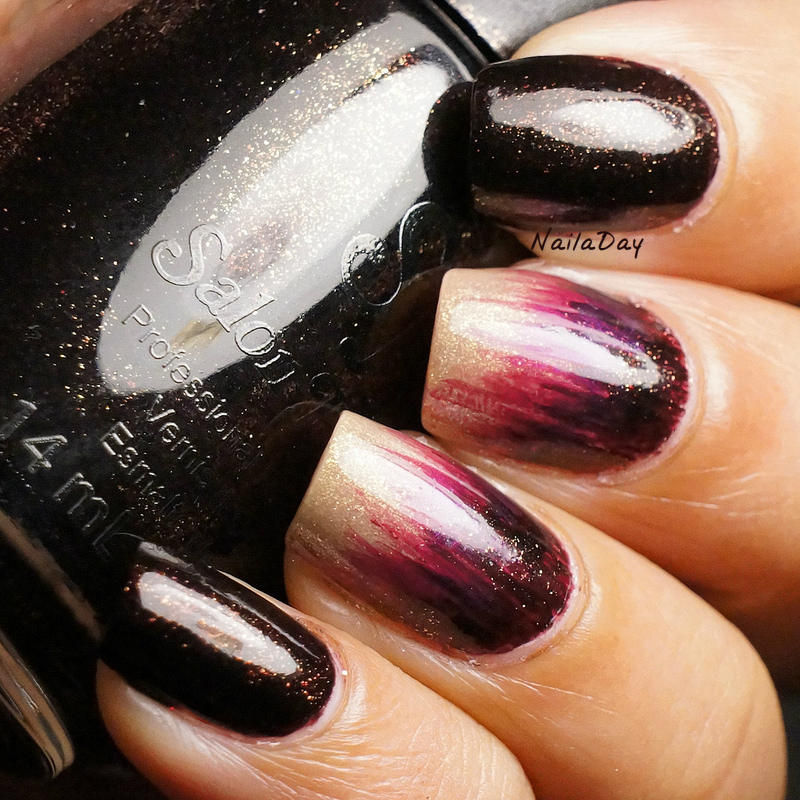
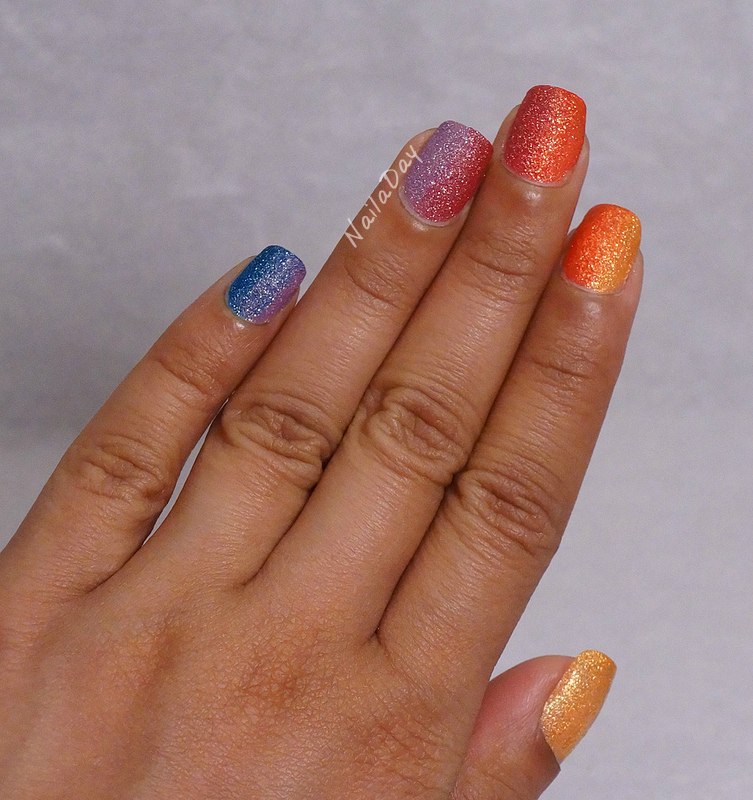
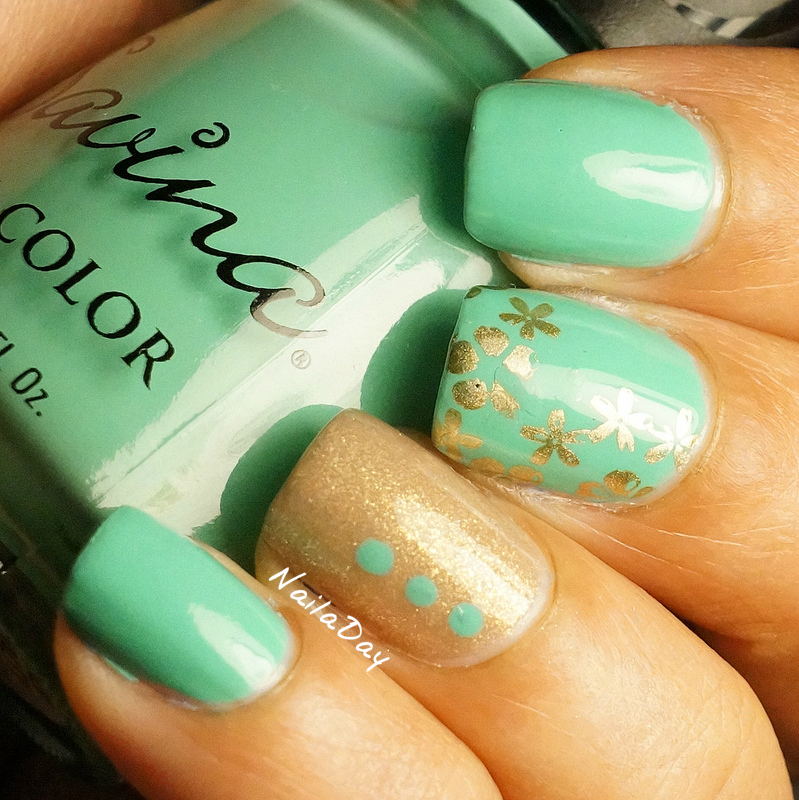
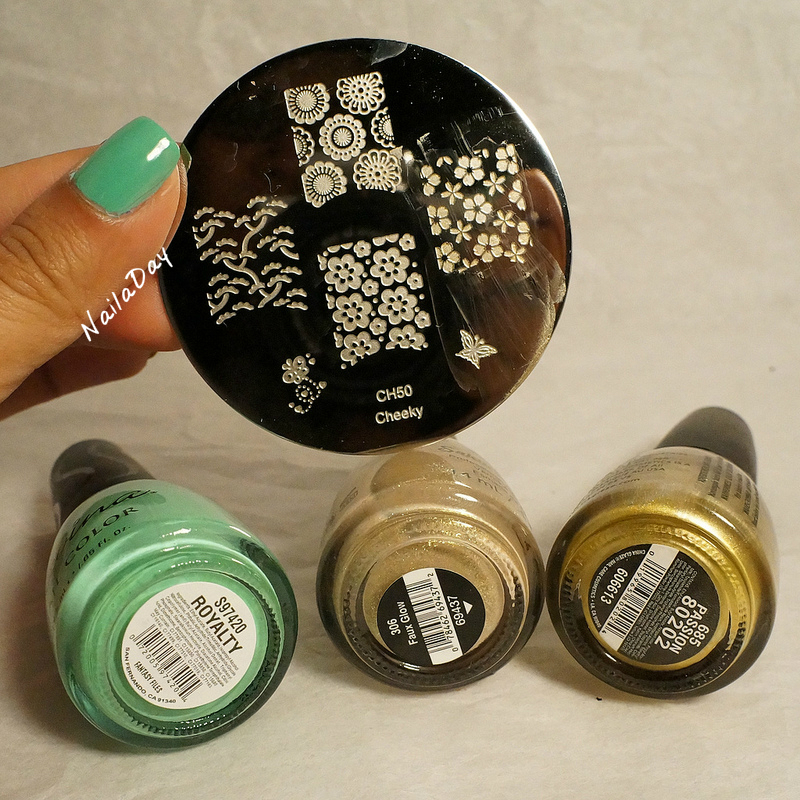
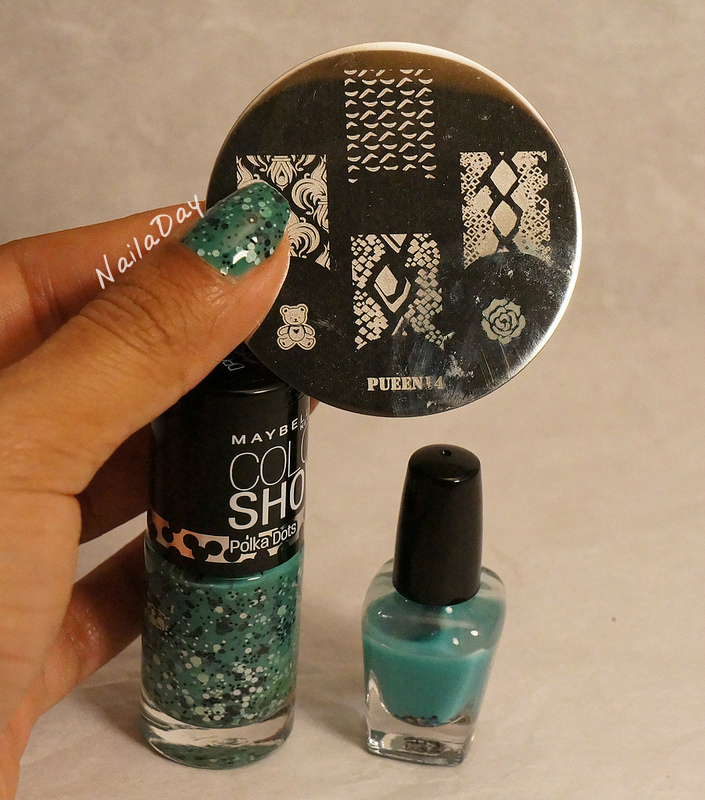
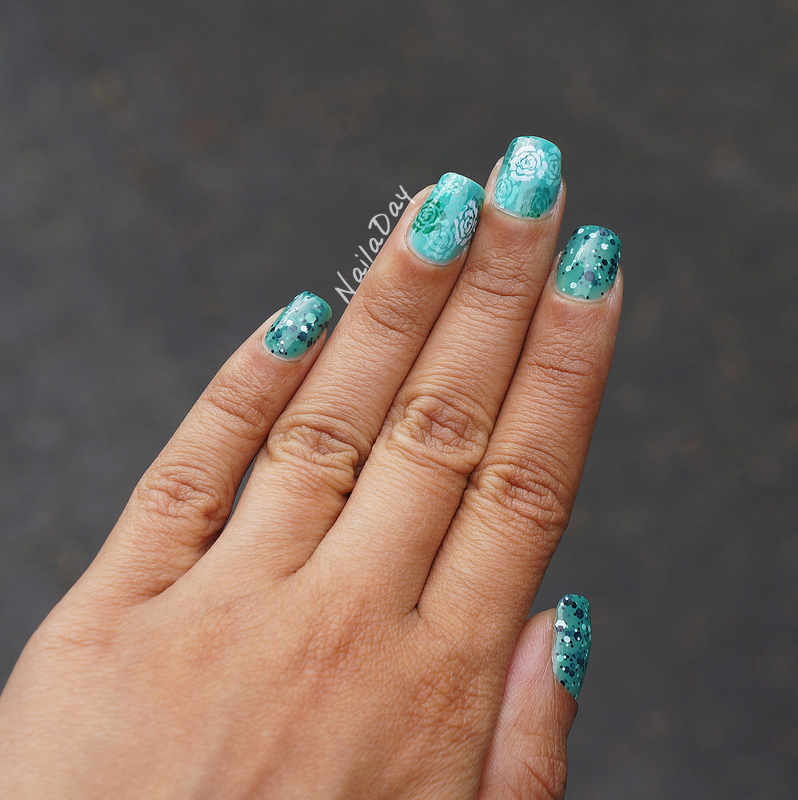
The thumb, index and pinky fingers are 3 coats of Maybelline Drops of Jade. The middle and ring finger accents are done by using my frankened jelly of Love and Beauty Jade, and sandwiching the rose stamp from the plate PUEEN 14 seen below.

NailaDay: The pond mani, with Maybelline Drops of Jade and Love and Beauty Jade

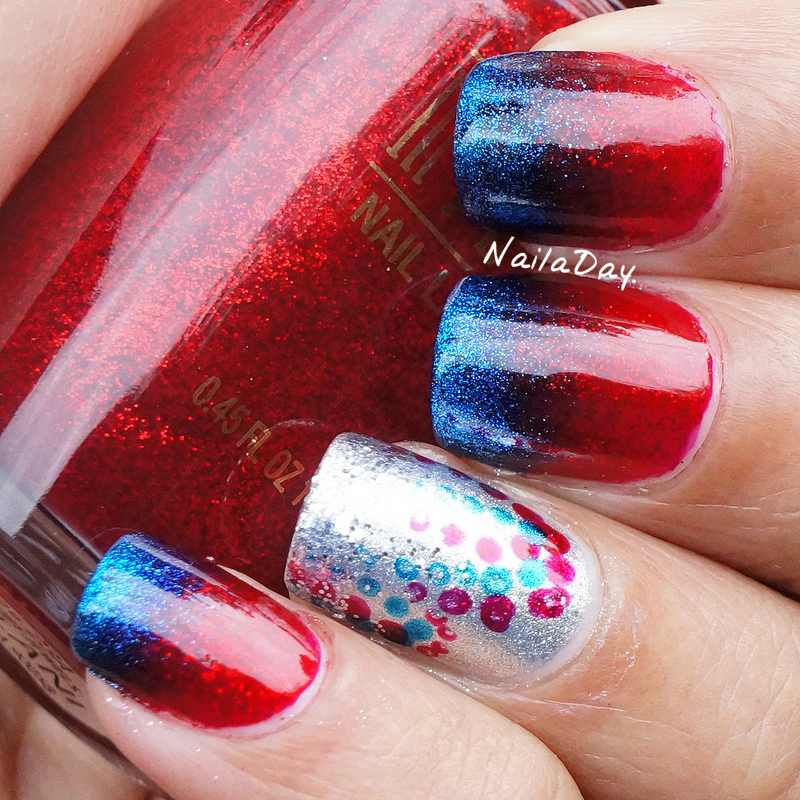
I actually used a couple of different colors for the stamping. I used SH Insta-Dri Whirlwind White and Sinful Colors last chance for the dark green.

NailaDay: The pond mani, with Maybelline Drops of Jade and Love and Beauty Jade

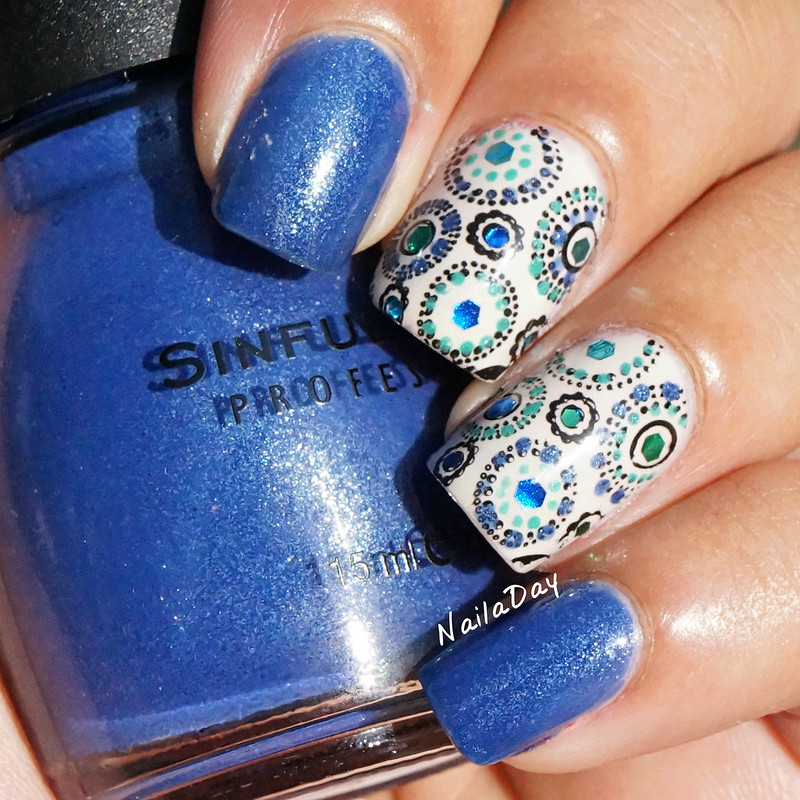
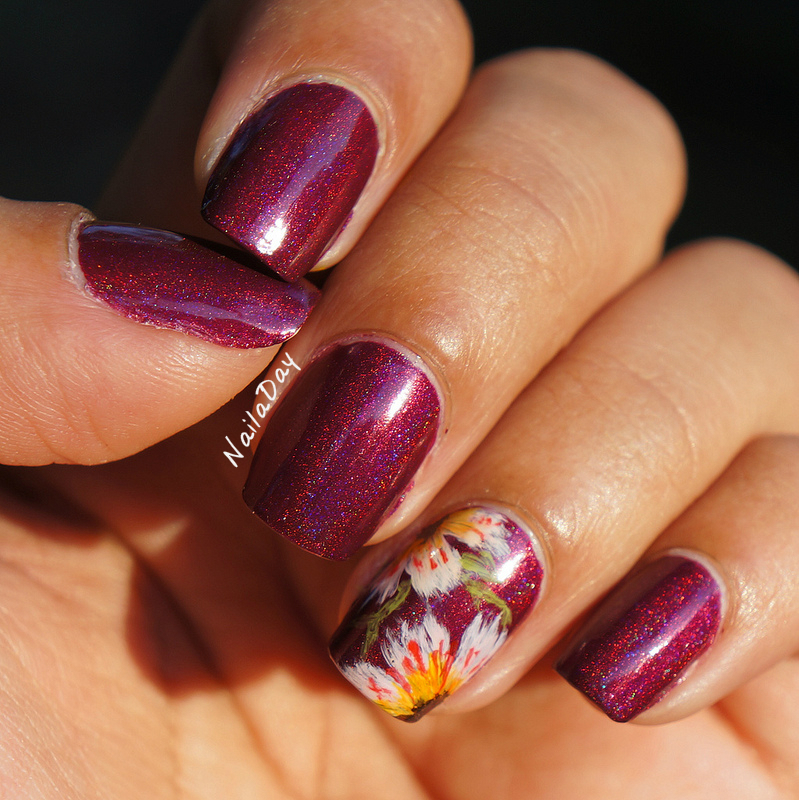
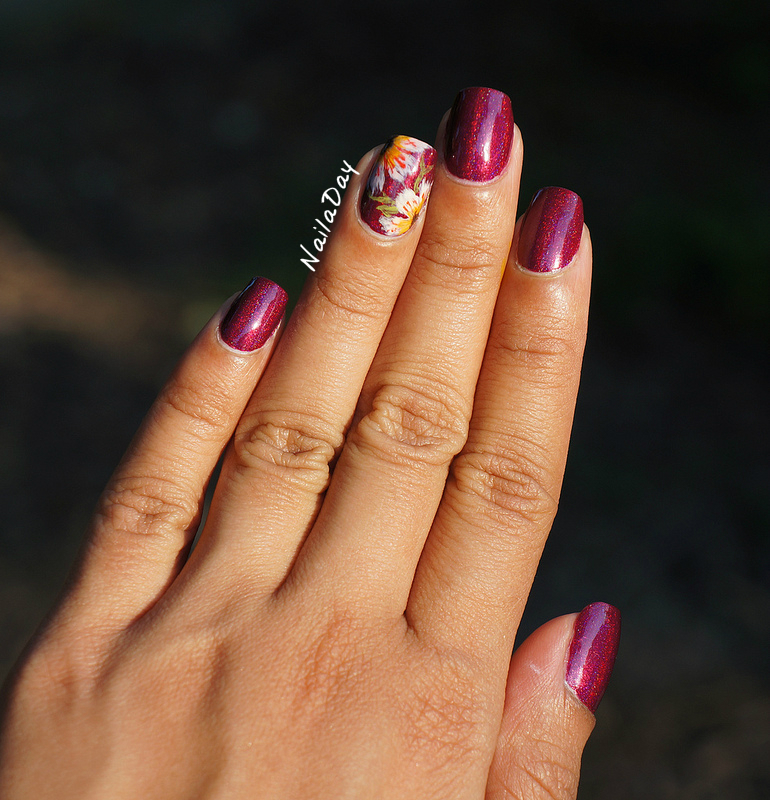
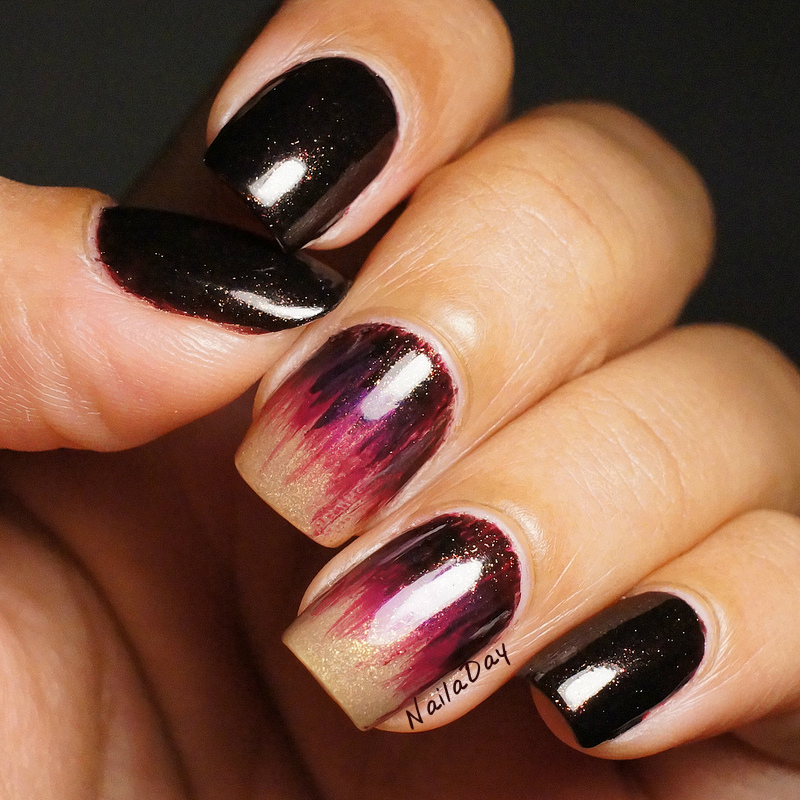
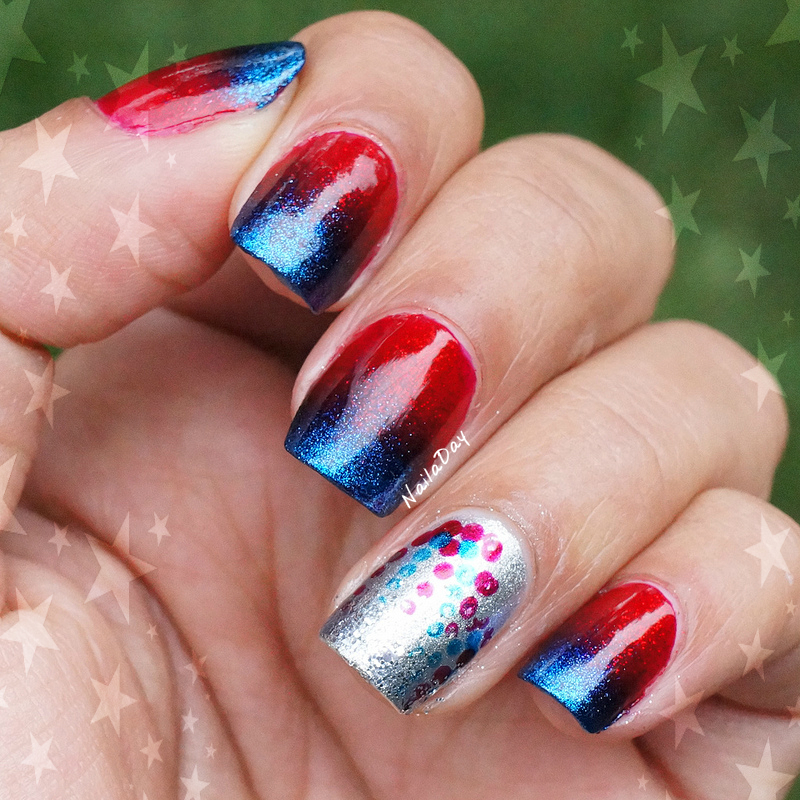
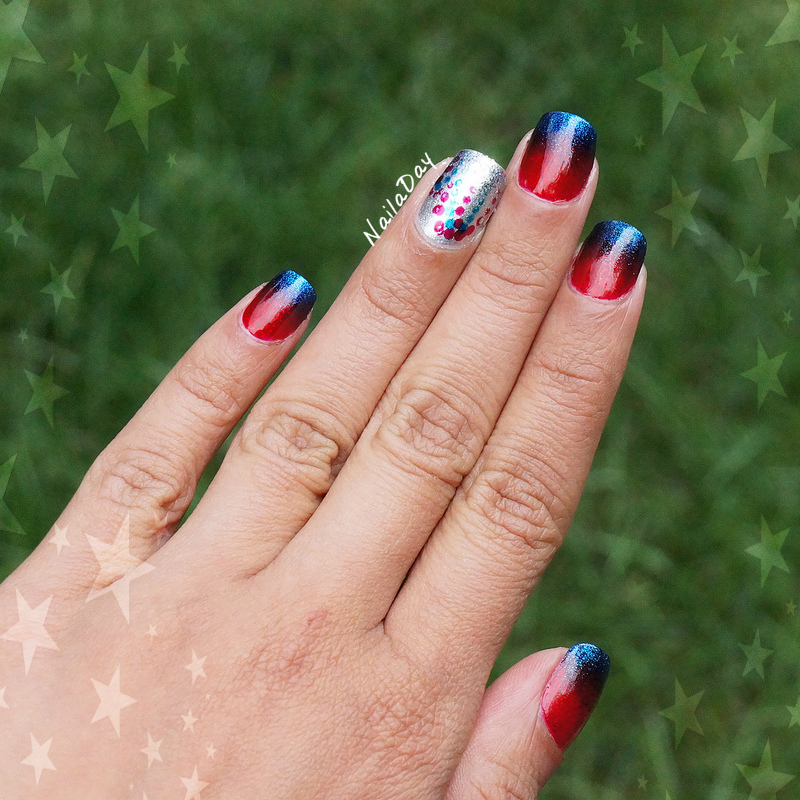
Outside pics, more color accurate, I think.

NailaDay: The pond mani, with Maybelline Drops of Jade and Love and Beauty Jade

NailaDay: The pond mani, with Maybelline Drops of Jade and Love and Beauty Jade

Enjoy and thanks for visiting!!

Saturday, July 27, 2013

Sinful Colors Neptune Baby Shower mani and I'm on Facebook!!!

Hi everyone! Another long week where the days just flew by! So much so that I am only now finding the time to post this mani. 

First and foremost, I'm on Facebook!! You can find the link to my page in the row of buttons on the right side of this page ----->. If you like to be on Facebook, please "like" my page and you can follow along with the posts through that as well.

NailaDay: Sinful Colors Neptune with stamping, dots and glitter...oh my!

As promised, I am showing you guys the mani I wore for my baby shower. The main colors used are Sinful Colors Neptune and Orly Powder Puff. I've used the Orly in other manis before when I just want a slightly off white base. It works well to wear in two to three coats. Dries in a decent time and with careful application, doesn't have any annoying bald spots. 

NailaDay: Sinful Colors Neptune with stamping, dots and glitter...oh my!

The accent nails are done with a combination of stamping, dots and glitter...oh my! After stamping, I added little colored dots with SC Neptune and Revlon Wind Fall. The glitters were hand placed after fishing them out of the different glitter polishes listed below. Sounds more time consuming than it actually was! The glitter pieces looked like little flat jewels on my nails.

A sunlight picture.

NailaDay: Sinful Colors Neptune with stamping, dots and glitter...oh my!


NailaDay: Sinful Colors Neptune with stamping, dots and glitter...oh my!

The colors I used for these are:
         Sinful Colors Neptune
         Orly Powder Puff
         Revlon Wind Fall
         WnW Black for stamping
         Glitters from:
                  Jordana Cosmic
                  Love & Beauty Crystal/Multi
                  Love & Beauty Dark Blue
Stamping Plate Cheeky XL B


My invitation was the inspiration for the mani.

NailaDay: Sinful Colors Neptune with stamping, dots and glitter...oh my!

Hubby rating: 10/10. He loved it :-)

Instafranken Fun Friday: Or, how I utterly failed at a Chanel Taboo Franken attempt

Hi all!

It's another franken fun Friday and today I am going to show you my attempt at recreating what I thought Chanel Taboo looked like from memory. Yeah....don't do that. Granted, it wasn't a very intense effort. As usual, I just took a few polishes that I thought would look interesting together, put a few drops of each in a tiny foil cup and painted my nails with it such I have demonstrated in this post. It came out nothing like Chanel Taboo but I thought it was pretty all the same!

NailaDay: Insta-franken failed Chanel Taboo attempt

These are the three polishes I mixed together. Sally Hansen Brilliant (which I also used as my first coat), Sally Hansen HD Laser and Revlon Spice It Up. I didn't have any specific proportions, just a couple of drops of each. 

NailaDay: Insta-franken failed Chanel Taboo attempt


Maybe if I were to attempt it again, I'd add more of a purple to it...like Revlon Grape or something. I did jazz it up with some hand placed holographic gold glitter. Here is a picture in the sun. 

NailaDay: Insta-franken failed Chanel Taboo attempt with holo gold glitter


I loved this so much! I made a video to really show off the sparkle of the holo glitter! I see more hand placed glitter in my life...


Saturday, July 20, 2013

Borghese Sonata Berry Franken with freehand acrylic flowers

Hi guys!
This is a big weekend for me. I had my Seemantham today, which is a religious function for expectant mothers with their first child. Tomorrow is going to be my baby shower! Of course this weekend needs two manis, one for each function, right? I'll show you what I ended up wearing today and if I manage to find the time to change my mani for tomorrow's shower, I'll show you that in my next post.

NailaDay: Borghese Sonata Berry Franken with freehand acrylic flowers

Once upon a time when holographic nail polish was still hard to get, I had heard about a pigment called spectraflair that gave the elusive beautiful holographic rainbows finish to any polish it was added to. I got myself a packet of it, back when it was more easily available and this is the first polish I made with it. It's Borghese Sonata Berry with a ton of spectraflair pigment in it. I had no idea how to do it right and I think that was evident with this polish. I didn't get as strong of a rainbow with this as I wanted so it sat in the drawer until now. Now I'm kicking myself for holding off. I actually love the subtlety of the polish. And I'm kicking myself for not taking advantage of the China Glaze Hologlams clearance at Sally's. It never ends.

NailaDay: Borghese Sonata Berry Franken with freehand acrylic flowers

Inside or cloudy weather, it looks like your standard burgundy. Under the lightbox, it has a lovely sheen to it, because of the spectraflair pigment. In the sunlight, the rainbows come out!!

NailaDay: Borghese Sonata Berry Franken with freehand acrylic flowers

What I really love about this mani are the flowers. With the recent brushstroke manis, I became a little more comfortable using the nail art brushes and thought I could do little ragged flowers. They are my first attempt at freehand acrylic painting and I think they came out pretty well! It took a lot less time than I thought it would too, probably because I just did one nail.

NailaDay: Borghese Sonata Berry Franken with freehand acrylic flowers


Here are some pictures of the frankened polish by itself.

NailaDay: Borghese Sonata Berry Franken

NailaDay: Borghese Sonata Berry Franken

For a spectraflair franken, it's not that impressive. I love the color though and I am in love with the flowers!!

Tuesday, July 16, 2013

Another tutorial! My raggedy brushstroke design.

Hi folks! What? Another post by me already? This is sort of a quick and dirty post. I have a tutorial for you based on my recent two manis here and here using the raggedy brushstroke technique.


NailaDay: Raggedy Brushstroke design tutorial

A couple of tips:
1. Make sure each color is mostly if not all the way dry before going to the next color. Shouldn't take long.
2. Don't have the brush too heavily laden with polish because you want it to run out and fade as you get to the end.
3. Use a light hand when stroking the colors down the nail. You can lean a little heavier on the brush close to the base but lighten up as you get to the end of the stroke.
4. It actually helped me to have a cheap brush that didn't give me perfect straight thin lines. It helped with the raggedy look.

I got my brush as part of a set on Ebay.

I truly don't know if there is much that is completely original regarding simple nail art anymore because so many of us arrive at the same technique and design independently. So, of course, during an internet search, I found a YouTube video of something similar to this done by SimpleNailArtDesigns. I would be remiss if I didn't show you this video because I think it's fantastic for those who want to see it being done.


How did I do with my tutorial? Was it a flub or actually helpful?

Monday, July 15, 2013

Now for something totally different. Neon Brushstroke Mani!

Hi everyone! Hope you all had a good weekend! Mine was...eeeh. That belly of mine that people love to talk about has been giving me a bit of pain issues and it got to the point where I couldn't do much besides sit on a couch and put my feet up all Sunday (so sad, right?). Well, after so much of catching up on work, what else could I do but watch TV and paint my nails! I decided to try my hand at the raggedy brushstroke technique again (I need a good name for this) and decided to go with completely different colors. I haven't done a neon mani this summer yet so that's what I went with!

NailaDay: Neon Brushstroke skittles mani

Um...crazy right? What a difference from the last one! The colors I used for this one are:
Sinful Colors Snow me White (base)
Sinful Colors Neon Melon (highlighter yellow)
Sinful Colors Summer Peach (orange)
Sinful Colors Pink
Sinful Colors Irish Green
Studio M Grape Escape
L'Oreal The Queen's Ambition (glittery black)

NailaDay: Neon Brushstroke skittles mani


NailaDay: Neon Brushstroke skittles mani


So, I surprised myself by actually wearing this to work but it was a light day. I might take it off though. It's a little loud. Too bad. It's growing on me. My hubby, though, not a fan. He gave this a 2/10.

Friday, July 12, 2013

Another dress inspired mani with Salon Perfect Brown Sugar

Hi folks. Survived another week! It's a bittersweet end though because I'm on call this weekend and hauling my 33 week belly around the hospital is going to be a chore.

I have a pretty sweet mani and a new to me technique to make up for it though! This mani is the first time I attempted the whole brush stroke nail art look. The verdict: I love it!!!  I actually thought of it in order to match a certain dress I wore this week, which I'm showing you at the bottom of the post.

NailaDay: Salon Perfect Brown Sugar with brush stroke accent nails

The polishes I used for this are Salon Perfect Brown Sugar, seen above, Salon Perfect Faux Glow, which you saw last in this mani, and Sinful Colors Fig. I used two coats of Brown Sugar on the plain nails and for the accent nails, I used two coats of Faux Glow and then painted freehand strokes with Fig with a small nail art brush randomly starting at the cuticle and ending before I got to the tip. Over that, I did the same thing with Brown Sugar, stopping even earlier to allow Fig to show through. I do believe Brown Sugar is a dupe for China Glaze Midtown Magic. I have both, never worn Midtown Magic but in the bottle they look exactly the same!

NailaDay: Salon Perfect Brown Sugar with brush stroke accent nails

NailaDay: Salon Perfect Brown Sugar with brush stroke accent nails

And here's me, sporting the dress and the mani.

NailaDay: Salon Perfect Brown Sugar with brush stroke accent nails

Why did I get all fancy, you might ask? No? I'll tell you anyway. This week, I got to meet some fellow Cleveland bloggers for the first time! I have been following both Michelle from All Lacquered Up and Andrea from Chickettes for a little while now and it was so nice to realize that we actually lived in the same place! I really started this blog as a way to just talk about and expand a little on my hobby and get a little more interaction from other people just as interested in this hobby as me. I have my own little corner of the internet and it's fun when I get you guys dropping in as visitors to check out what I've been doing. (I love your comments too, hint). Having an actual meetup with other nail bloggers, though, seemed to take it to another level. It was just neat to get out of my usual routine and interact with women from a completely different background from me and be able to share in a common interest! Anyway, can you tell I don't get out much, haha? Most times it really feels like work and baby are my life. I'm really looking forward to more meetups in the future!

Monday, July 8, 2013

Zoya Summer Pixie Dust collection Rainbow Gradient

Hi folks! Hope everyone had a good fourth of July weekend. Mine flew by way too fast, of course. Now, here we are, back at the beginning of another week. 

I do have a bright mani to start things off, though! I wore this about two weeks ago and didn't take it off for a whole week! Could you blame me? Look how pretty! 

NailaDay: Zoya PixieDust Summer Rainbow gradient

This mani was done with the entire Zoya Summer Pixie Dust collection. The colors from the outermost thumb to the outermost pinky nail are as follows with a very simplified description of the color:
    Zoya Solange - Yellow
    Zoya Beatrix - Orange
    Zoya Destiny - Red
    Zoya Miranda - Dark Pink
    Zoya Stevie - Lavender
    Zoya Liberty - Blue

For the gradient look, it was actually super easy. I just painted the two colors next to each other on each nail. Then, on a piece of foil, I mixed a drop of each color together and painted that mix in a single stripe right down the middle of the nail. With the consistency of the pixie dust polishes, this method seemed to work really well! I just repeated this for a second or third coat and I was done! No sponge necessary.

NailaDay: Zoya PixieDust Summer Rainbow gradient

There was no sun out when the pictures were being taken so you can't see the sparkliness of it all but, it was there!

NailaDay: Zoya PixieDust Summer Rainbow gradient

In the removal process, Liberty (the blue) was the only one that really showed a tendency to stain my nails. That one is going to require two layers of basecoat in the future. I also ended up using the foil method for the removal. I think it's very necessary. This is the first time I've done the whole rainbow gradient thing. I think it's going to have to happen again. I think I know what other unique polishes I'm going to use for it too. Keep your eyes peeled!

Thursday, July 4, 2013

Happy 4th of July!

Hello everyone! Happy America's birthday!!

Hope everyone who reads this is having a good day today. I am! I get to stay home. My mom, my mother-in-law and my husband are all home, cooking, eating, talking, painting nails (me), watching movies (my husband) and having a blast!! The mani I'm going to show you today, I actually did today and I still have on my nails! Usually, there's a lag time of a few days to some weeks before a mani gets featured here so this is special :-)

NailaDay: Milani Ruby Jewels and Sally Hansen Freeze July 4th mani

I adore everything about this. The polishes I used, the gradient, the abstract fireworks....ok, so the dotted fireworks need help. But I still love it! The polishes used here are Milani Ruby Jewels, Sally Hansen Insta-Dri Freeze!, Sally Hansen Celeb City. I dusted the tip of the ring finger with slight gradient of Sinful Colors Queen of Beauty but you can't really see it in the pictures. It's just extra sparkly in real life :-)

NailaDay: Milani Ruby Jewels and Sally Hansen Freeze July 4th mani


Pixlr.com, where I do my watermarking, had some fun 4th of July overlays and borders today so I just had some fun with those.

NailaDay: Milani Ruby Jewels and Sally Hansen Freeze July 4th mani


NailaDay: Milani Ruby Jewels and Sally Hansen Freeze July 4th mani


It's sort of simple but I'm going to love wearing this for the next few days. Thanks for looking!!!

Monday, July 1, 2013

Savina Royalty gold skittlette

Hey everybody!
Look at that, it's another Monday. Who's excited? Yeah, not me either. Let me show you a mani I was pretty excited about though.

NailaDay: Savina Royalty Skittlette


The base color I used in this mani is Savina Royalty. That's the green. The bottle I'm holding in the above picture is Salon Perfect Faux Glow. I believe this is a dupe for China Glaze Fast Track from the Hunger Games collection. I picked up and put that polish down so many times that I was super excited to see its dupe at Walmart!

NailaDay: Savina Royalty Skittlette

The stamping for the gold flowers was done with China Glaze Passion and the image came from the Cheeky plate CH50. I only used part of the image and left a blank space on the nail. I also really love the use of dots here as tiny accents on the ring finger nail. I supposed you could put studs or stones here but since I don't think I can wear those at work, I went with just dots. I think it works.

NailaDay: Savina Royalty Skittlette

A couple of sunlight pictures to give you an accurate idea of the color when viewed outside.

NailaDay: Savina Royalty Skittlette

NailaDay: Savina Royalty Skittlette


I am starting to really, really love greens like this. I think the mint green and gold combo is so pretty too. What do you think?
Related Posts Plugin for WordPress, Blogger...