Showing posts with label Sally Hansen. Show all posts

Wednesday, May 4, 2016

Barielle Falling Star with Sally Hansen CSM Copper Penny

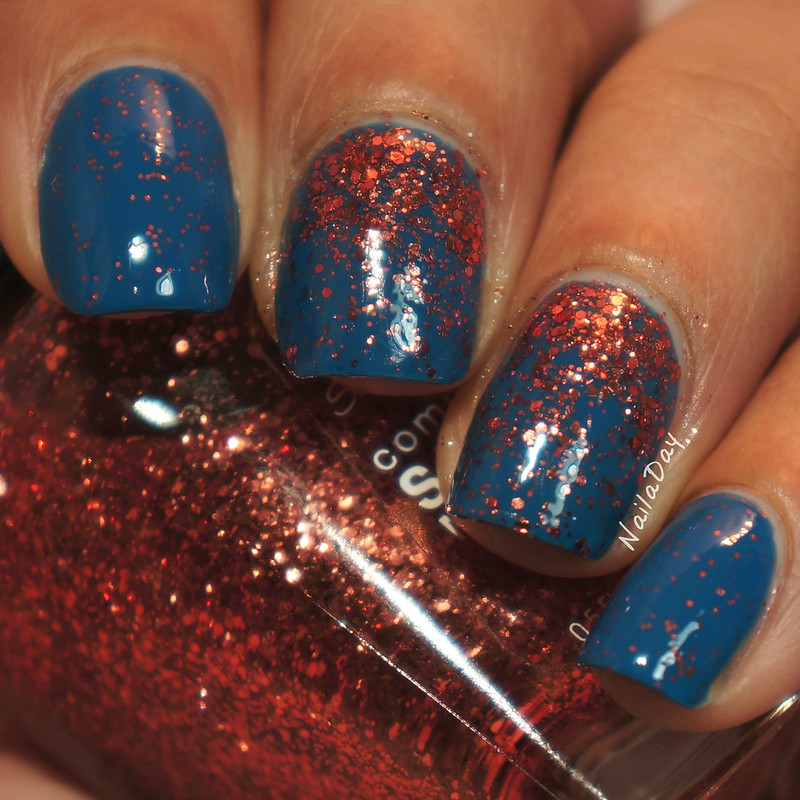
I'm not done with the Barielle swatches from my stash! I have a pretty blue one for you today, Barielle Falling Star. It's a slightly dusky medium blue with copper glitter mixed in. I decided to amp up the copper factor with some Sally Hansen CSM Copper Penny glitter gradient on my two middle fingers.

NailaDay: Barielle Falling Star with Sally Hansen CSM Copper Penny

NailaDay: Barielle Falling Star with Sally Hansen CSM Copper Penny

I think it looks okay in the pictures but for some reason I wasn't happy with it in real life. I felt like I should have just left it alone. It looked so garish for some reason in real life. Perhaps I went too heavy handed with the glitter, who knows? I took this off earlier than planned because it was bumming me out. 

Here is Falling Star on it's own. This is two coats. The glitter in the polish was subdued and not super shiny. Maybe that's what was wrong with the combo above. The Sally Hansen was so shiny that it looked a little odd with the non shiny but same color glitter on the other nails. Now I can't recall if I liked wearing this one on it's own because my memory is all overshadowed by my dislike for the one above. I'm just going to have to wear it again and find out.  

NailaDay: Barielle Falling Star

NailaDay: Barielle Falling Star

As always, thanks for looking!!

Tuesday, April 12, 2016

Barielle A Bouquet for Ava (teal and copper go so well together)

Hi folks! More Barielle swatches for you today. I swear, I swear, there aren't too many more after this. I have a lot of them from sets I bought on discount at TJ Maxx a few times so....
This one is Barielle A Bouquet for Ava. 

NailaDay: Barielle A Bouquet for Ava

Is that not just a totally gorgeous teal? The formula is just perfect too. I had no problems with the two coats this took. It did stain if I recall correctly so make sure to double up on your basecoat. I had to use the old teeth whitening toothpaste trick myself. 

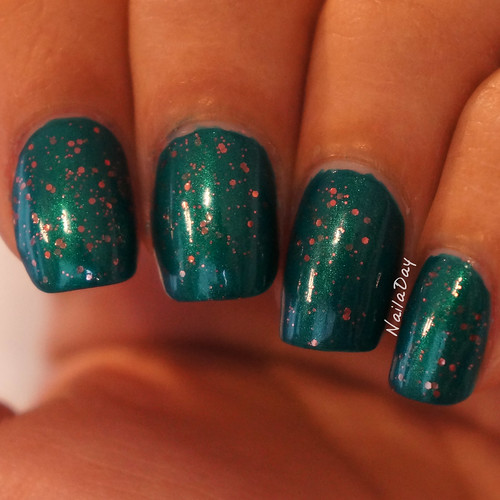
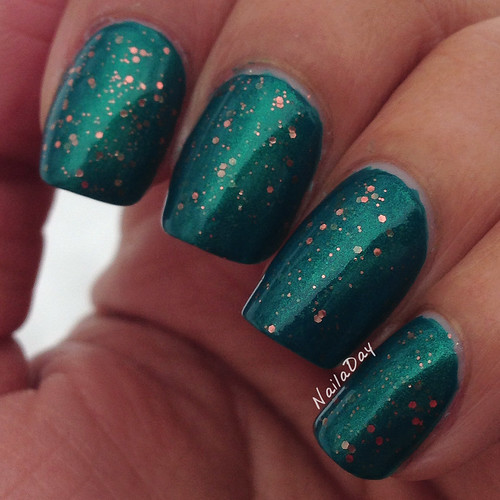
I wanted to see if I could transform it to a shimmery finish with some copper glitter by doing a small franken. I used a drop of Barielle End of the Rainbow with a drop of Sally Hansen CSM Copper Penny and a tiny drop of A Bouquet for Ava on a piece of foil and then applied a coat of that to each of my nails. I needed to repeat the process in order to cover all my nails. Here are pictures of the end result in various lighting situations. 

In the lightbox:
NailaDay: Barielle A Bouquet for Ava with Sally Hansen Copper Penny


In my bathroom:
NailaDay: Barielle A Bouquet for Ava with Sally Hansen Copper Penny


Outside in the bitter cold (it was January):
NailaDay: Barielle A Bouquet for Ava with Sally Hansen Copper Penny

See what I do for pretty pictures?

I really liked how the franken looked. I love love love Copper Penny in the bottle but I'm not sure how it looks on its own next to my skin. I need to use it with more colors to see what I like. 

Monday, March 28, 2016

Barielle Jordana's Skinny Jeans with Sally Hansen HD Laser

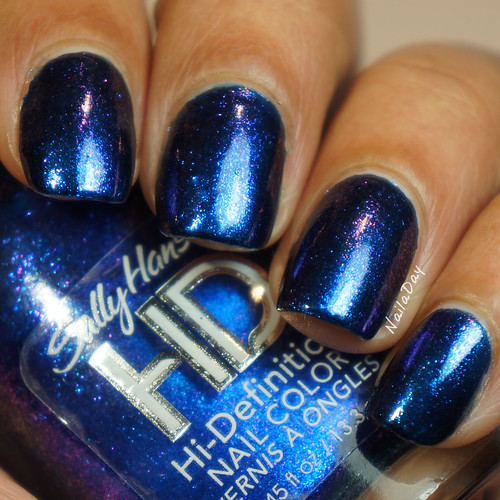
Another gorgeous Barielle blue polish for you today. Before I get to the swatch of the polish, let me show you a really fun layering comboI did  with this polish. This is Sally Hansen HD Laser, a wonderful duochrome shimmer that shifts from blue to purple. It was so sparkly!! And, as with all duochromes or multichromes, it was really interesting on cloudy days and other lower light situations. 

NailaDay: Barielle Jordana's Skinny Jeans with Sally Hansen HD Laser

NailaDay: Barielle Jordana's Skinny Jeans with Sally Hansen HD Laser

NailaDay: Barielle Jordana's Skinny Jeans with Sally Hansen HD Laser

This is what Sally Hansen Laser was layered over, Barielle Jordana's Skinny Jeans. This was two easy coats of this polish. It did not give me any trouble at all and it did not stain with removal. 

NailaDay: Barielle Jordana's Skinny Jeans


Sunday, July 19, 2015

Review post - Lady Queen Nail Wraps

Hi everyone!

This post is coming a lot later than I wanted. Over the last week my entire household has been one by one falling like dominoes to the cold and trying to deal with that while being back at work has been...challenging. I finally had a little breather today so let me show you a quick review. Today I'm showing you one of the oldest polishes I have, Sally Hansen Hard as Nails Reflection Frost, with one of the newest nail art items I got, Lady Queen Nail Wraps.


NailaDay: Review Lady Queen nail wraps and Sally Hansen Reflection Frost


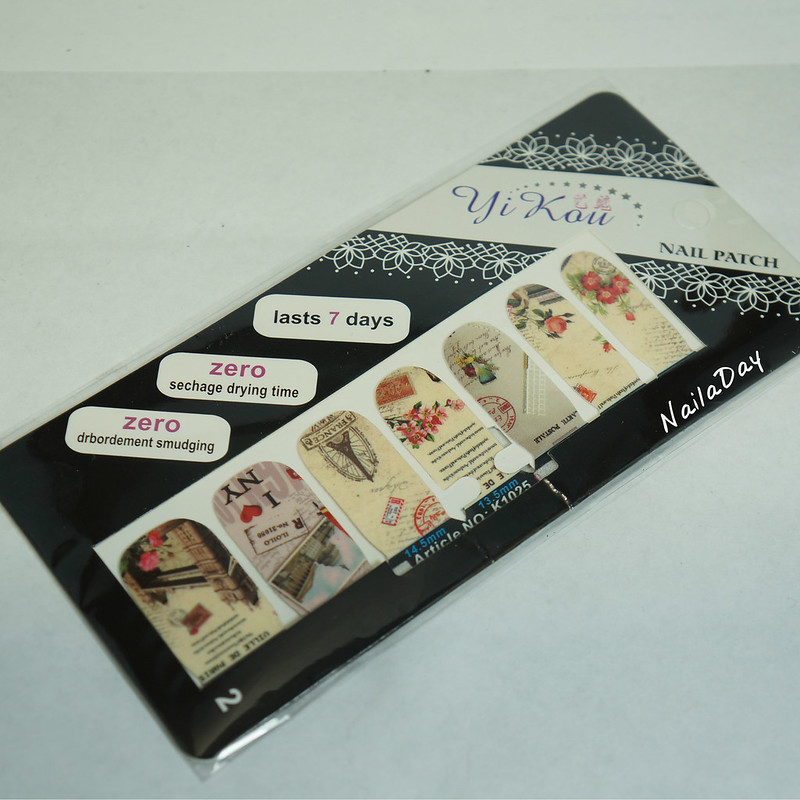
I was contacted by the company, Lady Queen Beauty, to review a couple of nail art items for them. I had never heard of them before but after browsing their website, they seem very much like Born Pretty Store. One of the items I selected was this set of nail wraps.

NailaDay: Review Lady Queen nail wraps and Sally Hansen Reflection Frost

I had been resisting using nail wraps for the longest time. I was always under the impression that they would be fussy, complicated. What it they didn't fit my nails very well? What if they peeled away too early? What if they were too hard to take off? Boy, was I wrong! When I saw this cute set of wraps on the Lady Queen website, I decided to go ahead and try them. What could I lose?

NailaDay: Review Lady Queen nail wraps and Sally Hansen Reflection Frost


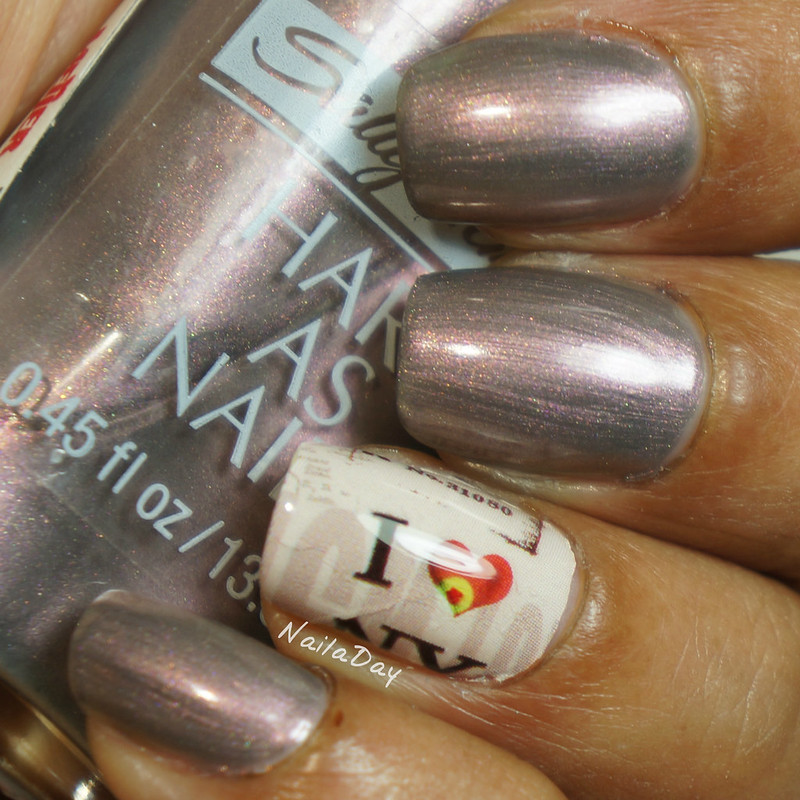
It was never my intention to wear these as a full set. I've seen others use nail wraps as quick accent nails and I wanted to do the same thing. The thing about these wraps is, those larger ones towards the left side of the pack, they are large enough to cover two nails when cut in half and laid on the side. So, I used ONE of the nails wraps, and got accents for two nails. My left hand, which you see here, had the I Heart NY portion of the sticker and my right hand had the picture of the government building. It too bad my right hand never looks as good as I'd like, otherwise you could see the other half of the nail sticker adorning my other hand.

NailaDay: Review Lady Queen nail wraps and Sally Hansen Reflection Frost


I'm happy to report that the sticker lasted beautifully for the entire 6 days that I wore this manicure. The actual placement of the sticker was easy as pie. I cut the sticker in half, rounded the edges a bit to fit my nail, followed the instructions for placement and didn't have any trouble. I used a coat of Seche Vite on top to maintain the longevity of the sticker. I don't think you could really use it without some sort of topcoat on top.


The polish I used for this mani is Sally Hansen Hard as Nails Reflection Frost, a polish that I think I bought when I was in high school, which was...a while ago. This was two very easy coats. It's a faintly duochrome-y greyed out lilac taupe color. I'm not the greatest describer of colors so I hope that makes sense. Anyway, I've put plenty of pictures up so you guys can see for yourself what an interesting color this. It seemed to go well with the particular nail sticker I picked for this mani. If this post instills a burning desire in anyone to possess this polish, I think you can still find it on Ebay for a VERY reasonable price.

NailaDay: Lady Queen Nail Wraps and Sally Hansen Reflection Frost


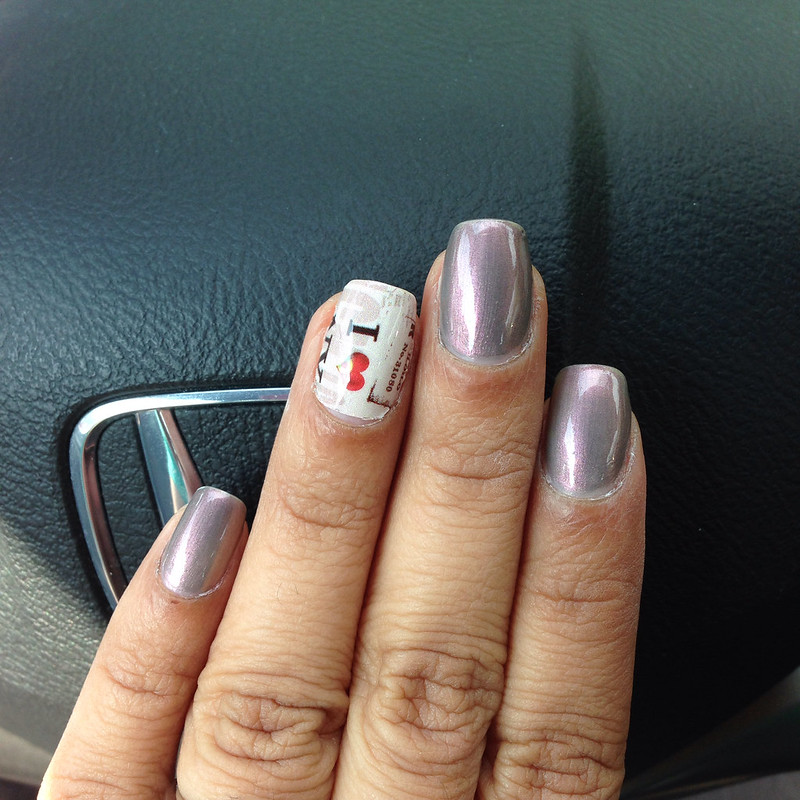
This last picture is something I hope to show you with most of my posts. I have realized that pictures taken in my car look very nice but also give you a flavor of what the mani looks like "in real life". So, here's the real life picture of this mani from my car! :-)

Thanks for sticking with me through this whole post. Again, check out the nail art items on the Lady Queen website. I have one other item that I need to review soon. Standard shipping took a few weeks so I wouldn't choose that if you're in a hurry to get anything. The specific nail art wraps can be found here. If you do decide to get anything, you can use the code "AQLC15" to get 15% off your items. Thanks for looking!!

Monday, June 15, 2015

Born Pretty Review - water decals

Hi everyone!
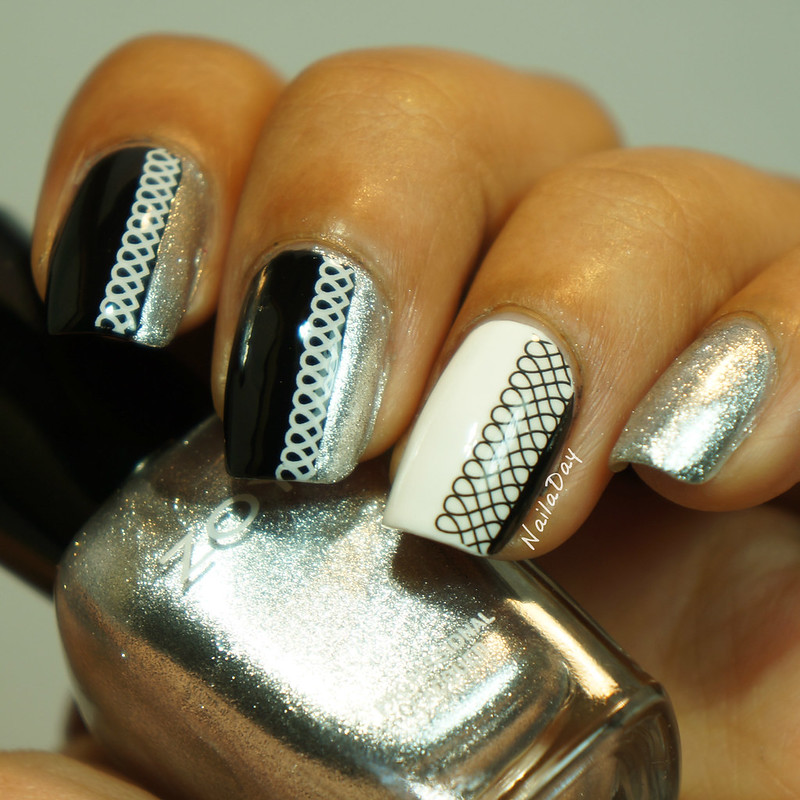
I have another review post for you today.  I'm reviewing some water decals from the Born Pretty Store. Until this mani, I had never used any water decals or nail strips of any kind. I was a little apprehensive to say the least. I thought I was going to go through many tries and waste a bunch of this product before I got something I was happy with. Not the case!! I managed to "nail it" almost right away!

NailaDay: Black and White Skittlette using Born Pretty Store water decals

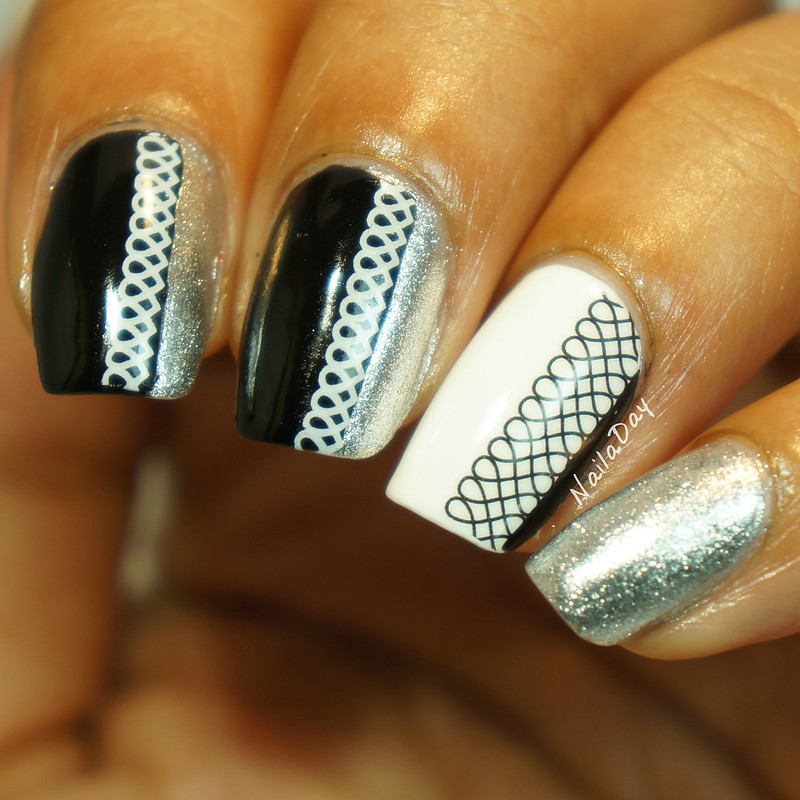
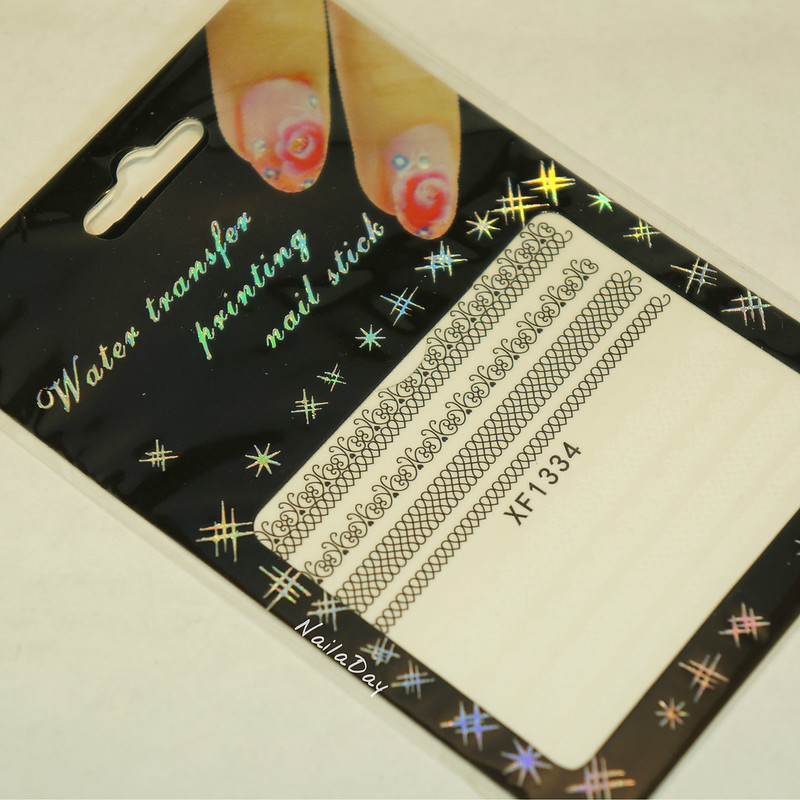
To create this nail art look I used these water decals below. They have strips of lace pattern in both white and black on the same sheet. You can't see the white colored pattern below because it blends in with the background paper. The black polish I used was Sally Hansen X-treme Wear Black Out and the white was Sally Hansen X-treme Wear White On. The silver was Zoya Trixie. I find all three polishes amazing for what they are and very easy to use.

NailaDay: Black and White Skittlette using Born Pretty Store water decals

Using the actual decals is very easy. Make sure your polish is dry before using the decals. 
     1. Measure and cut out of the portion of the decal that you will be using on your nail. 
     2. REMOVE the clear film on top of the design
     3. THEN place the design in a cup or bowl of water for several seconds, up to half a minute.
     4. Peel the design off the backing with a pair of tweezers and place over your nail.
     5. Align the design properly right away because it may be hard to adjust once it's already on the nail. I found it helped to dip my nail in the water as well and have a large drop of water under the design as I was aligning it. 
     6. Once the design is where you like it, press firmly to get rid of any bubbles of any kind (air/water)
     7. Cover with a coat of topcoat once the nail is dry.

The only flub I kept making was to forget to remove the clear protective film over the decal before putting it in the water. The first time, I remembered within a second of putting it in the water and I was able to fish it out, take off the film and put it back in the water. The second time, I completely forgot and ended up having to peel the design off the plastic film instead of the paper backing. Still salvaged it!!

A few more pictures for your enjoyment....

NailaDay: Black and White Skittlette using Born Pretty Store water decals

NailaDay: Black and White Skittlette using Born Pretty Store water decals

NailaDay: Black and White Skittlette using Born Pretty Store water decals

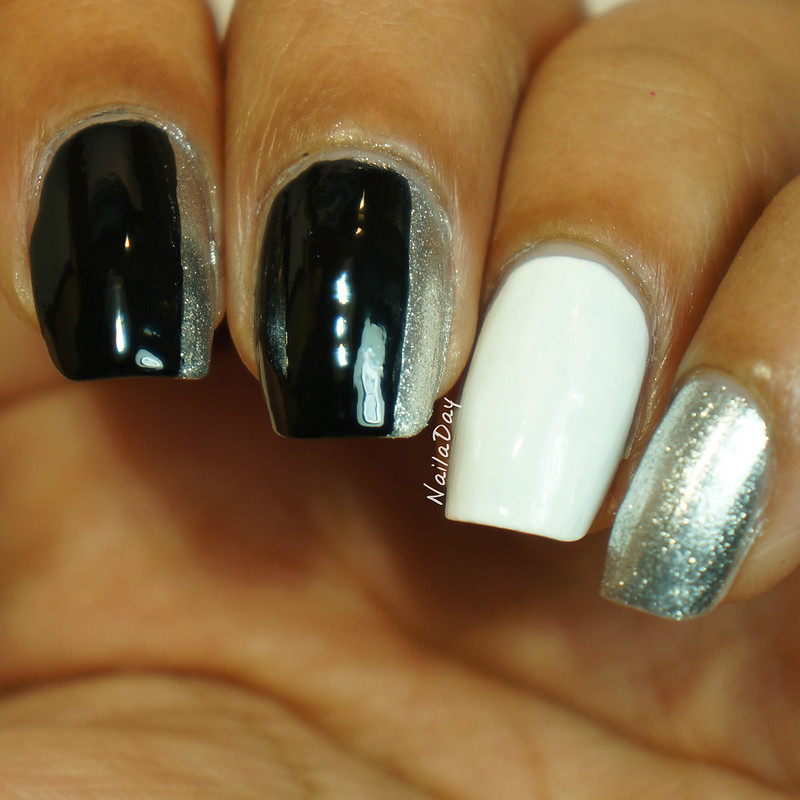
Here's a picture of the base before adding the decals.

NailaDay: Black and white skittlette using Born Pretty Store water decals

Hope you liked this review and hopefully, if you've been like me, unsure of water decals, you'll be more encouraged to try them out after this post. If you're thinking of getting them from the Born Pretty Store, you can use my code "PRK31" for a 10% discount on your order at checkout. 

Thank you for looking!!

*items in this post were provided to me for honest review*


Wednesday, April 22, 2015

New goals, new manis and new additions!!
Wow, so another long absence!! Let me show you the reason for that...


As I'm writing this today, he is a little over two weeks old and between him and his older brother, we are being kept very busy!! However, I am slowly starting to find some time to sit and work on blog posts so hopefully you will be seeing a lot of manis coming up in the next few weeks. I have been keeping up with painting my nails but instead of trying to get nail art done, I've been satisfied with just painting my nails uniformly with a single color and experimenting with layering and mixing polishes. Someday, I will have time for nail art again! I've also been trying to swatch all the polishes in my collection on my nails so once in a while, you might get a deluge of polish swatches you may or may not care about.

I obviously must show you guys what I was wearing on my nails when this guy was born. I was wearing Sally Hansen CSM Indigo Waves and I have terrible pictures of it. I never got around to taking good pictures because I wasn't sure I liked it, I smudged the index finger, wasn't happy with the application etc. Of course, now there's no question of me keeping it :-) It's grown on me and I'll have to wear it again and take better pictures next time. But for now....

NailaDay: Sally Hansen CSM Indigo Waves

This first picture was taken on the way to the hospital, when I realized this was it. The next picture was taken almost a week after I put it on. You can see the growth at the cuticles and I'd filed off some tipwear but it held up pretty well! I thought there would be some duochrome to be seen based on what the bottle looks like but it's hard to see on the nail. I was trying to find it in the above picture.

NailaDay: Sally Hansen CSM Indigo Waves

I have a new favorite regimen for base and top coat. Base coat - Finger Paints base coat. Topcoat - first Revlon Colorstay Topcoat (discontinued, which is why I bought a bunch on Amazon) and Seche Vite immediately afterwards. This combination has been really really good to me so far.

Ok, well thanks for making it this far and hopefully I'll be back soon!

Thursday, November 14, 2013

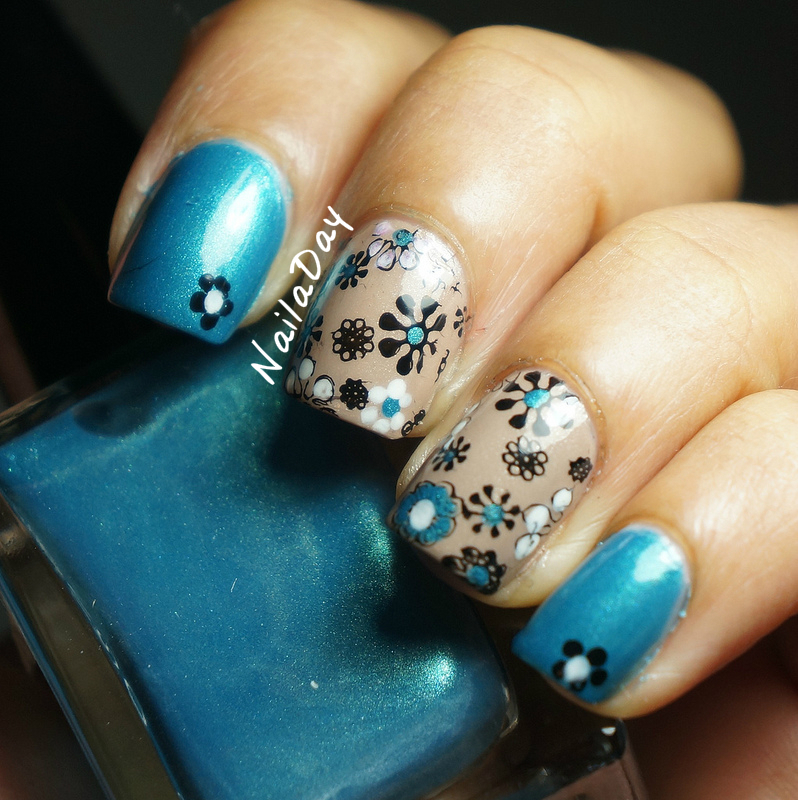
Rimmel Marine Blue and Sally Hansen Fedora flowers

Hi folks!

Depending on what part of the world you live in, winter has come. And no, that is not a Game of Thrones reference. I tried reading that book and I had to stop after the third really bad thing happened to a good person. A child, no less! This was only a few chapters into the first book and I couldn't go on. I've heard stories about the television series and I don't think I can watch that either. I see bad stuff in real life all the time, in the news, at work. I don't need it in my free time/escape activity as well. I tend to gravitate towards things that are happy, cute, pretty, funny...etc. I guess that explains my love of nail polish :-)

Ok, mini digression over. What was I saying again? Oh yeah, winter is here. Boo :-( That is all. I suppose I'll start doing winter themed manis just to make it a little more bearable but for now, here are some flowers. 

NailaDay: Rimmel Marine Blue and Sally Hansen Fedora flowers


NailaDay: Rimmel Marine Blue and Sally Hansen Fedora flowers

NailaDay: Rimmel Marine Blue and Sally Hansen Fedora flowers


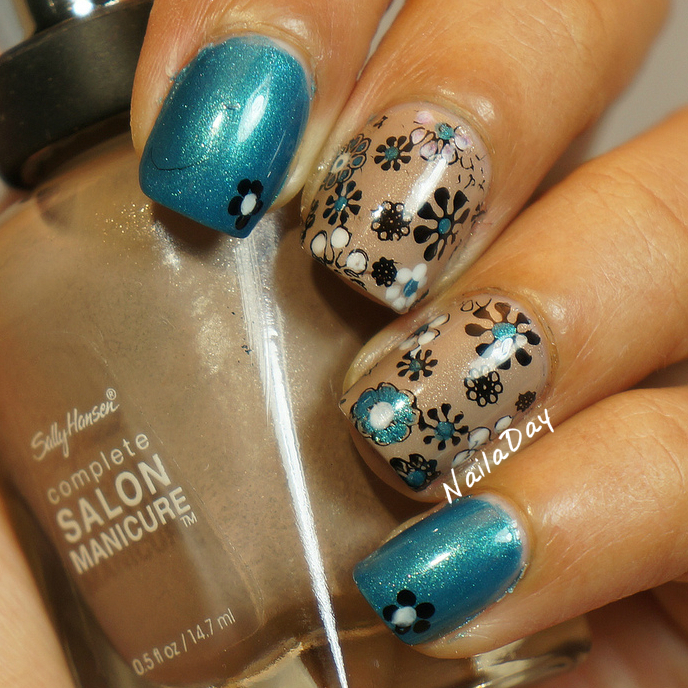
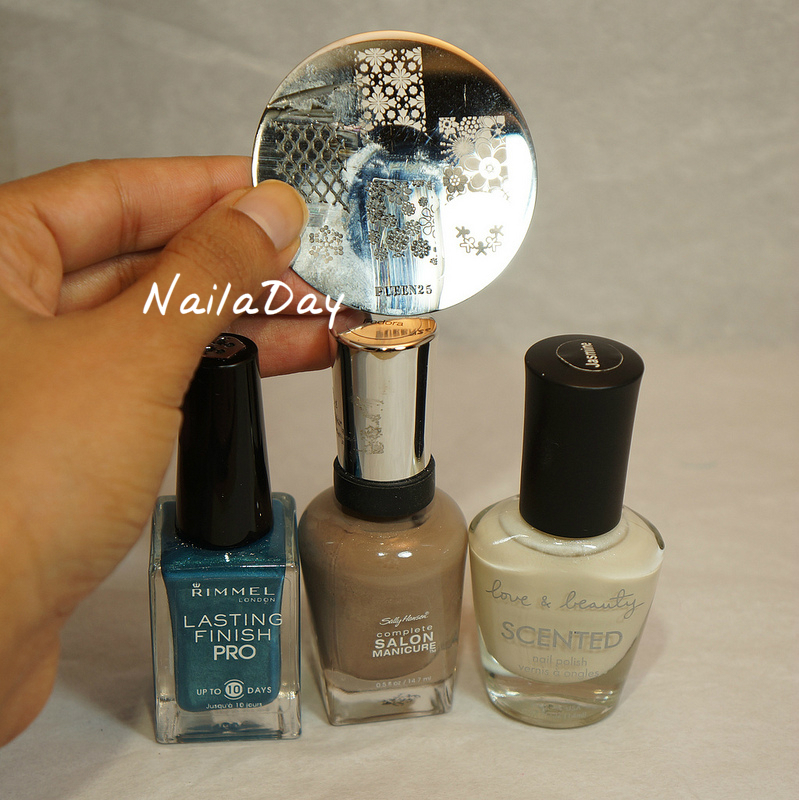
I know I did a similar thing for my baby shower mani, but here we have different colors and stamp pattern. I didn't add the glitters either. The teal polish here is Rimmel Marine Blue. The beige is Sally Hansen SCM Fedora and the white is a Forever 21 Love and Beauty polish called Jasmine. It's says it's scented but I can't really tell. The image is from the Pueen plate 25.


NailaDay: Rimmel Marine Blue and Sally Hansen Fedora flowers


Sunday, October 27, 2013

Sunday Stamping: Halloween Stamping, Black and White Halloween mani with Hard Candy Black Tie Optional

Hi folks!

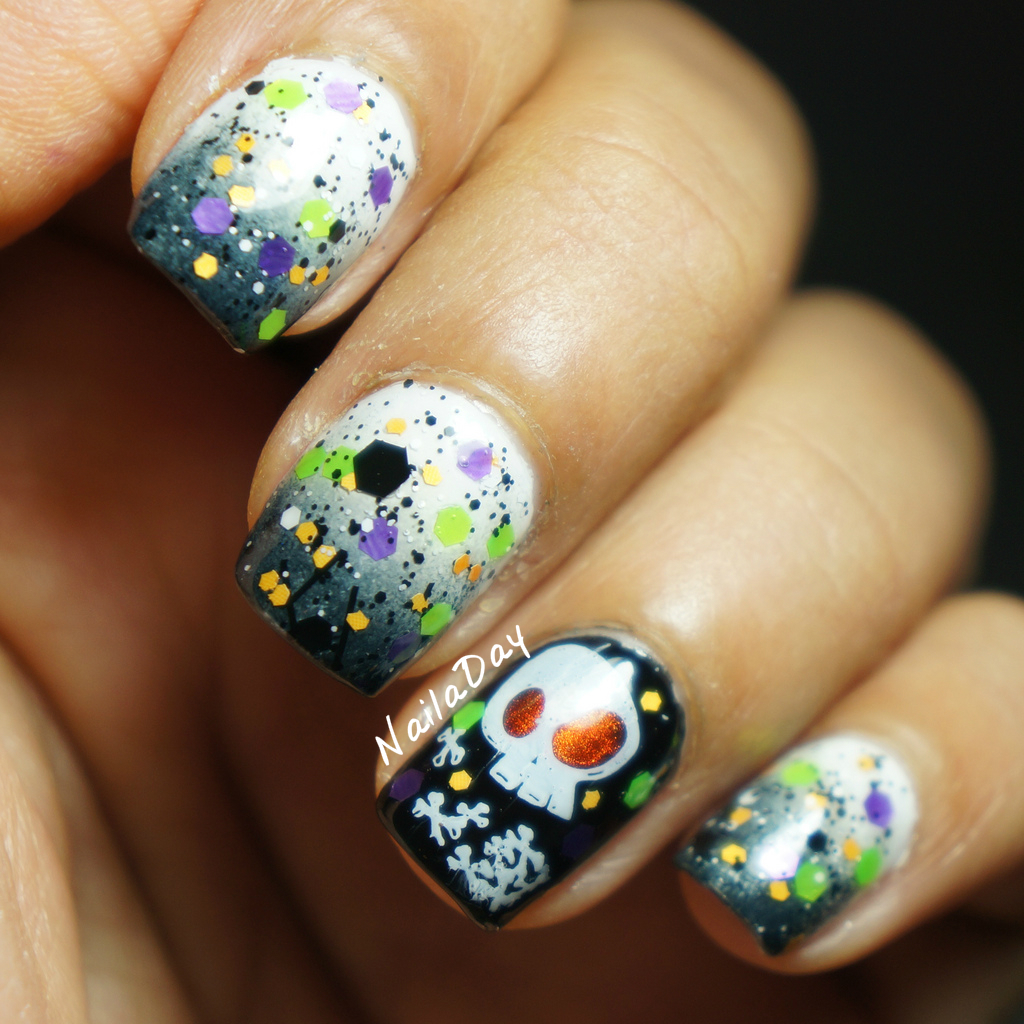
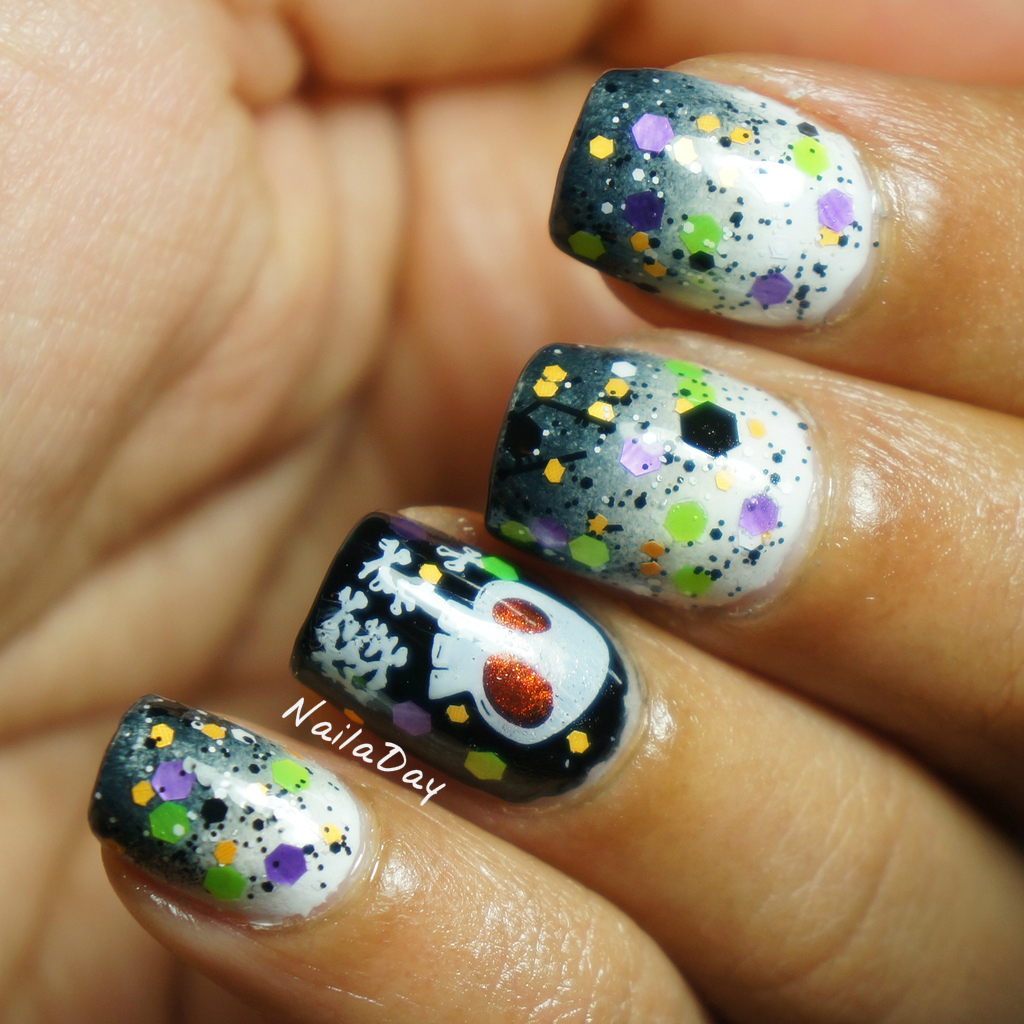
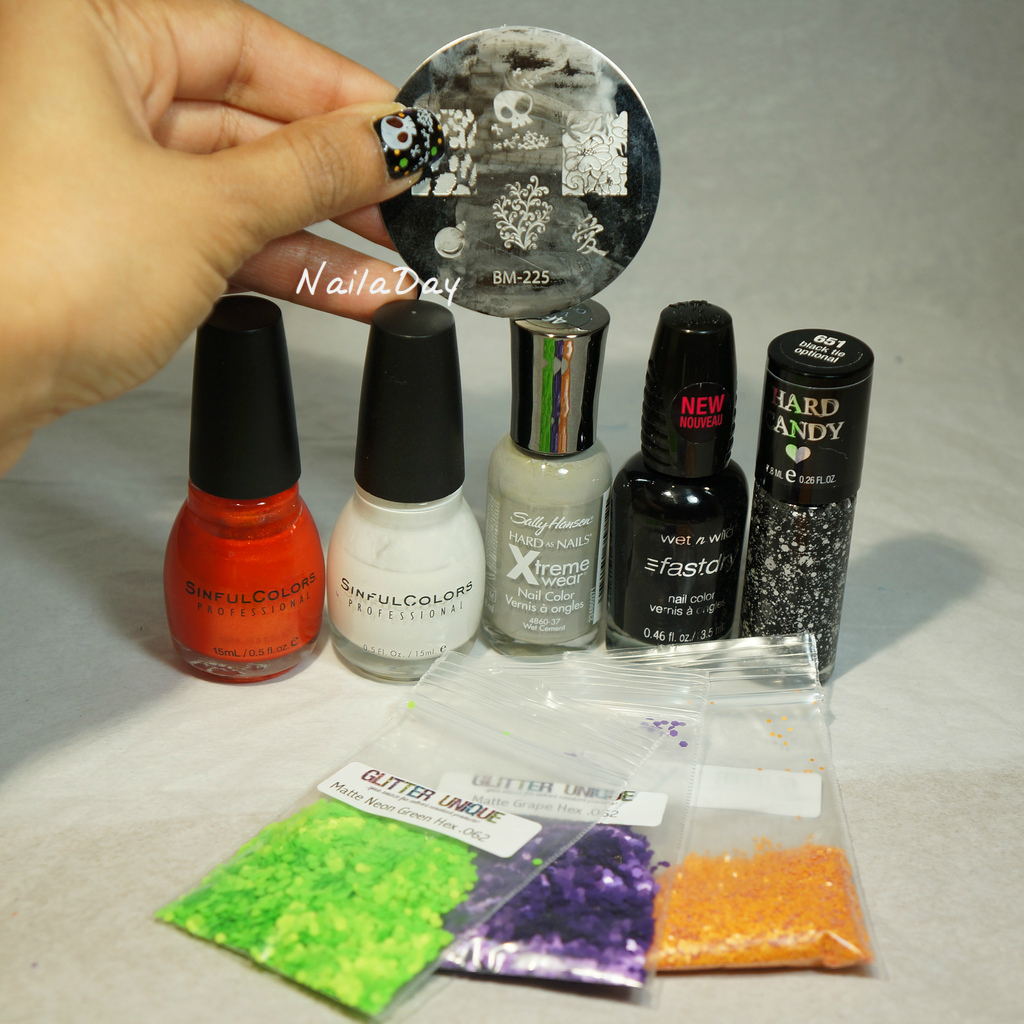
This post is going up late, seeing how Sunday is more than halfway over. This is my mani for the Sunday Stamping challenge, Halloween themed stamping. I really, really wanted to do a black and white gradient so I finally did it for this mani. Then I took Hard Candy Black Tie Optional out of my untrieds and used it with a few randomly yet strategically placed matte glitter in orange, purple and lime green. I added glowing orange eyes to the skull while the image was still on the stamper, stamping decal style. If anyone is curious about what I'm talking about, I can elaborate if you ask me.

NailaDay: Black and White Halloween mani with Hard Candy Black Tie Optional

I really love how this looks. Love the randomly hand placed glitter mixed with the black and white glitter. I placed a few glitters down first, then painted a coat of BTO, then placed a few more glitters over it. A lot less time consuming than you would think because it was random placement. I will have to do this technique more often. Gives the impression of having an entirely new form of glitter polish.

NailaDay: Black and White Halloween mani with Hard Candy Black Tie Optional


NailaDay: Black and White Halloween mani with Hard Candy Black Tie Optional


Here's all the polishes used in this mani. The plate is Bundle Monster BM 225.
Wet n Wild Ebony Hates Chris
Sinful Colors Snow me White
Sally Hansen Wet Cement
Hard Candy Black Tie Optional 
Sinful Colors Courtney Orange

NailaDay: Black and White Halloween mani with Hard Candy Black Tie Optional


Friday, September 27, 2013

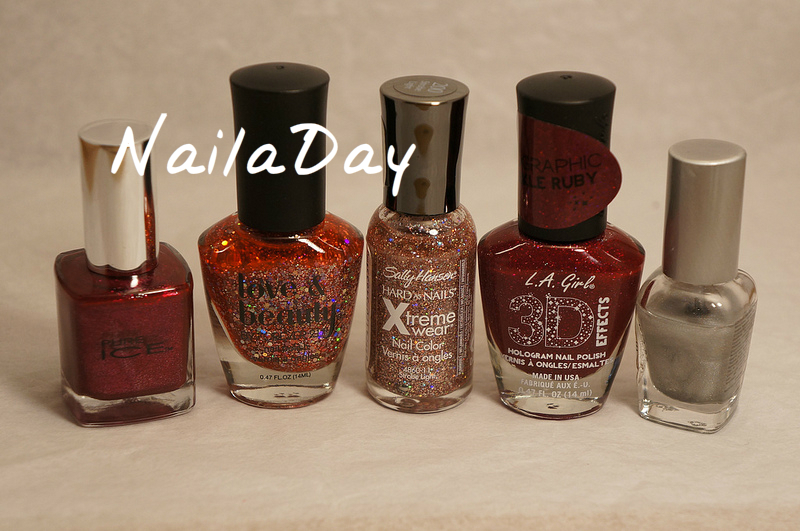
InstaFranken Friday: "Sparkle Merlot" holo glitter franken

Hi all! Time to show another one of my frankens. I should not be given a job naming polishes. It's really gorgeous though!! I recommend clicking on the pictures to really see the awesomeness.

NailaDay: Red holo glitter franken

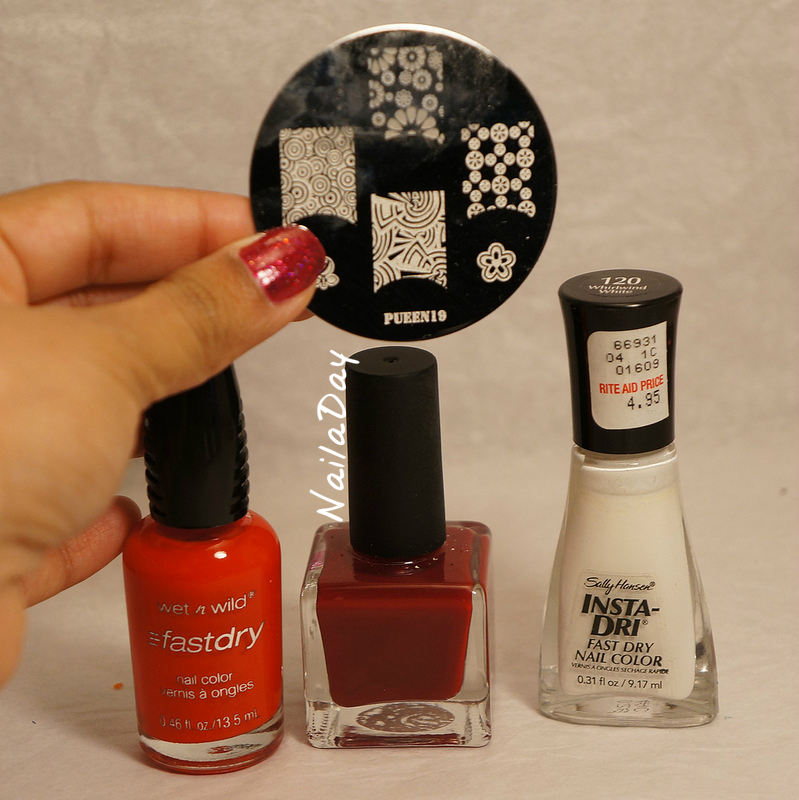
Here are the polishes I used for this.
Pure Ice Iced Merlot
Sally Hansen Strobe Light
L.A. Girls 3D Sparkle Ruby
Love and Beauty Faded Rose/Multi
Spectraflair Franken but this didnt do much

NailaDay: Red holo glitter franken

I made it in the same fashion as the others. Single use batch in a little foil cup. I'm going to show you more pictures in different lights. The one above was in sunlight. The next one is in shade.

NailaDay: Red holo glitter franken

And in the lightbox...

NailaDay: Red holo glitter franken

Then inspired by Lisa from Polished Elegance by this post, I added a cut out stamped design with hand placed glitter borders. Design is from the Pueen plate 19. For that red base, I used a mix of WnW Everybody Loves Redmond and Urban Outfitters Blood.

NailaDay: Red holo glitter franken with cut out stamp design


NailaDay: Red holo glitter franken with cut out stamp design


NailaDay: Red holo glitter franken with cut out stamp design

Monday, August 19, 2013

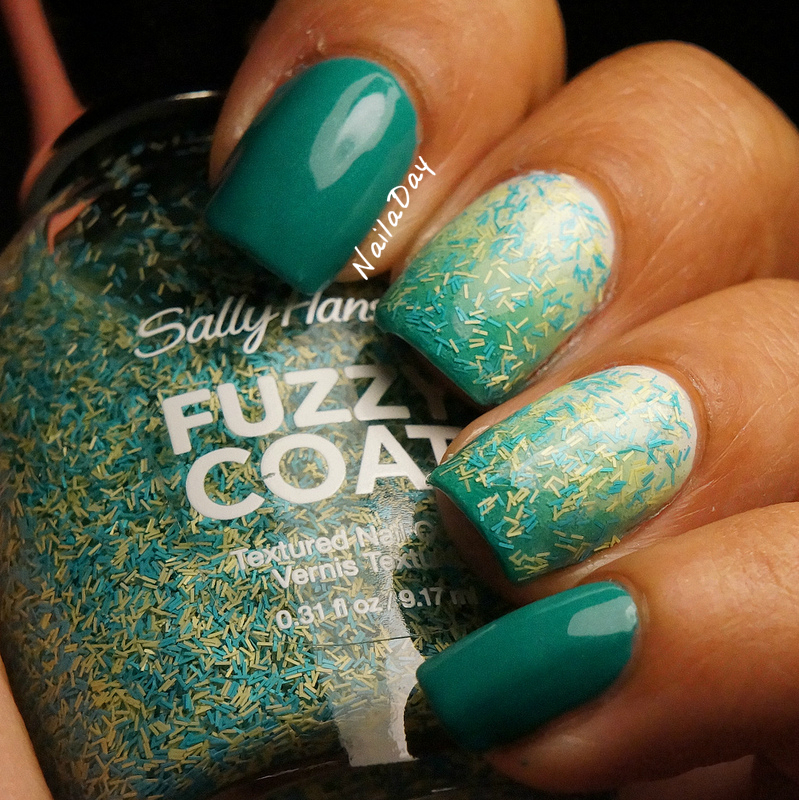
My Delivery Mani: Sinful Colors Rise and Shine Gradient with Sally Hansen Fuzz-Sea

Hi all! So I'm actually pretty surprised I managed to cobble together a few minutes here and there over the last couple of days to come up with this post for you. The baby is sleeping and therefore I should be too but, go figure, I can't. So I might as well get this post up!

NailaDay: Sinful Colors Rise and Shine gradient with Sally Hansen Fuzz-Sea

So, this is the mani I ended up having on my nails during the delivery. Not blue like I thought I would end up wearing but that's what happens when the delivery is a surprise! It actually held up really well afterwards as well since I didn't take it off for over a week. Except for growth at the cuticles, it hardly chipped or got tipwear.

NailaDay: Sinful Colors Rise and Shine gradient with Sally Hansen Fuzz-Sea

The polishes used for this mani are:
Sinful Colors Rise and Shine (darker green)
Sinful Colors Pistache (Lighter green)
Sinful Colors Snow me White (far left)
Sally Hansen Fuzzy Coat Fuzz-Sea

NailaDay: Sinful Colors Rise and Shine gradient with Sally Hansen Fuzz-Sea

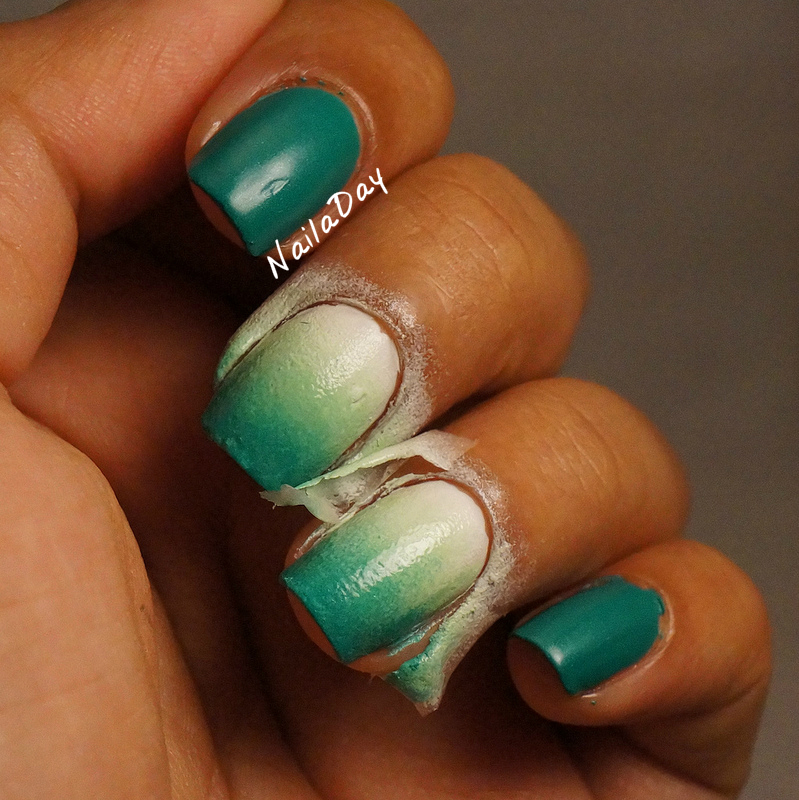
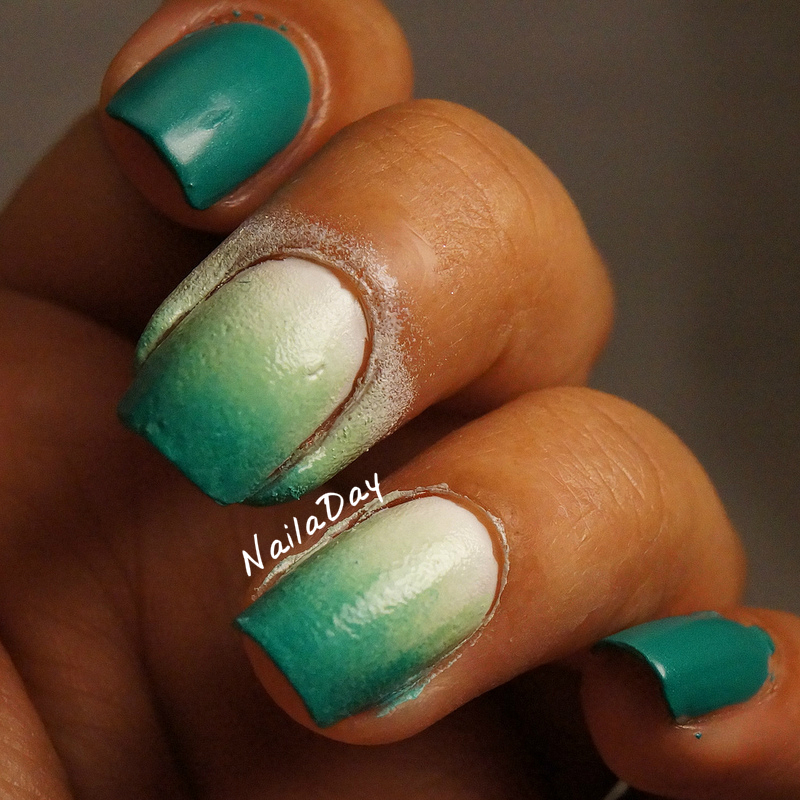
The fun thing with this mani as well was that I used Elmer's glue around the nail to help with clean up after creating the gradient. It is sooo easy!! The picture below shows the Elmer's Glue liftoff in action.

NailaDay: Sinful Colors Rise and Shine gradient with Sally Hansen Fuzz-Sea


The picture below shows what it looks like after all the Elmer's Glue has been removed from the ring finger. The middle finger still needs the Elmer's Glue removed. What's left over is really minimal!

NailaDay: Sinful Colors Rise and Shine gradient with Sally Hansen Fuzz-Sea

Thursday, July 4, 2013

Happy 4th of July!

Hello everyone! Happy America's birthday!!

Hope everyone who reads this is having a good day today. I am! I get to stay home. My mom, my mother-in-law and my husband are all home, cooking, eating, talking, painting nails (me), watching movies (my husband) and having a blast!! The mani I'm going to show you today, I actually did today and I still have on my nails! Usually, there's a lag time of a few days to some weeks before a mani gets featured here so this is special :-)

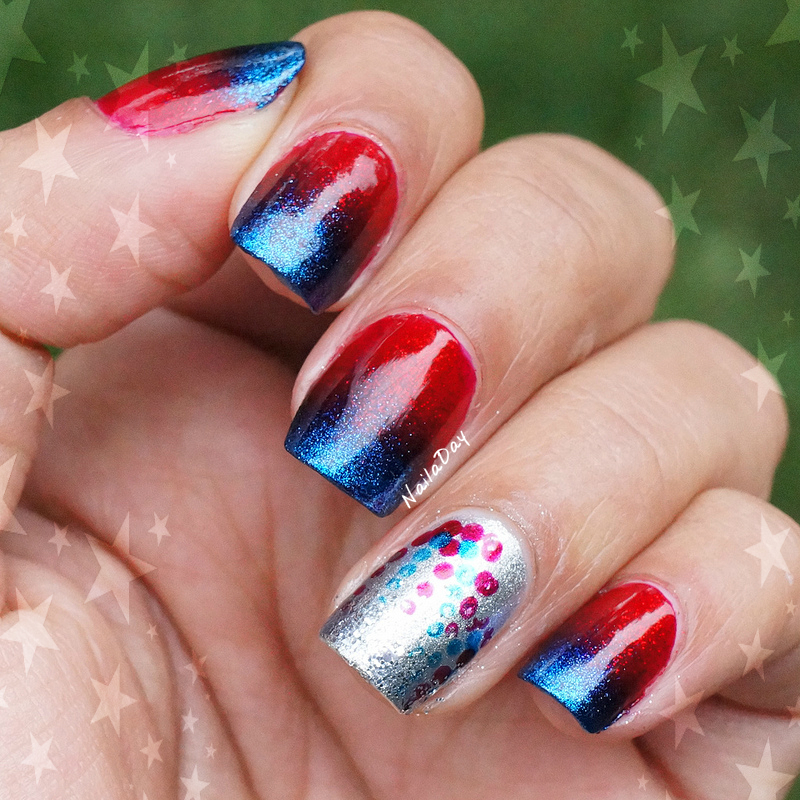
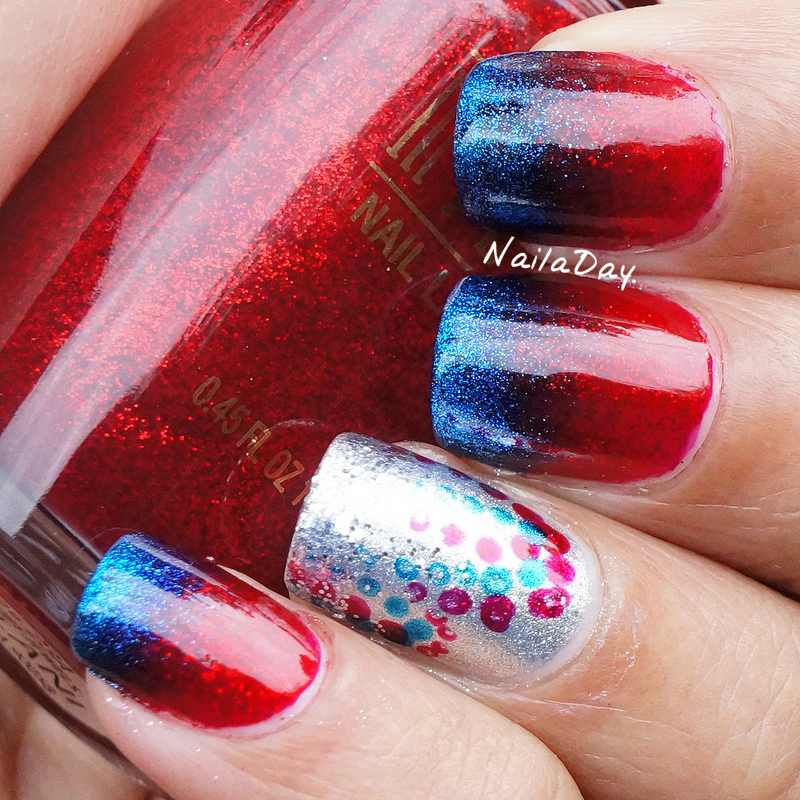
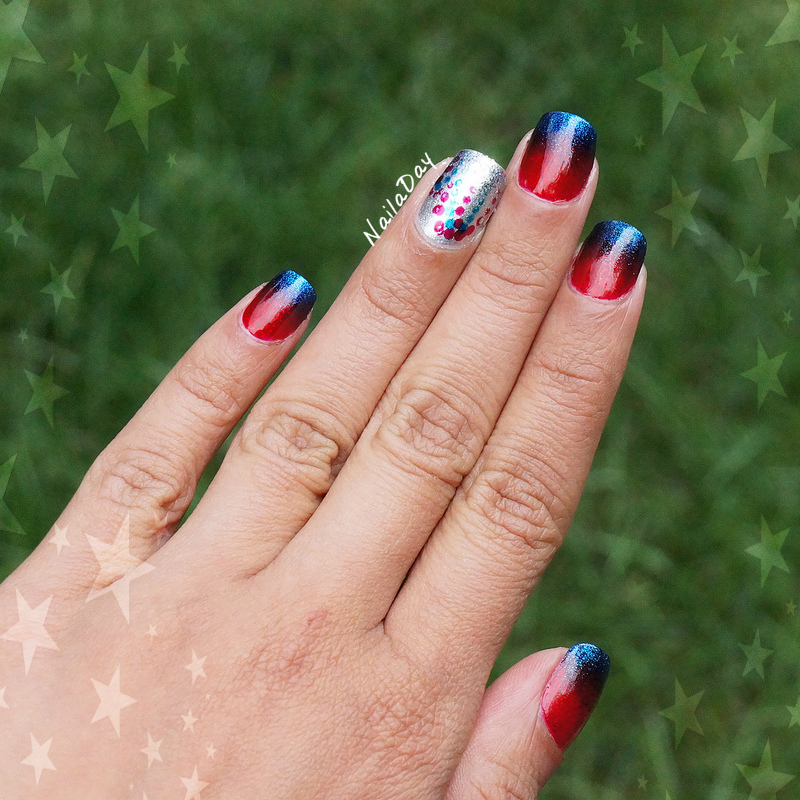
NailaDay: Milani Ruby Jewels and Sally Hansen Freeze July 4th mani

I adore everything about this. The polishes I used, the gradient, the abstract fireworks....ok, so the dotted fireworks need help. But I still love it! The polishes used here are Milani Ruby Jewels, Sally Hansen Insta-Dri Freeze!, Sally Hansen Celeb City. I dusted the tip of the ring finger with slight gradient of Sinful Colors Queen of Beauty but you can't really see it in the pictures. It's just extra sparkly in real life :-)

NailaDay: Milani Ruby Jewels and Sally Hansen Freeze July 4th mani


Pixlr.com, where I do my watermarking, had some fun 4th of July overlays and borders today so I just had some fun with those.

NailaDay: Milani Ruby Jewels and Sally Hansen Freeze July 4th mani


NailaDay: Milani Ruby Jewels and Sally Hansen Freeze July 4th mani


It's sort of simple but I'm going to love wearing this for the next few days. Thanks for looking!!!

Related Posts Plugin for WordPress, Blogger...