Showing posts with label gradient. Show all posts

Saturday, June 25, 2016

Road trip and neon sunset gradient

Hi everyone!
We survived our first major road trip with the kids this past week! We drove to Asheville, NC, then to Blacksburg, PA, then to Laurel, MD, then all the way back home to Ohio. I can't believe that not only we survived, but nobody got majorly sick! My older son, the almost three year old, had his fussy moments and I came away with a minor rash but....that's it!! You know what they say, you haven't really hiked until you've picked up a rash or two. Well, maybe only I say that. And maybe only now because it makes me feel better. Anyway, we got to see so much family and a few friends. It was great!

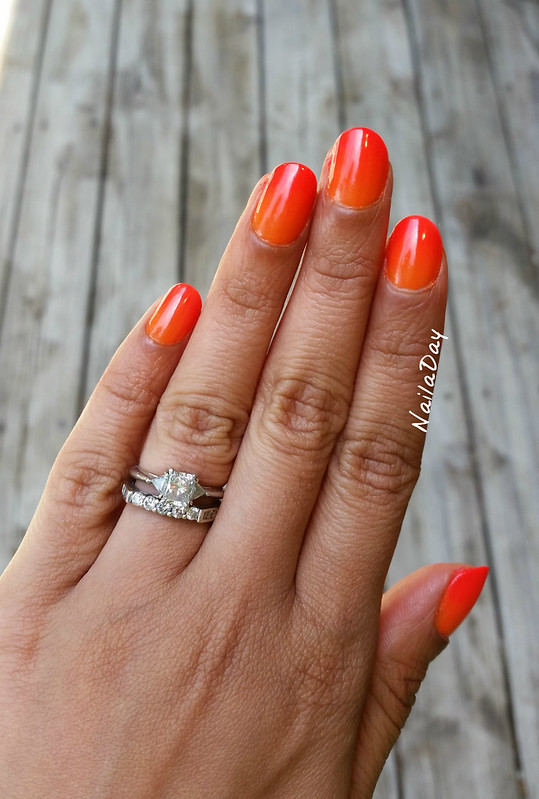
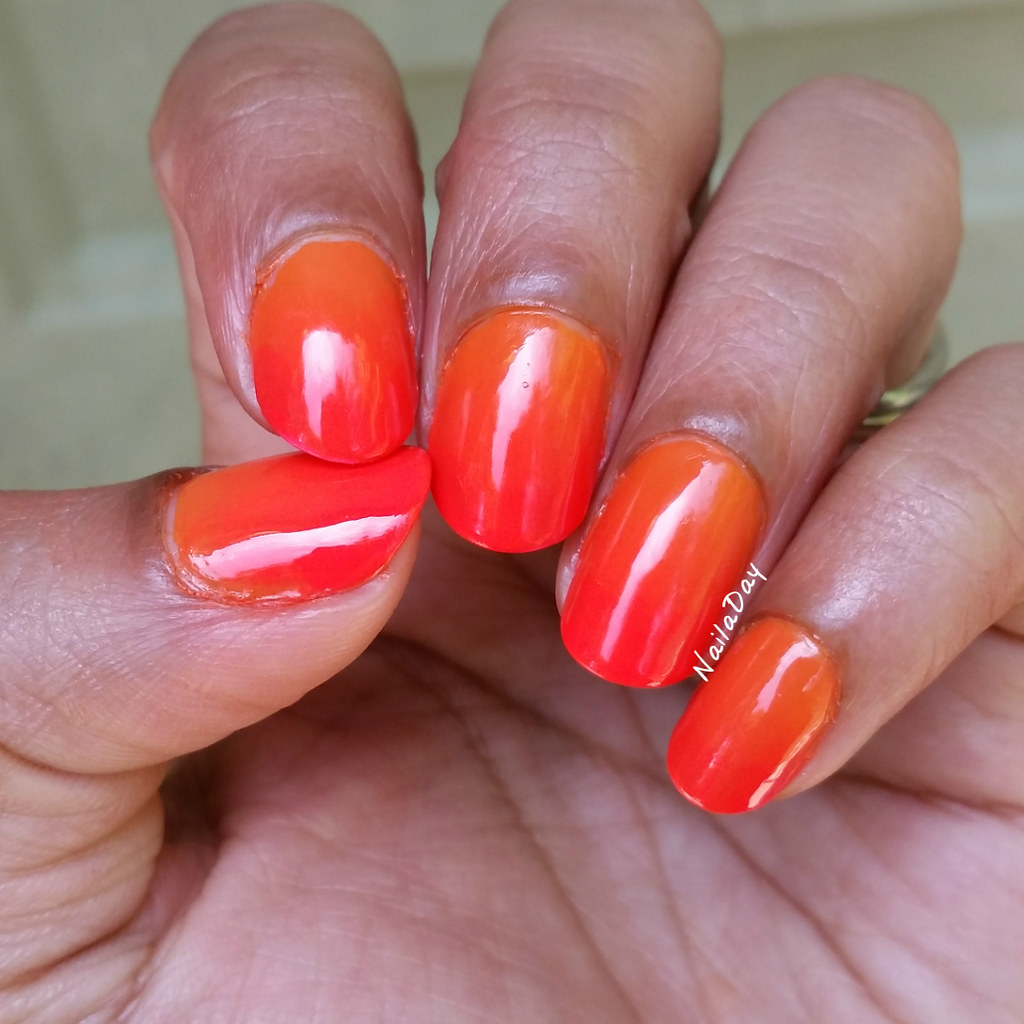
Of course I took a couple of nail polishes with me to do my nails when I got the chance. I went with a bright sunset gradient look using Essie Fear and Desire and Wet n Wild Fergilicious from the Fergie line. The application, I'm sure, looks terrible since I didn't have any of my usual clean up tools with me. I really wished I had my latex skin barrier! But, all in all, I was very happy with it. 

NailaDay: Sunset gradient with Essie Fear and Desire and Wet n Wild Fergilicious


NailaDay: Sunset gradient with Essie Fear and Desire and Wet n Wild Fergilicious

NailaDay: Sunset gradient with Essie Fear and Desire and Wet n Wild Fergilicious

Some pictures from the trip:


There you go. A little glimpse into my personal life. Thanks for looking!!

Wednesday, May 4, 2016

Barielle Falling Star with Sally Hansen CSM Copper Penny

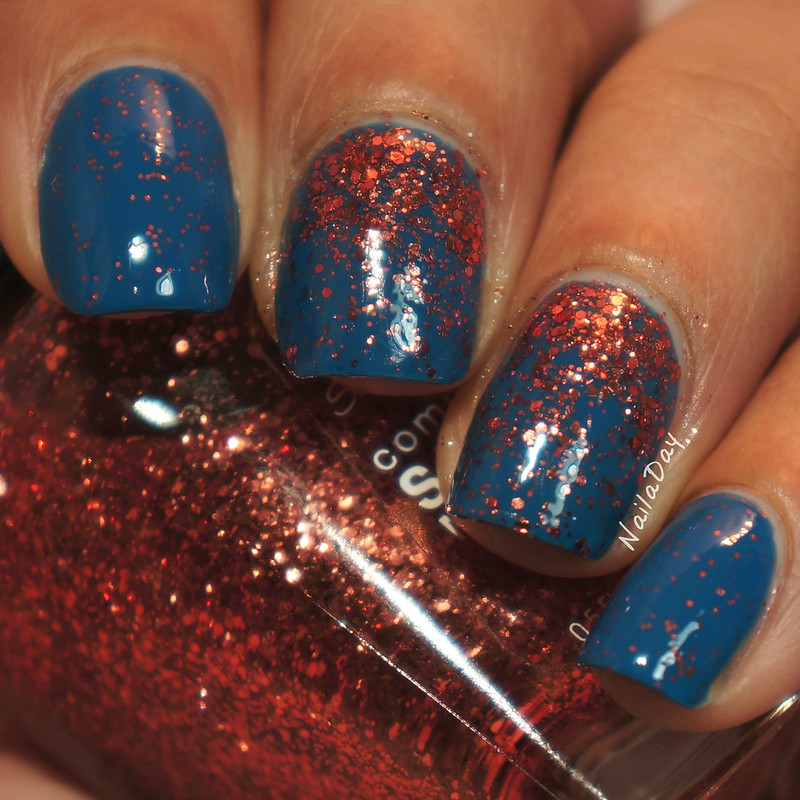
I'm not done with the Barielle swatches from my stash! I have a pretty blue one for you today, Barielle Falling Star. It's a slightly dusky medium blue with copper glitter mixed in. I decided to amp up the copper factor with some Sally Hansen CSM Copper Penny glitter gradient on my two middle fingers.

NailaDay: Barielle Falling Star with Sally Hansen CSM Copper Penny

NailaDay: Barielle Falling Star with Sally Hansen CSM Copper Penny

I think it looks okay in the pictures but for some reason I wasn't happy with it in real life. I felt like I should have just left it alone. It looked so garish for some reason in real life. Perhaps I went too heavy handed with the glitter, who knows? I took this off earlier than planned because it was bumming me out. 

Here is Falling Star on it's own. This is two coats. The glitter in the polish was subdued and not super shiny. Maybe that's what was wrong with the combo above. The Sally Hansen was so shiny that it looked a little odd with the non shiny but same color glitter on the other nails. Now I can't recall if I liked wearing this one on it's own because my memory is all overshadowed by my dislike for the one above. I'm just going to have to wear it again and find out.  

NailaDay: Barielle Falling Star

NailaDay: Barielle Falling Star

As always, thanks for looking!!
Friday, April 29, 2016

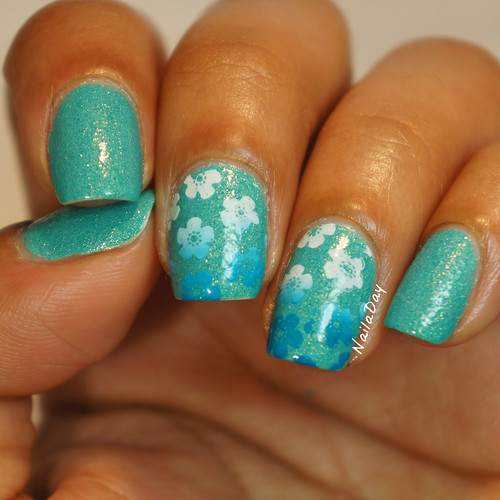
Blue Gradient flowers over Sinful Colors Treasure Chest

I showed you a swatch of Sinful Colors Treasure Chest in my last post. Today, I'm going to show you my second attempt at gradient stamping and this one I like even better. The first one was here. 

NailaDay: Blue Gradient flowers over Sinful Colors Treasure Chest

The polishes I used are Konad White and Sally Hansen Insta-Dri Blue By. The image plate used was Uber Chic plate 4-03.

NailaDay: Blue Gradient flowers over Sinful Colors Treasure Chest

Also, I can't believe that I ever found the time to do a video but my silly little video of me wiggling my fingers around was kinda fun so I had to make another video and try my hand at actual editing this time. So, to see a short video of how I did the gradient stamping, check out my page on Instagram. 
Thank you!!!

Thursday, June 11, 2015

My first mermaid nails with Barielle A Bouquet for Ava

So, I have been busy this week. We went to the zoo last weekend and two days ago, we went to the aquarium. I'm pretty sure the kids don't care one bit since they're so young but I've been having a blast! So, in honor of going to the aquarium, I did my first mermaid nails! I'm pretty proud of how they turned out too!

NailaDay: Mermaid nails with Barielle A Bouquet for Ava

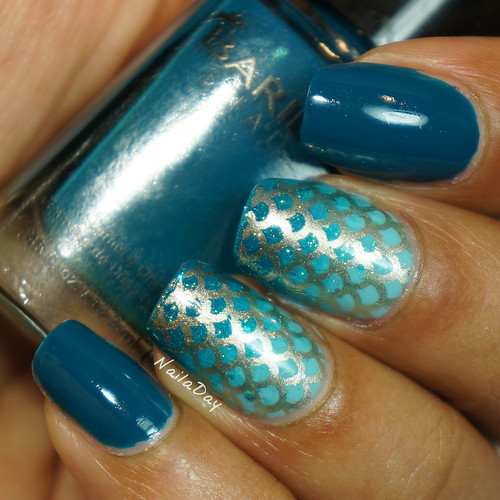
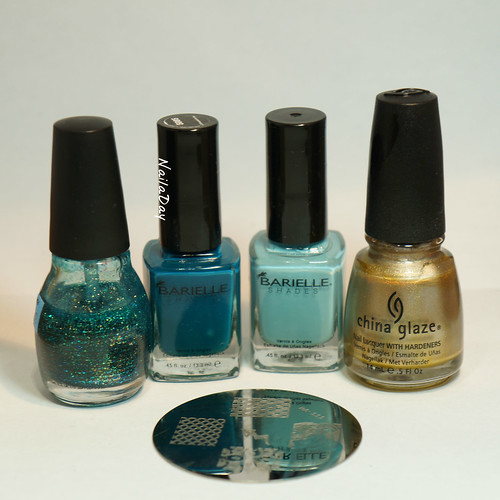
For this look, I used Barielle A Bouquet for Ava, which is the darker teal. I did a gradient with Barielle Swizzle Stix and A Bouquet for Ava and went over the tips with Sinful Color Nail Junkie. I then stamped over the gradient with the fish scale stamp from the Red Angel plate RA111. The stamping polish I used was China Glaze Passion from the Romanitique collection. All of the ones from that collection are great to stamp with. 

NailaDay: Mermaid nails with Barielle A Bouquet for Ava

NailaDay: Mermaid nails with Barielle A Bouquet for Ava

NailaDay: Mermaid nails with Barielle A Bouquet for Ava


Here's a visual of the polishes I used.

NailaDay: Mermaid nails with Barielle A Bouquet for Ava

I love stamping over gradients. It may be my new favorite thing next to a watermarble accent if I can afford the time. What's your favorite nail art style?

Thursday, April 30, 2015

Shimmer Trisha gradient over L.A. Colors Dark Brown


Hello, hello!!

I'm here with another post! I forgot how somewhat time consuming creation of posts can be, and time is a hot commodity these days! For those who care, my family and I are adjusting to life with two little boys fairly well. It's still too early to have have come up with a solid routine but there is a decent one we've settled into that works for now. It will all change again when I have to go back to work so we'll see what happens then.

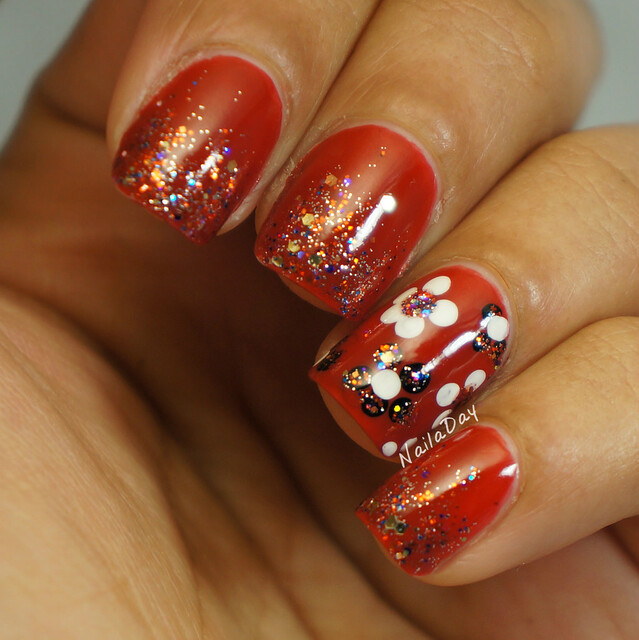
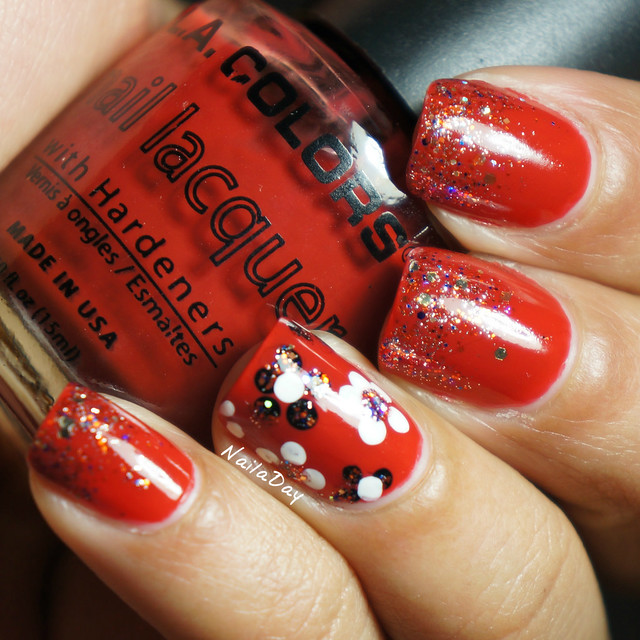
My post for you today is a simple glitter gradient with a Shimmer polish glitter called Trisha over L.A. Colors Dark Brown. It looks more like a burnt orange color to me and Trisha has orange glitter in it along with a multitude of other colors so that worked out well. I love love love how complex the Shimmer glitters are. I wish I could afford to just get every bottle they have but I contended myself with three...for now. 

NailaDay: Shimmer Trisha gradient over L.A. Colors Dark Brown


I thought I'd bring some extra visual interest (aka, I was bored), by adding some dotted flowers to the ring finger. I think I should have just left it alone now and done the whole nail with glitter or just stuck with the gradient. I love how the glitter pops over black so maybe next time, that's what I should do. 

NailaDay: Shimmer Trisha gradient over L.A. Colors Dark Brown


NailaDay: Shimmer Trisha gradient over L.A. Colors Dark Brown

Hope you enjoyed this mani and thanks for looking!!

Wednesday, November 6, 2013

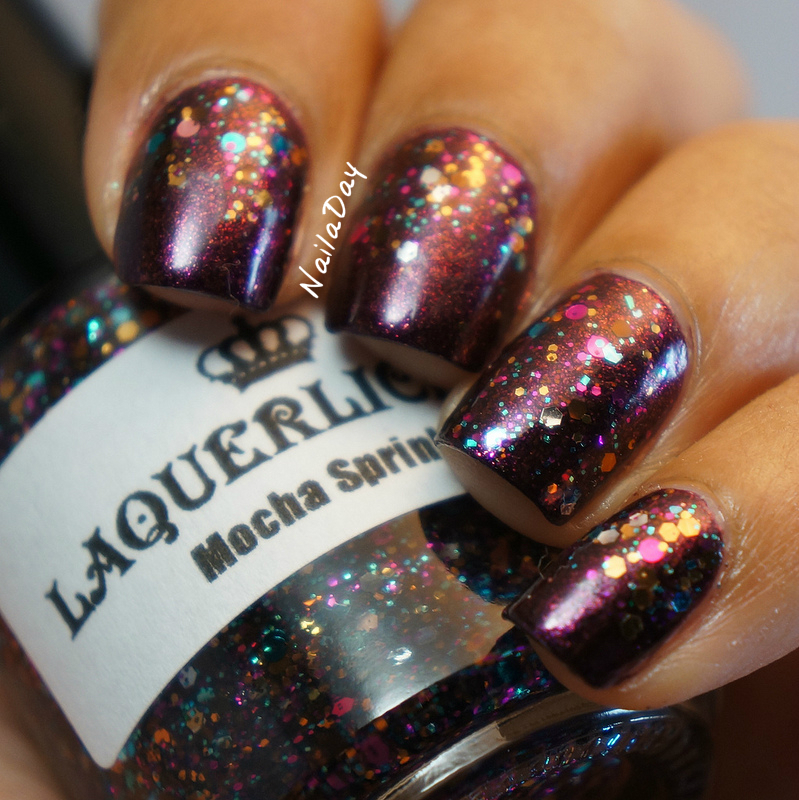
Fresh Paint Nebula with Laquerlicous Mocha Sprinkles

Hi folks!!
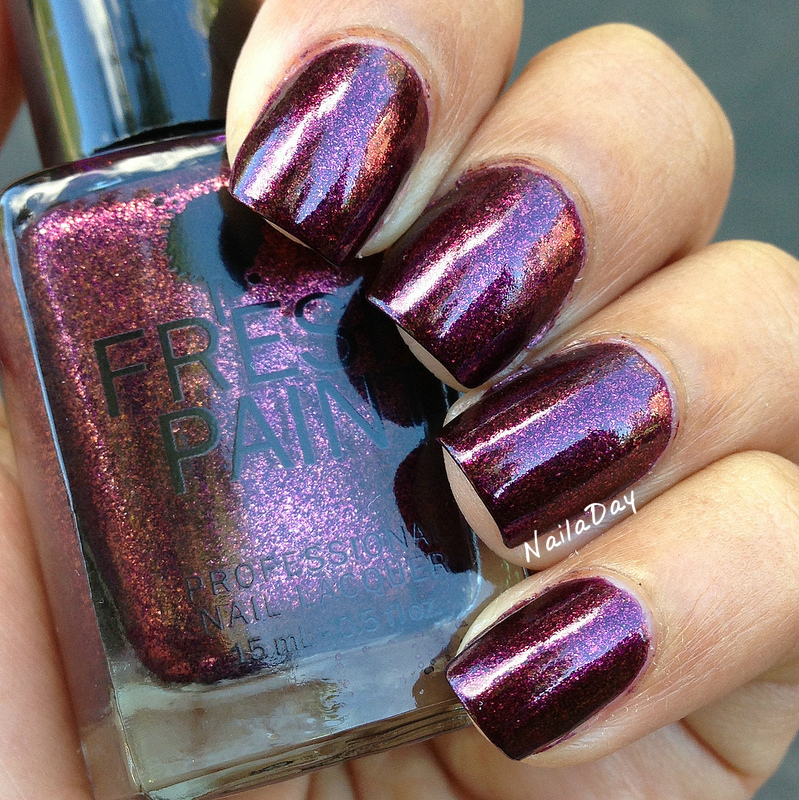
In my last post I showed you an indie polish by Polished by KPT. Today I have another indie polish that I had been eyeing for a while by Laquerlicious. This one is called Mocha Sprinkles. First of all, love the name. It is very evocative of all that is good about cold weather...basically warm, sweet drinks. I'm also a sucker for multi-colored glitter polishes so I was irresistibly drawn to it.

NailaDay: Fresh Paint Nebula with Laquerlicous Mocha Sprinkles


It's a dense glitter mix of metallic glitters in caramel, brown, pink, magenta and teal. There are a variety of sizes and shapes including round glitter. I did not have any trouble working with this polish. They were all well suspended in the base and spread evenly on the nail. I used one coat for this mani.

NailaDay: Fresh Paint Nebula with Laquerlicous Mocha Sprinkles


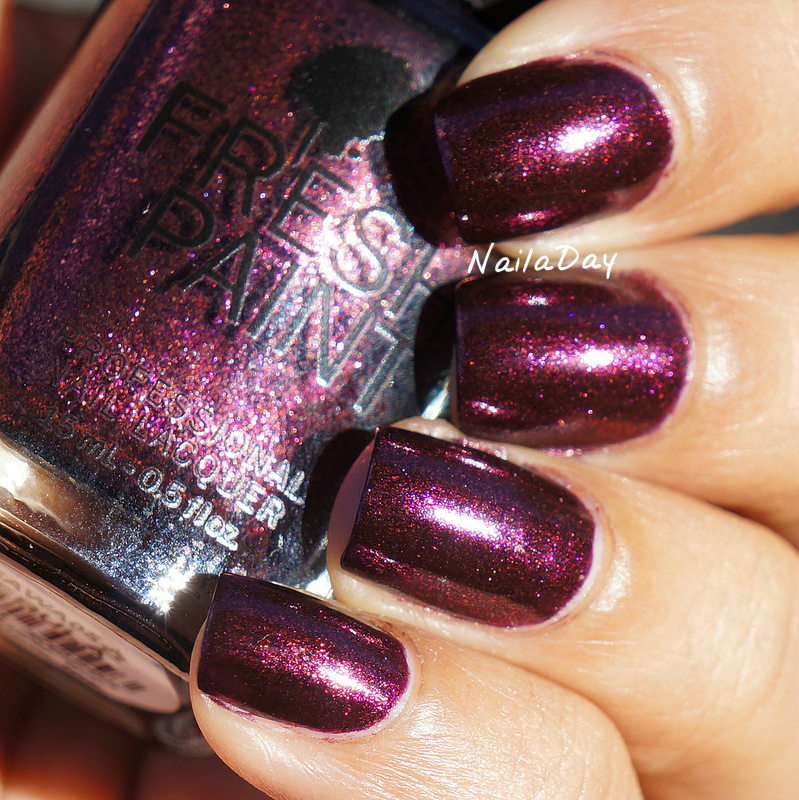
For the base, I used a polish that actually quite stunned me with how beautiful it is for how inexpensive it is. This is Fresh Paint Nebula, a brand found at Five Below stores. It had a blackened burgundy base with deep berry shimmer with particles large enough to be almost foil like. It made me very happy to wear it. This is only two coats. In certain lights, it had a brownish tone to it, which I thought made it very appropriate for Mocha Sprinkles.

Lightbox:
NailaDay: Fresh Paint Nebula


Direct sunlight:
NailaDay: Fresh Paint Nebula


Shade:
NailaDay: Fresh Paint Nebula


What are some of your favorite indie brands or polishes??

Sunday, October 27, 2013

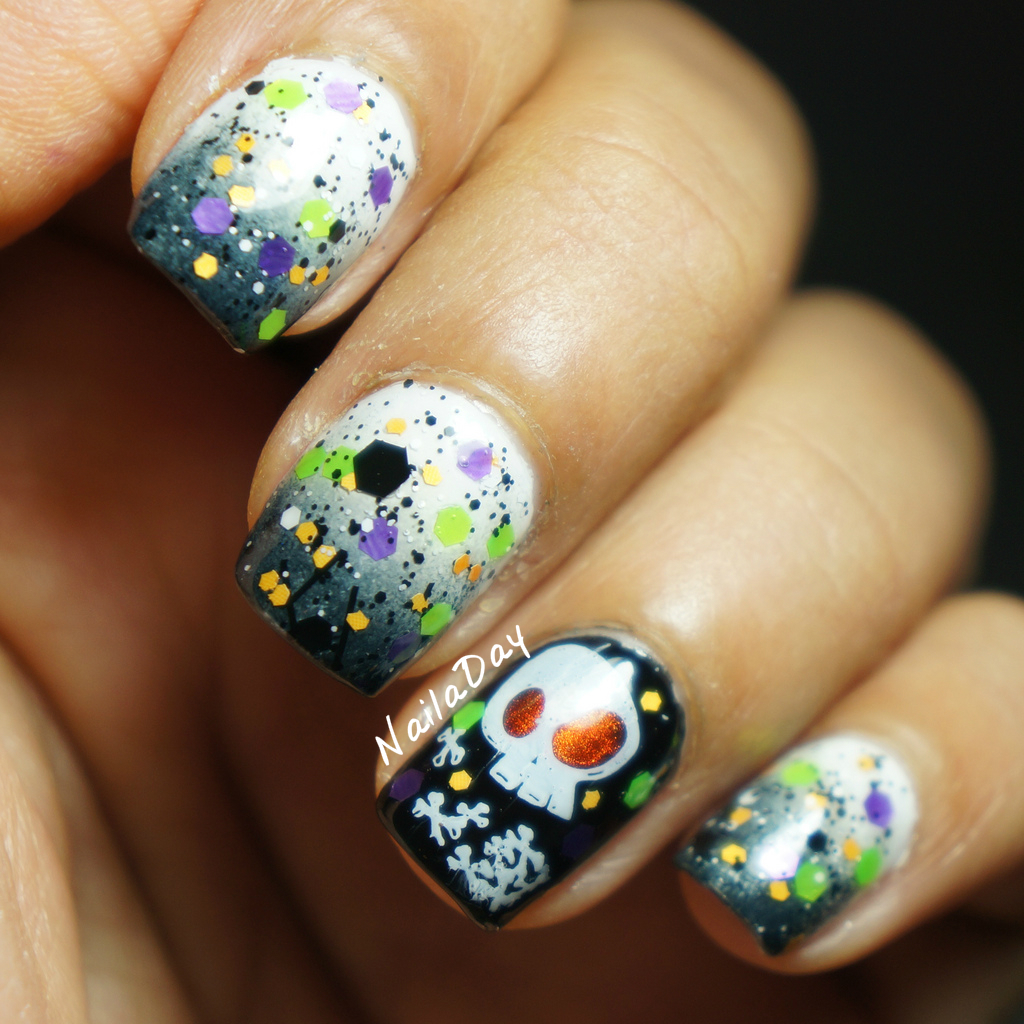
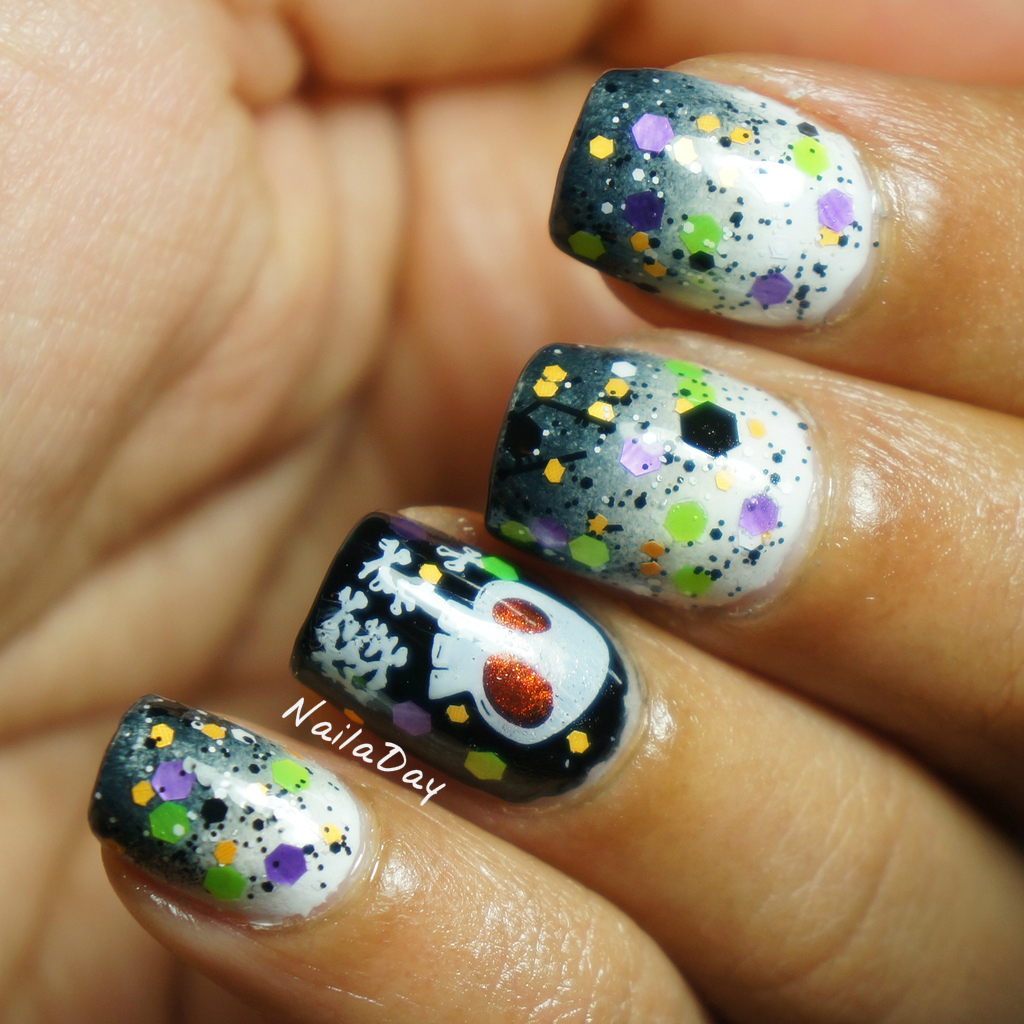
Sunday Stamping: Halloween Stamping, Black and White Halloween mani with Hard Candy Black Tie Optional

Hi folks!
This post is going up late, seeing how Sunday is more than halfway over. This is my mani for the Sunday Stamping challenge, Halloween themed stamping. I really, really wanted to do a black and white gradient so I finally did it for this mani. Then I took Hard Candy Black Tie Optional out of my untrieds and used it with a few randomly yet strategically placed matte glitter in orange, purple and lime green. I added glowing orange eyes to the skull while the image was still on the stamper, stamping decal style. If anyone is curious about what I'm talking about, I can elaborate if you ask me.

NailaDay: Black and White Halloween mani with Hard Candy Black Tie Optional

I really love how this looks. Love the randomly hand placed glitter mixed with the black and white glitter. I placed a few glitters down first, then painted a coat of BTO, then placed a few more glitters over it. A lot less time consuming than you would think because it was random placement. I will have to do this technique more often. Gives the impression of having an entirely new form of glitter polish.

NailaDay: Black and White Halloween mani with Hard Candy Black Tie Optional


NailaDay: Black and White Halloween mani with Hard Candy Black Tie Optional


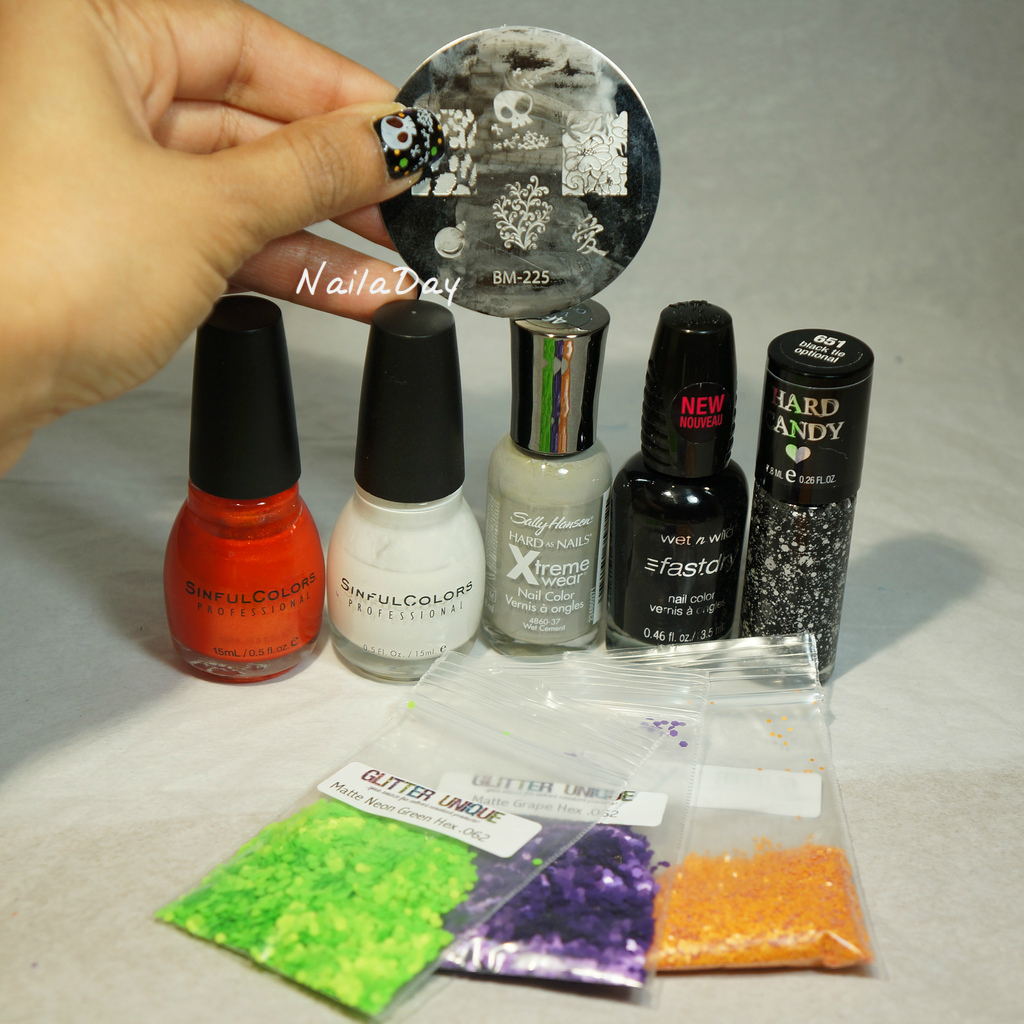
Here's all the polishes used in this mani. The plate is Bundle Monster BM 225.
Wet n Wild Ebony Hates Chris
Sinful Colors Snow me White
Sally Hansen Wet Cement
Hard Candy Black Tie Optional 
Sinful Colors Courtney Orange

NailaDay: Black and White Halloween mani with Hard Candy Black Tie Optional


Sunday, September 22, 2013

Adventures in Stamping Sunday Stamping: Autumn Nails

Hi everyone! Happy no more summer...at least in the northern hemisphere. (Do I have any below the equator readers?) Today's mani is along those lines. I'm part of a Facebook group called Adventures in Stamping and every Sunday participants are asked to submit a stamped mani with a theme. This Sunday, the challenge theme is autumn nails. I gotta say, I'm not too proud of this one. I love the colors of the gradient but the stamping is waaaayyyy too subtle. Oh well. 


The polishes I used are 
Sinful Colors Courtney Orange
Sinful Colors Mercury Rising
Stamped with SC Mercury Rising, SC Sugar Sugar, KC Metallic Green, L'Oreal Because You're Worth It
Plate used BM 04

NailaDay: Autumn Nails with Sinful Colors Courtney Orange and Mercury Rising

I am really loving the gradient colors though. Did I already mention that?

Monday, August 19, 2013

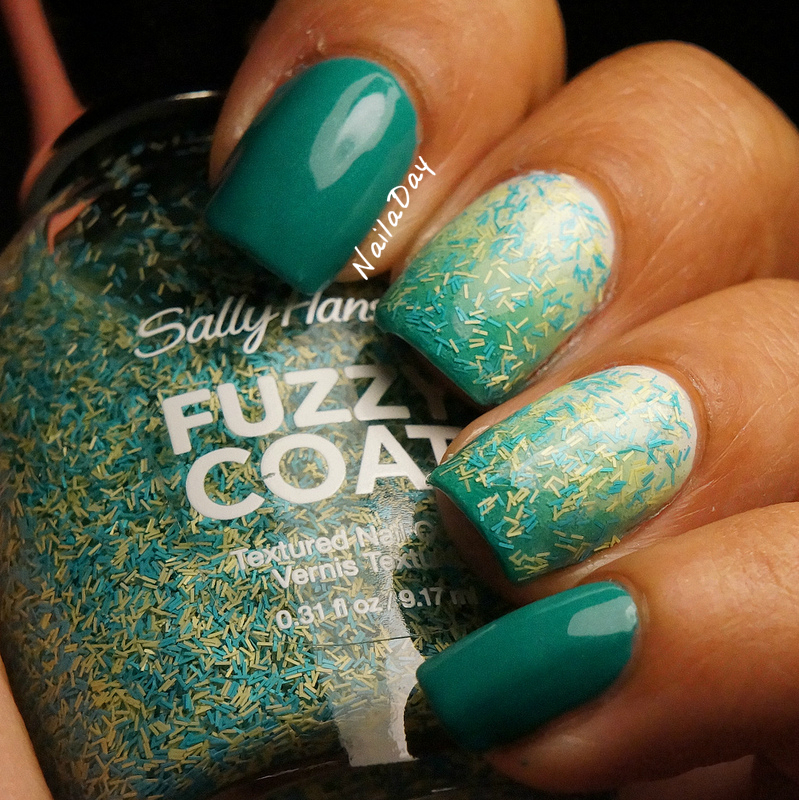
My Delivery Mani: Sinful Colors Rise and Shine Gradient with Sally Hansen Fuzz-Sea

Hi all! So I'm actually pretty surprised I managed to cobble together a few minutes here and there over the last couple of days to come up with this post for you. The baby is sleeping and therefore I should be too but, go figure, I can't. So I might as well get this post up!

NailaDay: Sinful Colors Rise and Shine gradient with Sally Hansen Fuzz-Sea

So, this is the mani I ended up having on my nails during the delivery. Not blue like I thought I would end up wearing but that's what happens when the delivery is a surprise! It actually held up really well afterwards as well since I didn't take it off for over a week. Except for growth at the cuticles, it hardly chipped or got tipwear.

NailaDay: Sinful Colors Rise and Shine gradient with Sally Hansen Fuzz-Sea

The polishes used for this mani are:
Sinful Colors Rise and Shine (darker green)
Sinful Colors Pistache (Lighter green)
Sinful Colors Snow me White (far left)
Sally Hansen Fuzzy Coat Fuzz-Sea

NailaDay: Sinful Colors Rise and Shine gradient with Sally Hansen Fuzz-Sea

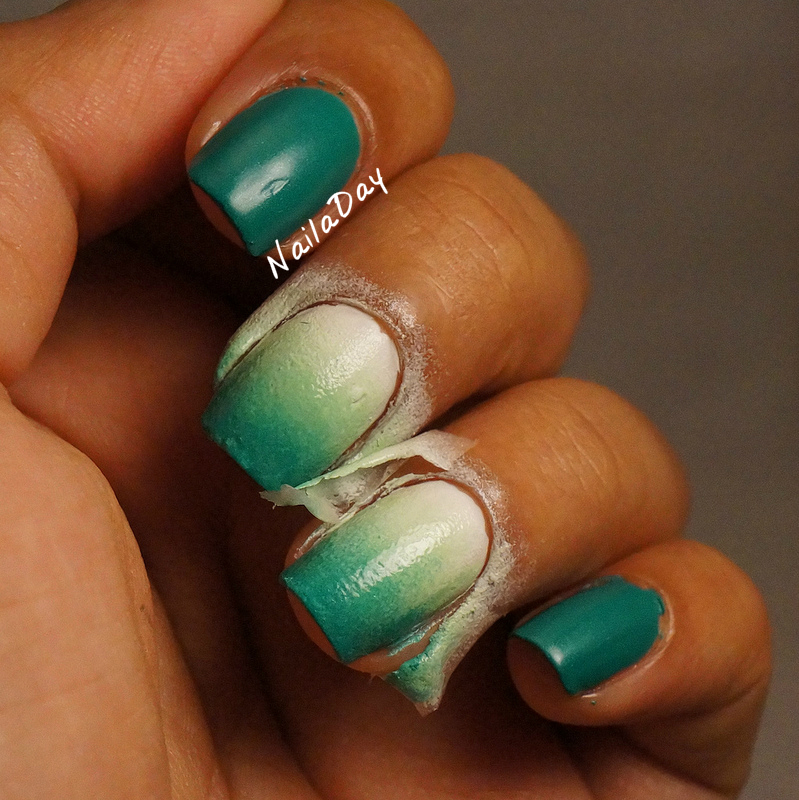
The fun thing with this mani as well was that I used Elmer's glue around the nail to help with clean up after creating the gradient. It is sooo easy!! The picture below shows the Elmer's Glue liftoff in action.

NailaDay: Sinful Colors Rise and Shine gradient with Sally Hansen Fuzz-Sea


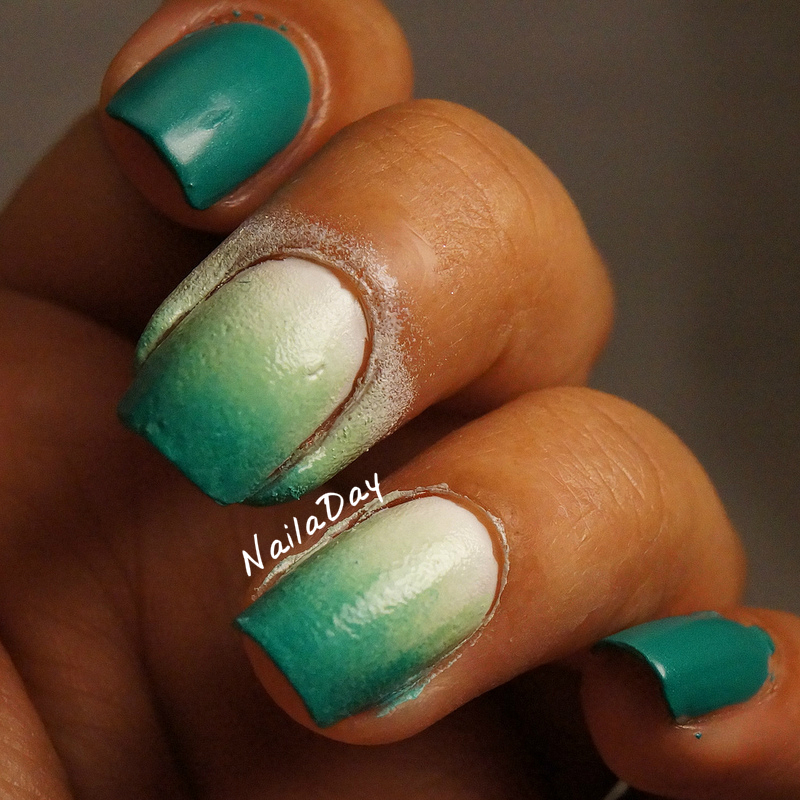
The picture below shows what it looks like after all the Elmer's Glue has been removed from the ring finger. The middle finger still needs the Elmer's Glue removed. What's left over is really minimal!

NailaDay: Sinful Colors Rise and Shine gradient with Sally Hansen Fuzz-Sea

Monday, July 8, 2013

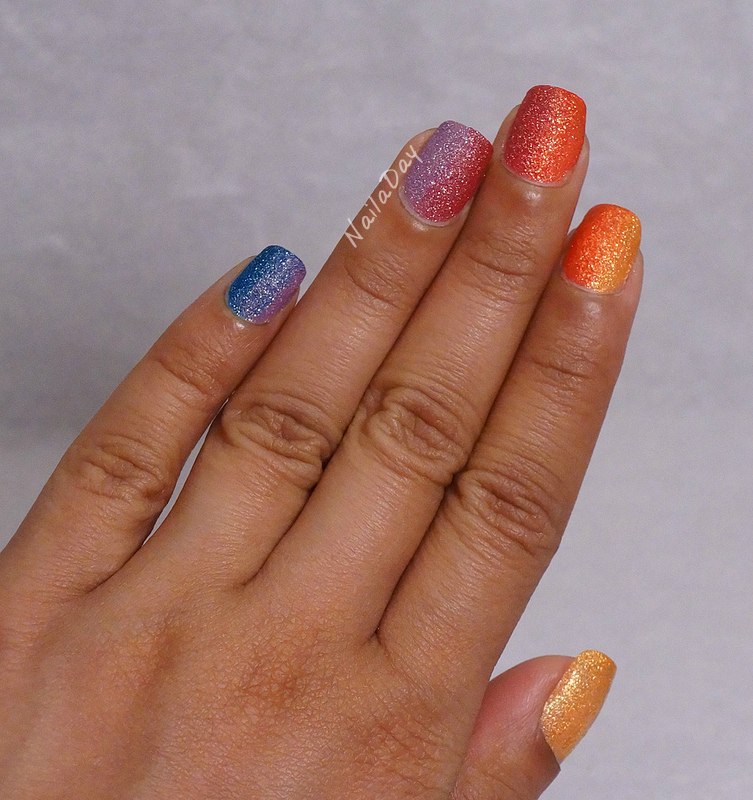
Zoya Summer Pixie Dust collection Rainbow Gradient

Hi folks! Hope everyone had a good fourth of July weekend. Mine flew by way too fast, of course. Now, here we are, back at the beginning of another week. 

I do have a bright mani to start things off, though! I wore this about two weeks ago and didn't take it off for a whole week! Could you blame me? Look how pretty! 

NailaDay: Zoya PixieDust Summer Rainbow gradient

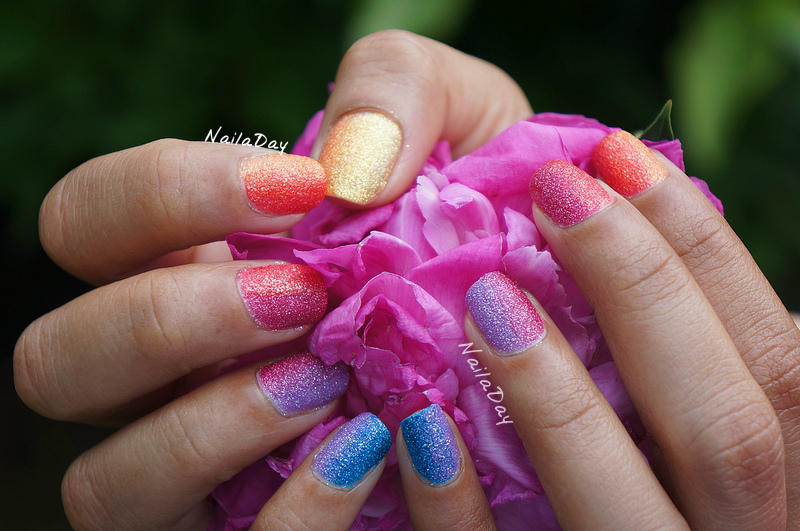
This mani was done with the entire Zoya Summer Pixie Dust collection. The colors from the outermost thumb to the outermost pinky nail are as follows with a very simplified description of the color:
    Zoya Solange - Yellow
    Zoya Beatrix - Orange
    Zoya Destiny - Red
    Zoya Miranda - Dark Pink
    Zoya Stevie - Lavender
    Zoya Liberty - Blue

For the gradient look, it was actually super easy. I just painted the two colors next to each other on each nail. Then, on a piece of foil, I mixed a drop of each color together and painted that mix in a single stripe right down the middle of the nail. With the consistency of the pixie dust polishes, this method seemed to work really well! I just repeated this for a second or third coat and I was done! No sponge necessary.

NailaDay: Zoya PixieDust Summer Rainbow gradient

There was no sun out when the pictures were being taken so you can't see the sparkliness of it all but, it was there!

NailaDay: Zoya PixieDust Summer Rainbow gradient

In the removal process, Liberty (the blue) was the only one that really showed a tendency to stain my nails. That one is going to require two layers of basecoat in the future. I also ended up using the foil method for the removal. I think it's very necessary. This is the first time I've done the whole rainbow gradient thing. I think it's going to have to happen again. I think I know what other unique polishes I'm going to use for it too. Keep your eyes peeled!

Thursday, July 4, 2013

Happy 4th of July!

Hello everyone! Happy America's birthday!!

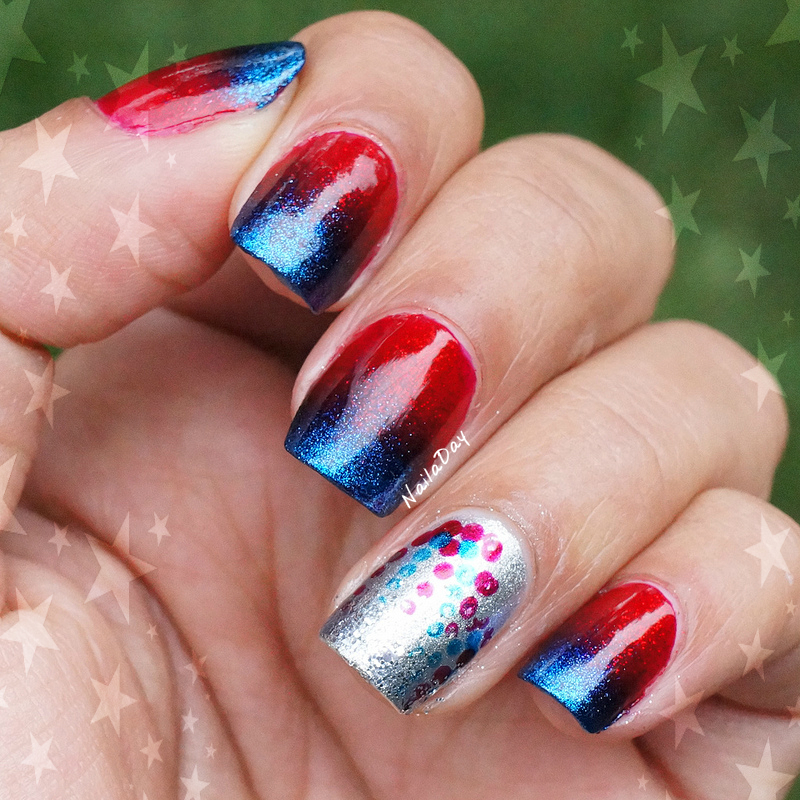
Hope everyone who reads this is having a good day today. I am! I get to stay home. My mom, my mother-in-law and my husband are all home, cooking, eating, talking, painting nails (me), watching movies (my husband) and having a blast!! The mani I'm going to show you today, I actually did today and I still have on my nails! Usually, there's a lag time of a few days to some weeks before a mani gets featured here so this is special :-)

NailaDay: Milani Ruby Jewels and Sally Hansen Freeze July 4th mani

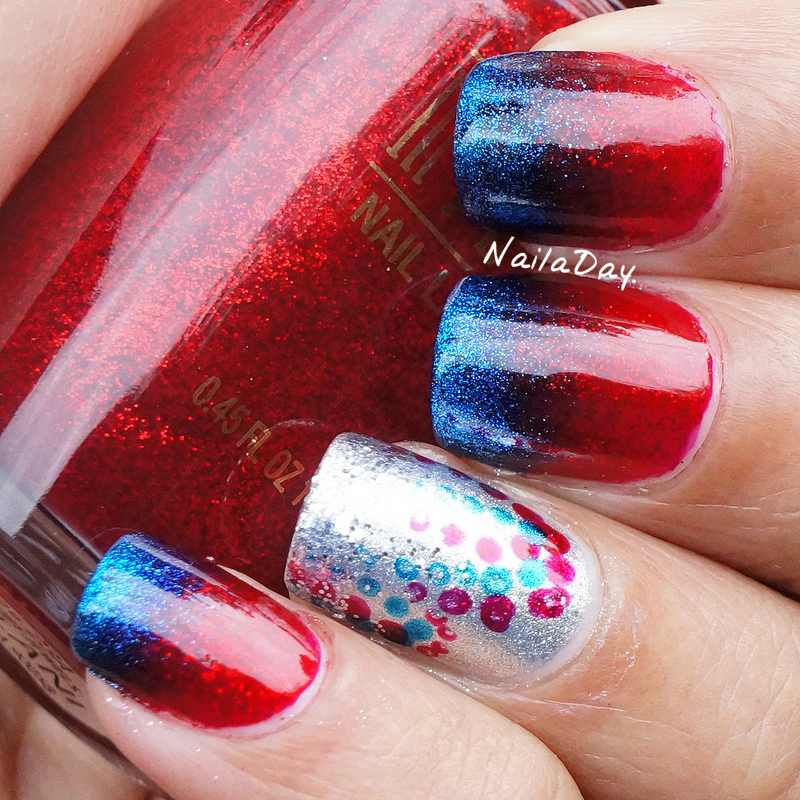
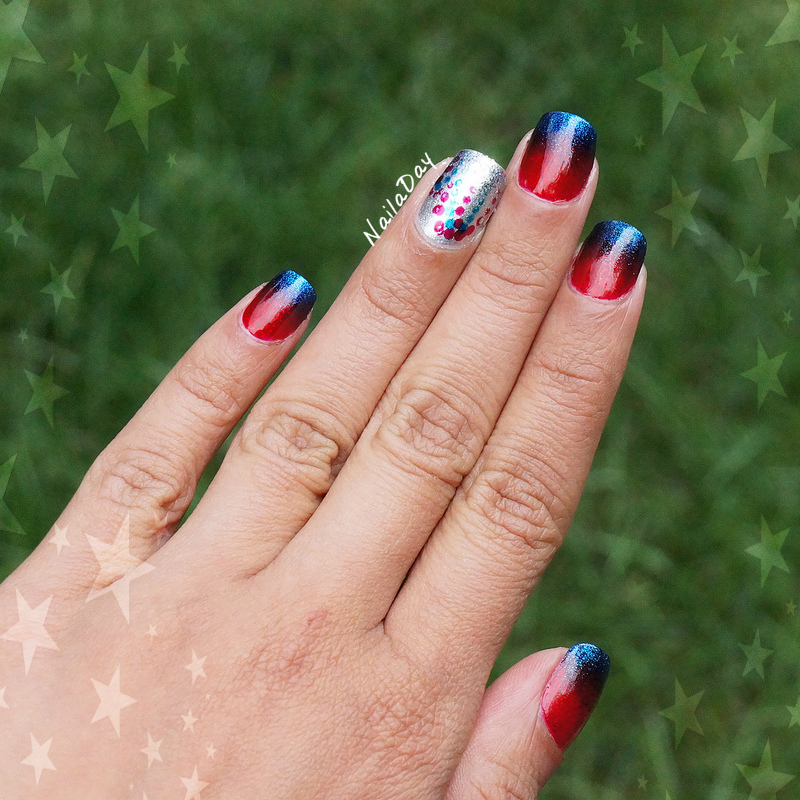
I adore everything about this. The polishes I used, the gradient, the abstract fireworks....ok, so the dotted fireworks need help. But I still love it! The polishes used here are Milani Ruby Jewels, Sally Hansen Insta-Dri Freeze!, Sally Hansen Celeb City. I dusted the tip of the ring finger with slight gradient of Sinful Colors Queen of Beauty but you can't really see it in the pictures. It's just extra sparkly in real life :-)

NailaDay: Milani Ruby Jewels and Sally Hansen Freeze July 4th mani


Pixlr.com, where I do my watermarking, had some fun 4th of July overlays and borders today so I just had some fun with those.

NailaDay: Milani Ruby Jewels and Sally Hansen Freeze July 4th mani


NailaDay: Milani Ruby Jewels and Sally Hansen Freeze July 4th mani


It's sort of simple but I'm going to love wearing this for the next few days. Thanks for looking!!!

Wednesday, May 1, 2013

Seven Deadly Sins Challenge Day 3: Gluttony

Hi all! Ok, so you might be wondering, she did a day 1, and now it says day 3....where did day 2 go? The way this challenge works is that you can do one or two challenges per week and each of those challenges are numbered. I can only probably do one challenge a week and depending on which challenge it is, I'm probably going to be skipping days here and there.

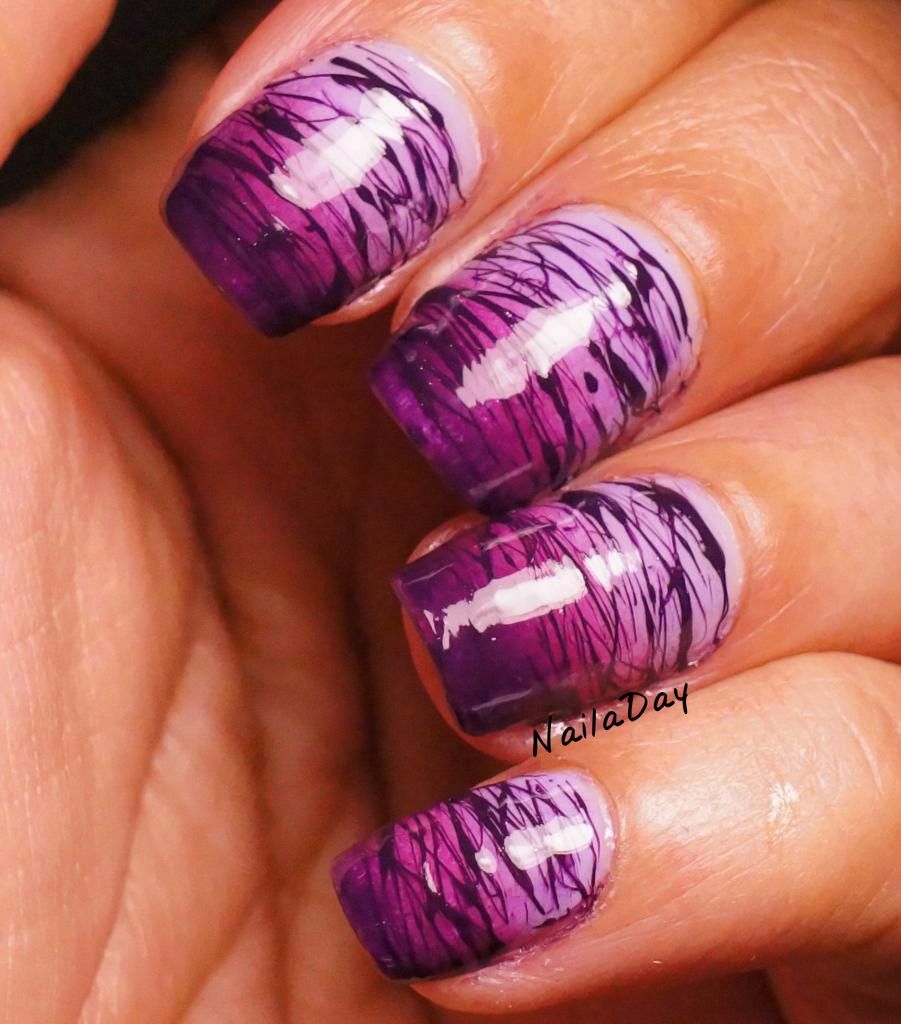
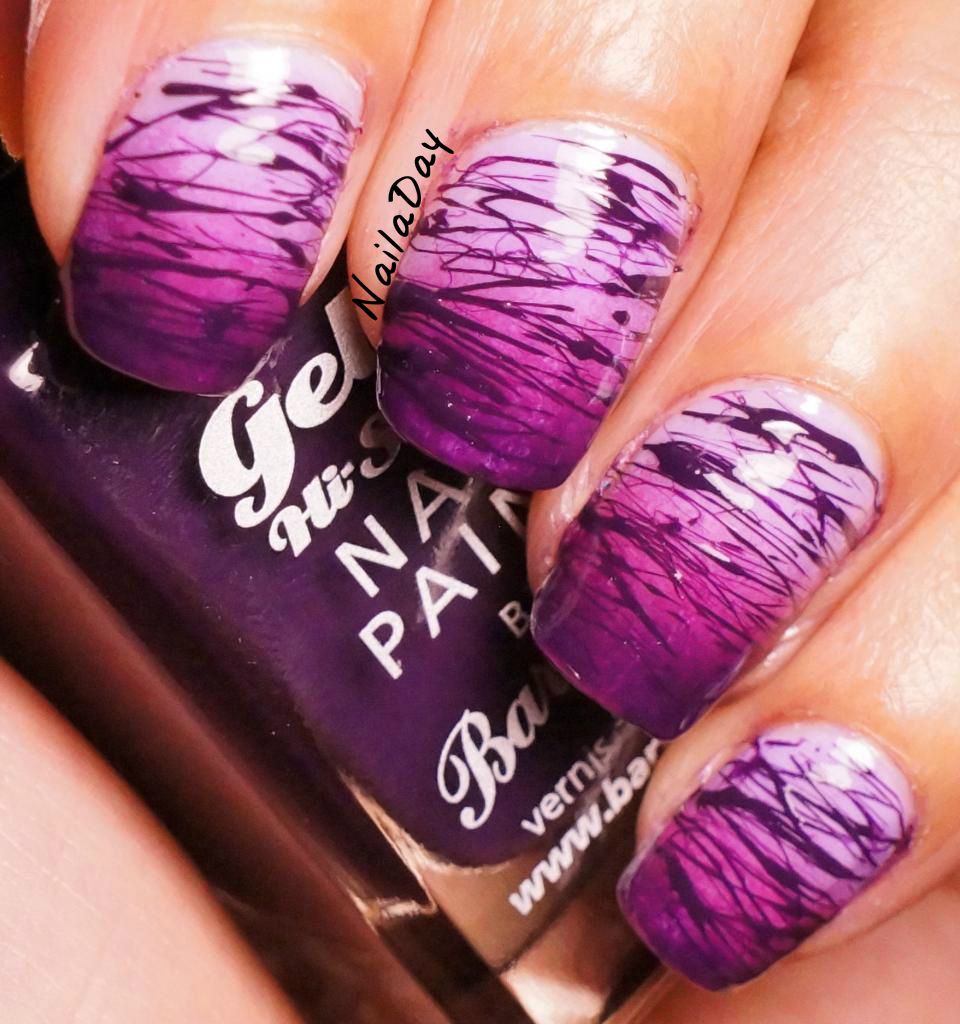
NailaDay: Barry M Purple Gradient with Sugar Spun lines

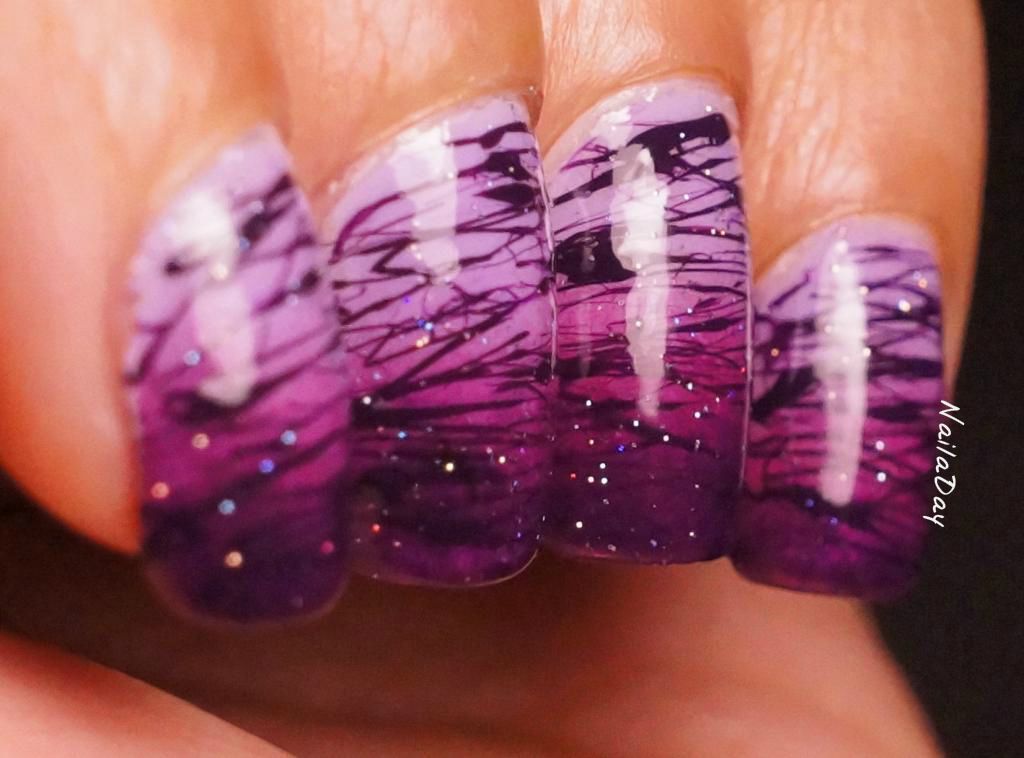
So, on to this week's challenge, Gluttony! Day 3 guideline is, "Delight yourself with a Sugar Spun inspired manicure". I had done a sugar spun mani before but had been less than pleased with those results. When I started playing with some of my Barry M polishes that I purchased on my trip to London, I realized that the creme/jelly consistency that a lot of them had really lent itself well to creating thin sugar spun lines. I also really wanted to do sugar spun over a gradient so this was the perfect opportunity!

NailaDay: Barry M Purple Gradient with Sugar Spun lines

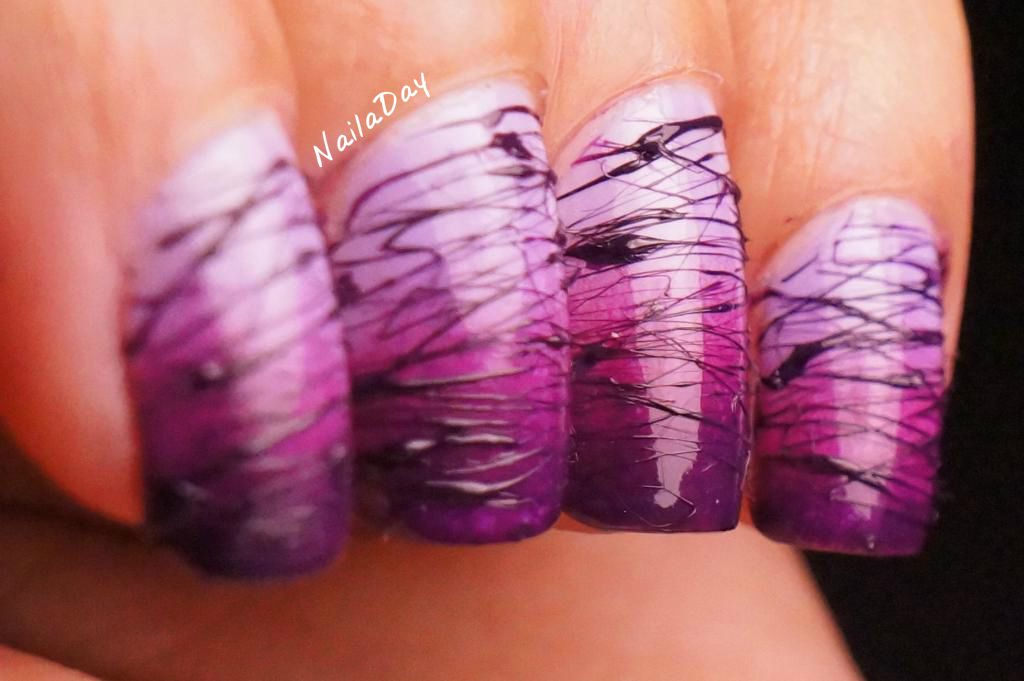
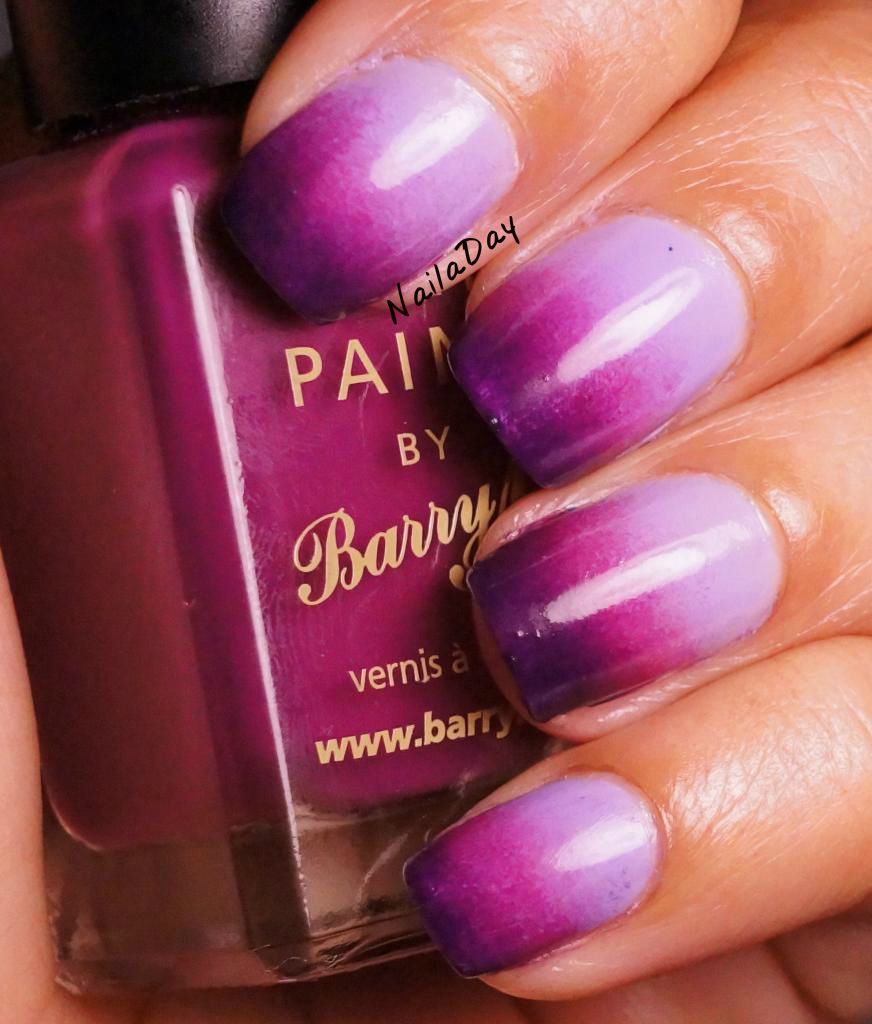
The polishes I used for this are Barry M Prickly Pear, Bright Purple and Plum. After the gradient, I used Plum to create the sugar spun design. I really tried to make the lines as thin as possible and I think I did a better job than with my last attempt. My hands were a mess afterwards though. It took me four episodes of Parks and Recreation to get both hands done! I got into a good rhythm after a while of dripping polish on one nail, then replenishing the drop on the foil and cleaning up the skin around the nail while waiting for that drop to thicken. The sparkles come from INM Northern Lights topcoat. I love the density of the holographic glitter in this, perfect for a topcoat.

This manicure went through a lot of stages and was a creation built over days. Here it is with just regular topcoat.

NailaDay: Barry M Purple Gradient with Sugar Spun lines

NailaDay: Barry M Purple Gradient with Sugar Spun lines

Here it is before any topcoat. Love this picture!

NailaDay: Barry M Purple Gradient with Sugar Spun lines

Here is it as just the gradient. I wore it this way for a day or so. Not perfect but I knew I was going to cover it up so I didn't stress.

NailaDay: Barry M Purple Gradient with Sugar Spun lines

Click below to see what the other ladies part of this challenge have been up to.
Related Posts Plugin for WordPress, Blogger...