Showing posts with label red. Show all posts

Thursday, May 10, 2018

Multichrome Madness Trio May 2018: P.O.P. Polish!!

*product samples sent for review*

Hi everyone!! I am so excited for what I'm going to show you today! Recently, I had one of those rare occasions where I was selected to swatch nail polish! It's a trio of multichrome polishes by P.O.P. Polish and it's this month's offering from Multichrome Madness. If you don't know what that is, it's a Facebook group that is devoted exclusively to all things multichrome and each month there is a guest polish maker that creates lovely custom multichrome polishes for the group. I myself have purchased some real beauties but this is the first time I get to show them off in time for you to get it yourself! Be prepared for a picture heavy post!!

P.O.P. Polish is an indie brand run by Bianca and thus far, although I've lusted after the polishes from afar, I haven't actually made a purchase yet so it has been a double treat to not only swatch for her but to try out the brand for the first time as well! As I mentioned before, this month there are 3 custom polishes and they are each in vibrant jewel tone colors. Bianca calls her multichrome polishes oil slicks (and names them accordingly) because of the multiple array of colors you can see with each one, just like an oil slick! Each of these have primary, secondary and tertiary shifts that I'll describe below. 

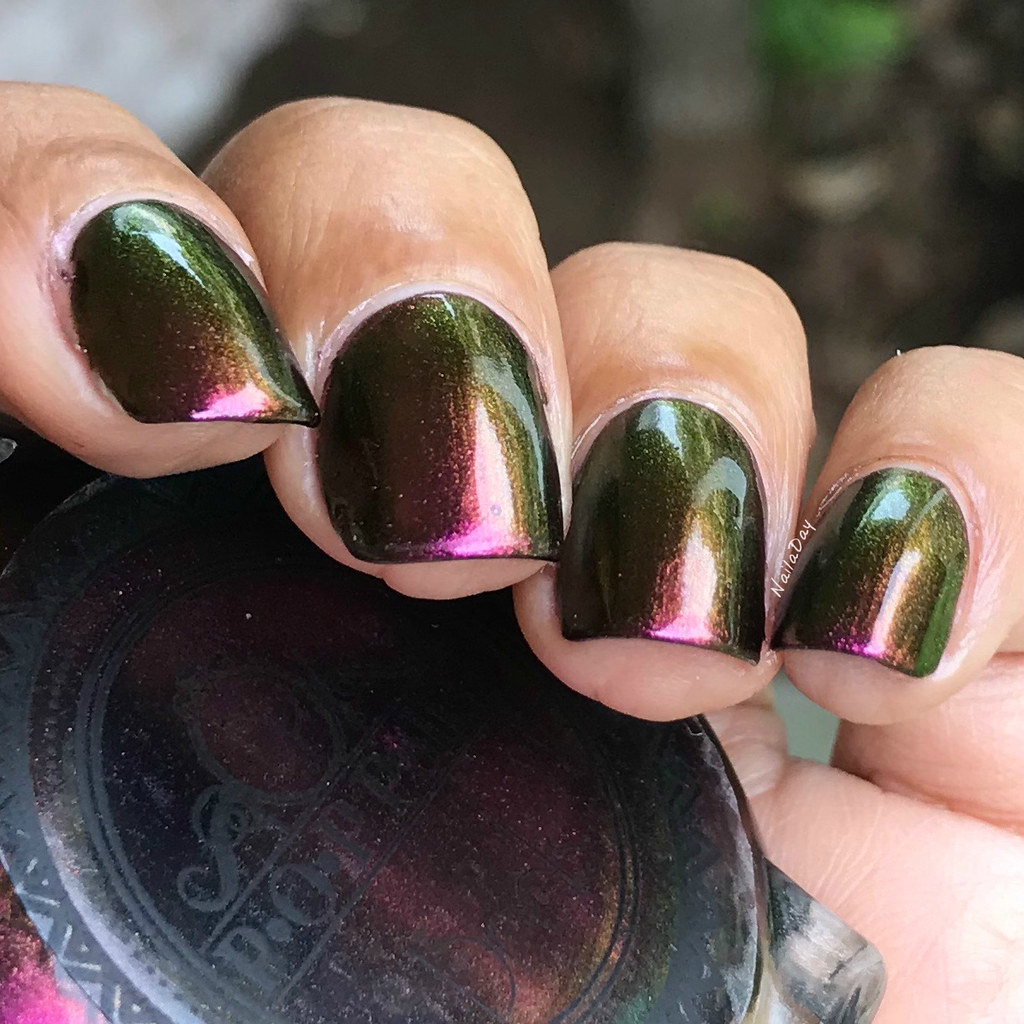
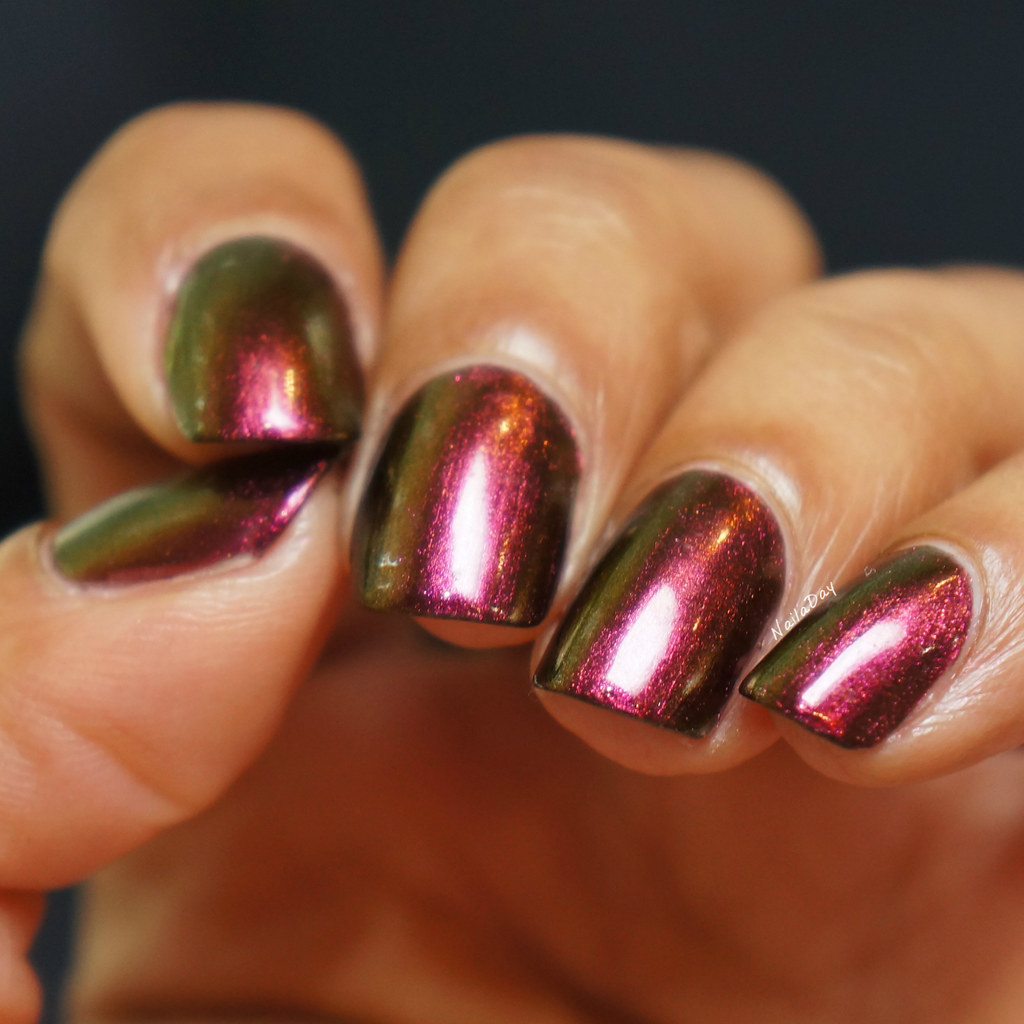
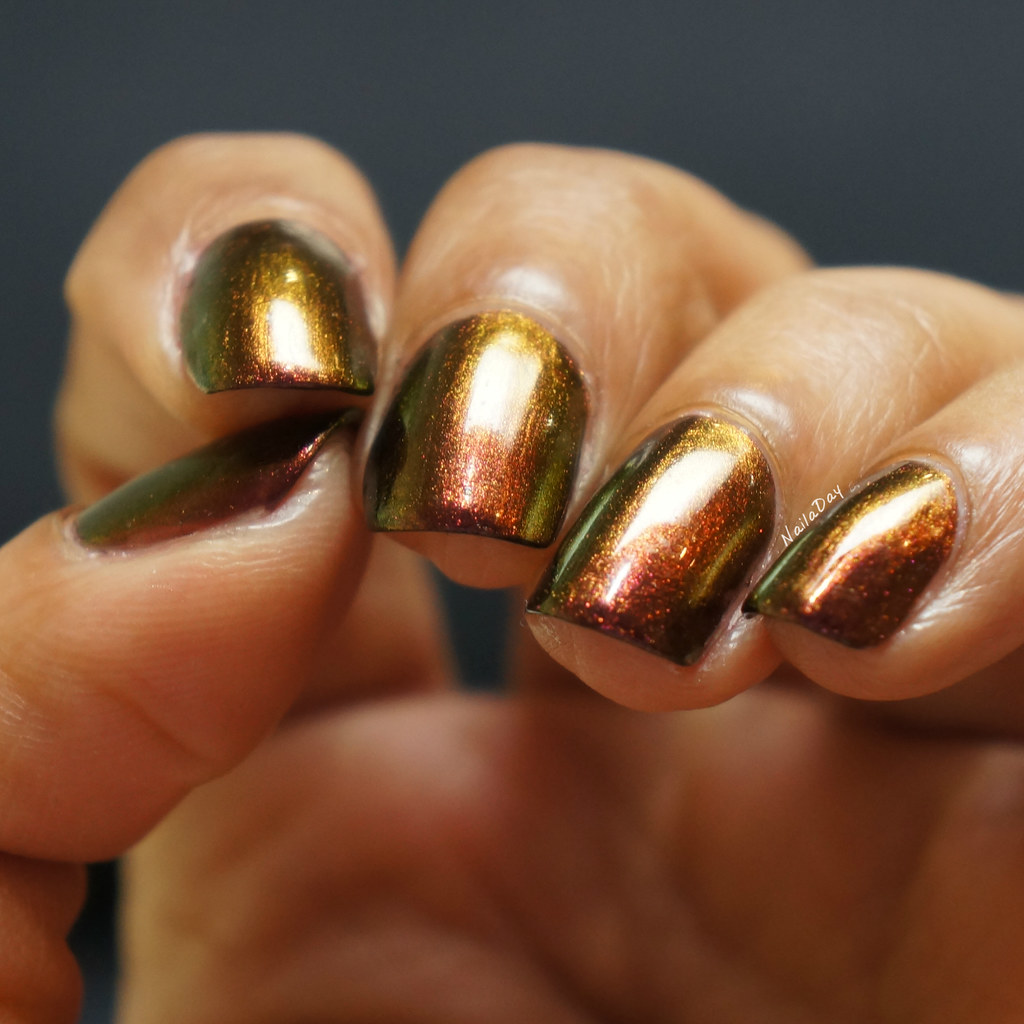
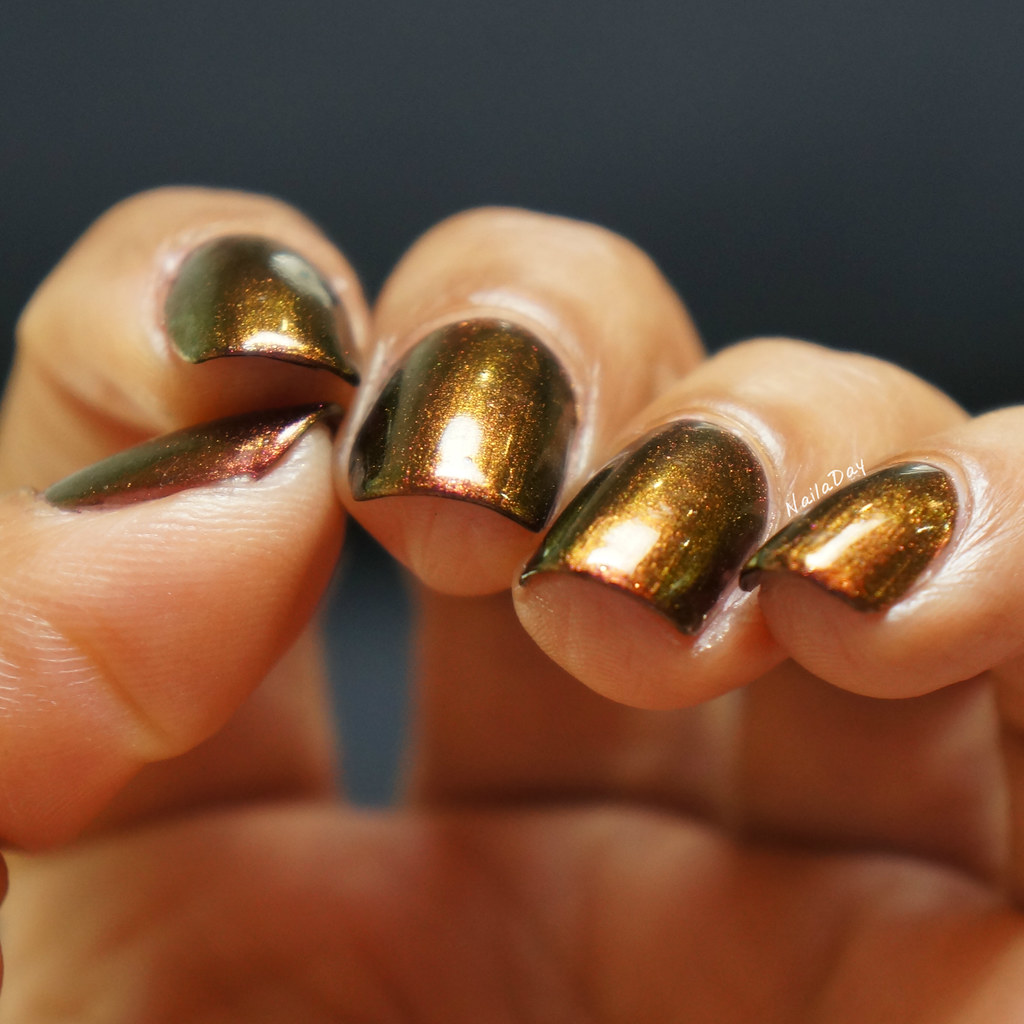
The first polish is called Slick & Flirty. The primary color on this one is dark fuchsia (oh I love my fuchsia!). In the shade or indoors, the secondary shift can be seen of bronze and gold. Finally, at just the right angle (or in the car), the tertiary colors of blue, green and black can be seen. I really had no trouble getting all the colors to show in real like. It maaay have been a little harder to show them in pictures but I gave it a good effort. 

NailaDay: P.O.P. Polish Slick & Flirty

NailaDay: P.O.P. Polish Slick & Flirty

NailaDay: P.O.P. Polish Slick & Flirty

NailaDay: P.O.P. Polish Slick & Flirty

NailaDay: P.O.P. Polish Slick & Flirty


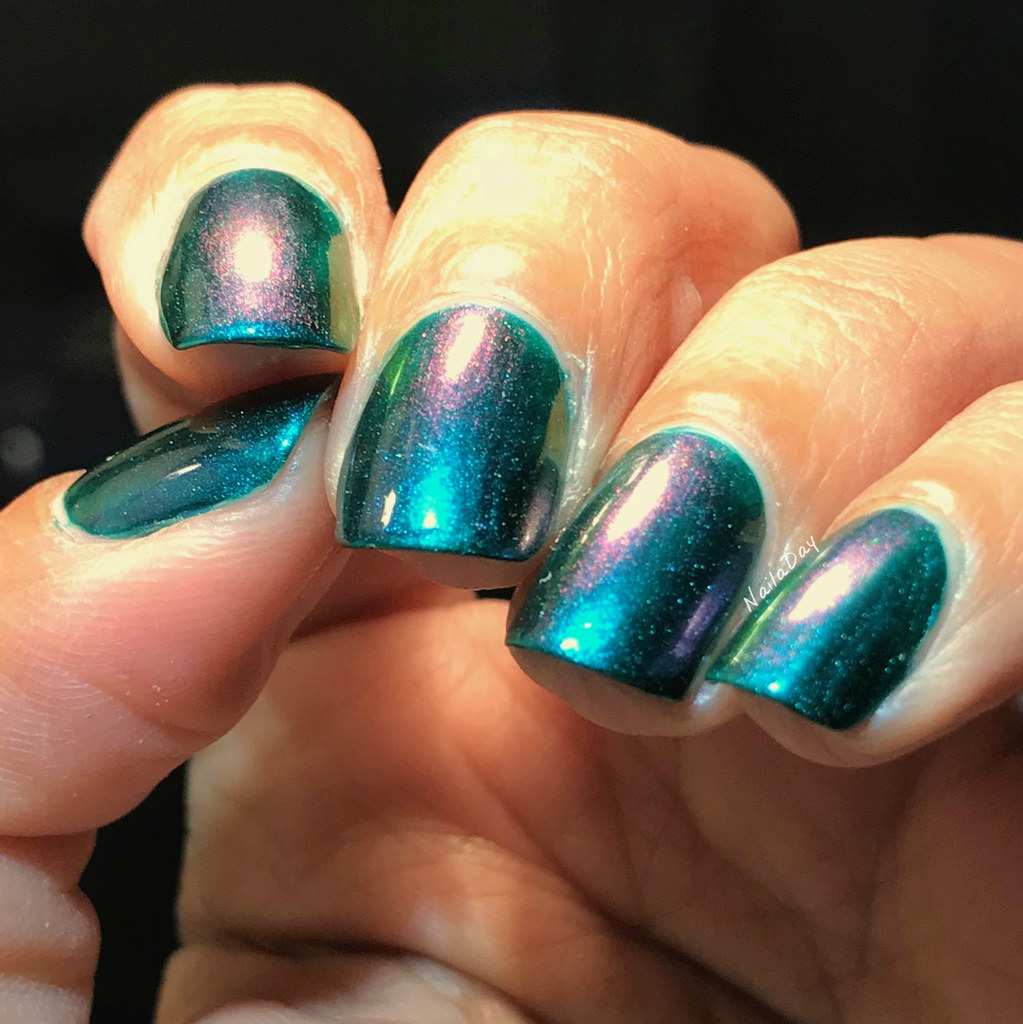
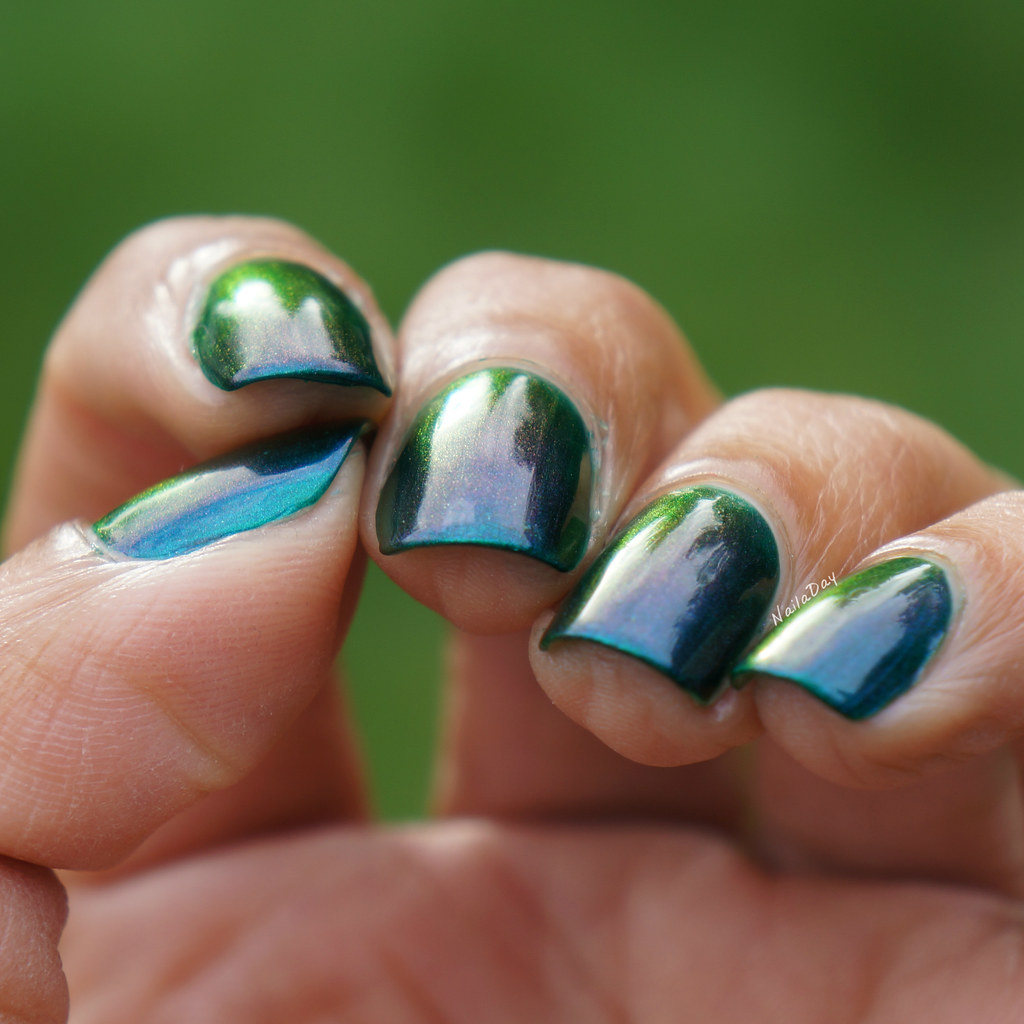
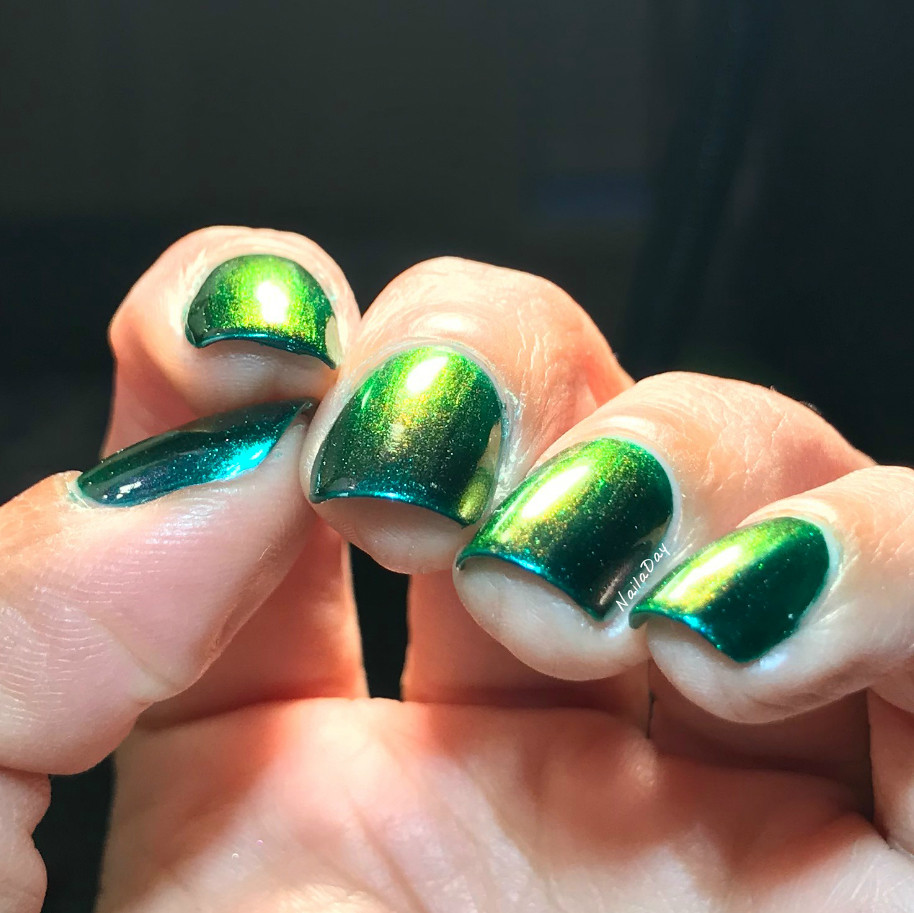
The second one I will show you is Enchanted Slick. The primary color on this is a gemstone green. It moves into aqua and purple shades in the shade and at just the right angle you can also see mauve, gold and a stunning lime green!

NailaDay: P.O.P Polish Enchanted Slick


NailaDay: P.O.P Polish Enchanted Slick

NailaDay: P.O.P Polish Enchanted Slick

NailaDay: P.O.P Polish Enchanted Slick

NailaDay: P.O.P Polish Enchanted Slick


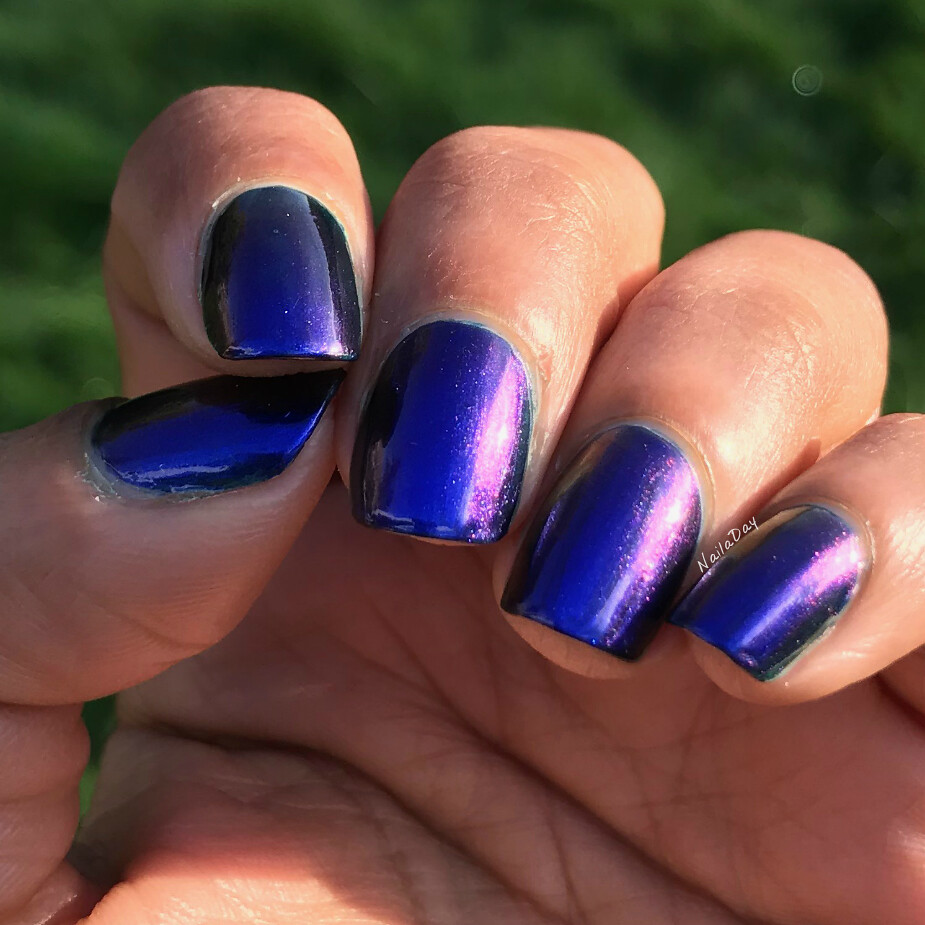
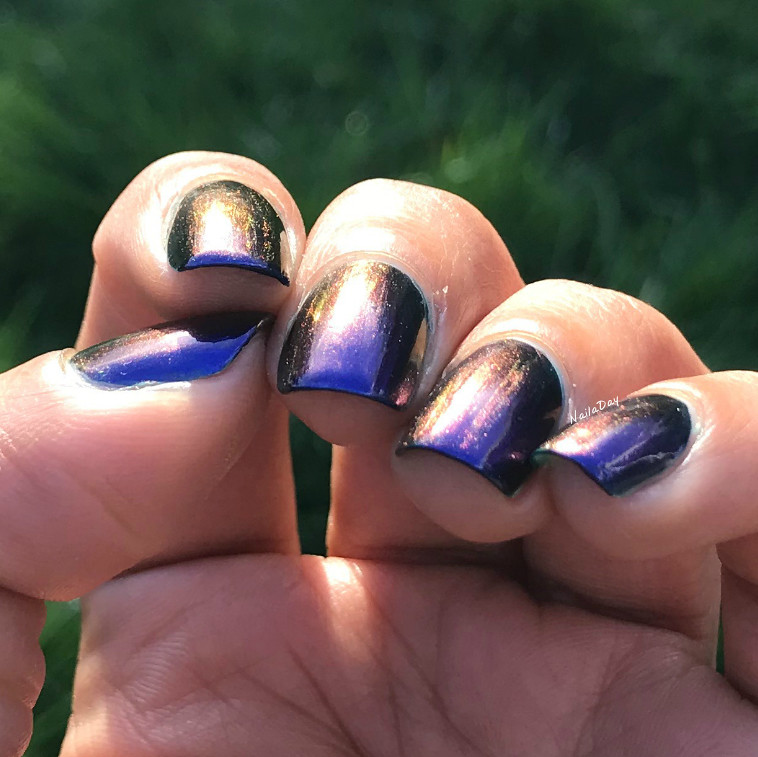
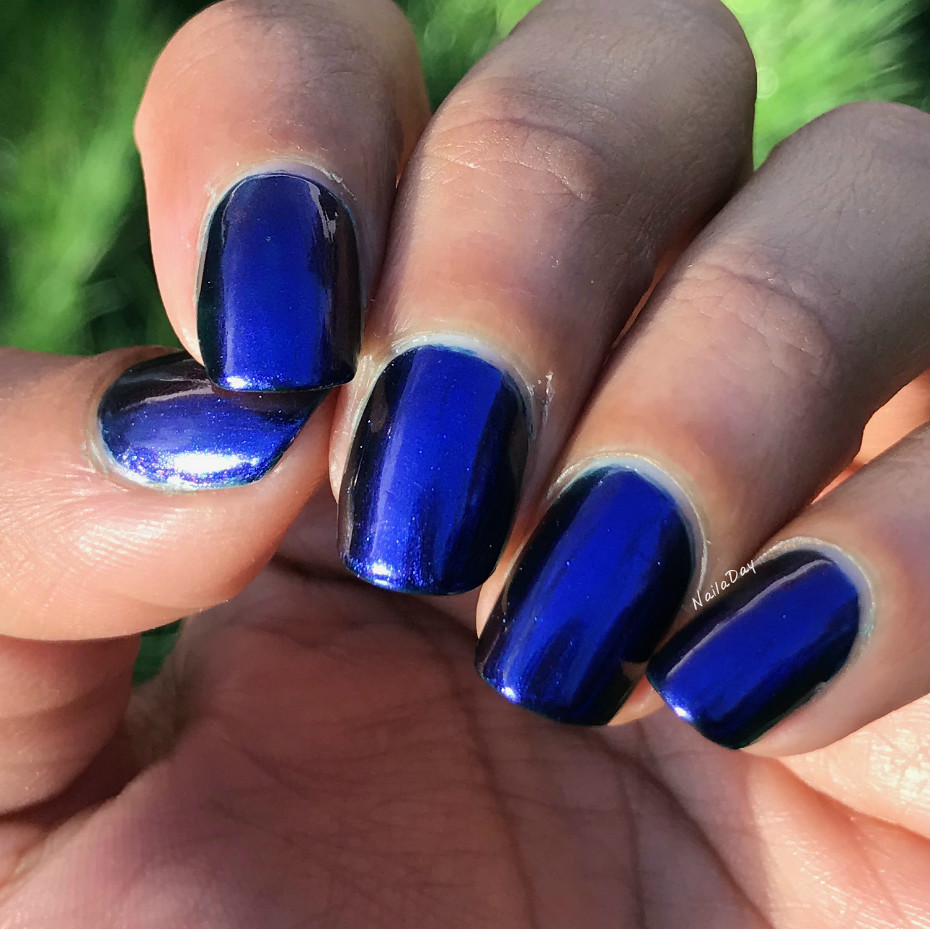
I love those last two pictures! The last one is called Red, White & Slick. Bianca named it that way because it looked very much like the blue on the American flag. The primary color is that bright royal blue, secondary colors are purple and bronze and the tertiary colors are mauve, green and gold. 

NailaDay: P.O.P Polish Red, White & Slick

NailaDay: P.O.P Polish Red, White & Slick

NailaDay: P.O.P Polish Red, White & Slick

NailaDay: P.O.P Polish Red, White & Slick

NailaDay: P.O.P Polish Red, White & Slick

I applied two really easy coats for each of these and topped them off with P.O.P Polish Liquid Glass topcoat. It is my one of the few times I've branched away from my Seche Vite or Sally Hansen Intsa-Dri and I was very pleased. I wore each of these for about five days and only had mild tip wear by the end. The longer I kept them on my nails, the more I found myself loving them! If you would also like to get your hands on them, they are being sold right now through the P.O.P. Polish Etsy store till the end of the month of May but you have to be a member of Multichrome Madness to be able to purchase them. The polishes are $12 each or $33 for the trio and if you'd like to buy either the Liquid Glass topcoat or her new Radioactive Topcoat (glows under blacklight), it's an additional $5 each with the purchase of the trio.

Happy polishing and see you next time!

Saturday, May 5, 2018

Contrary Polish Feel The Spark (May 2017 PPU)

Hello everyone! A quick post for you guys today. 
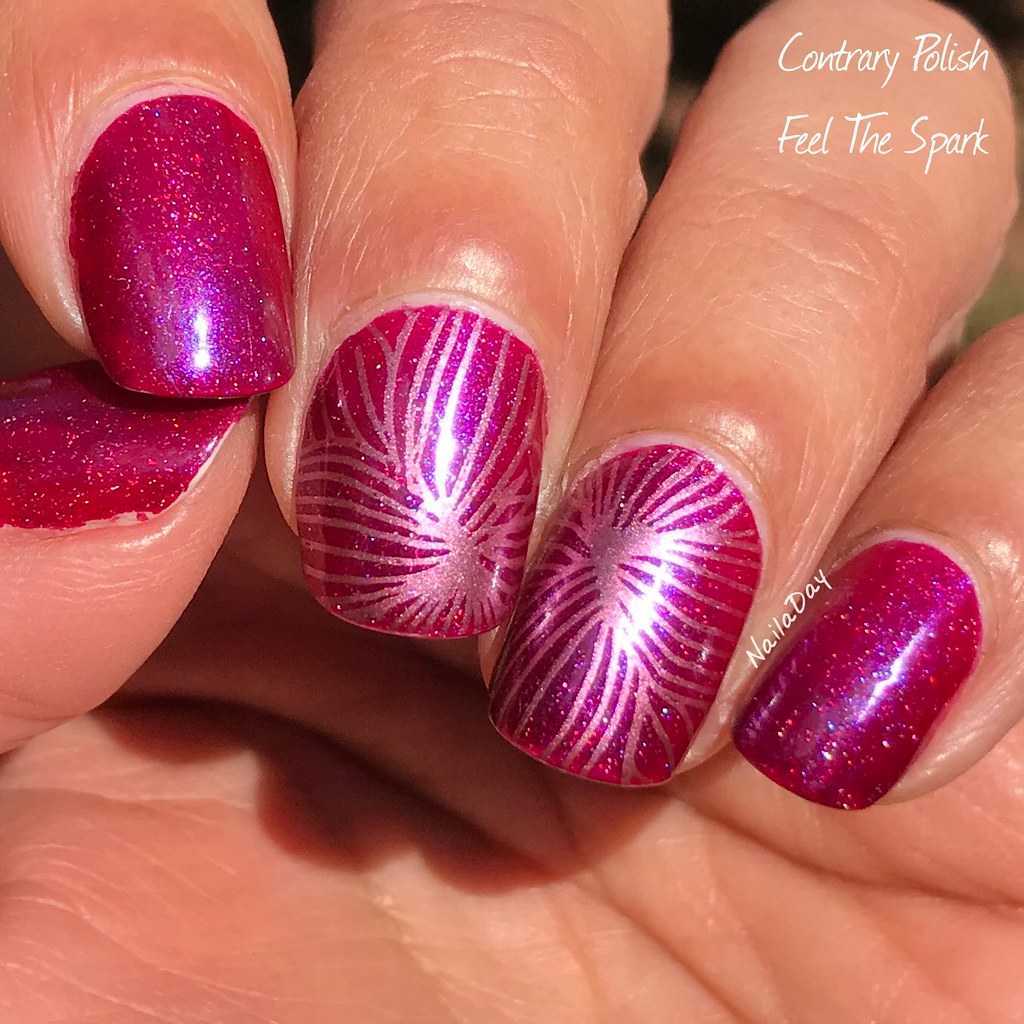
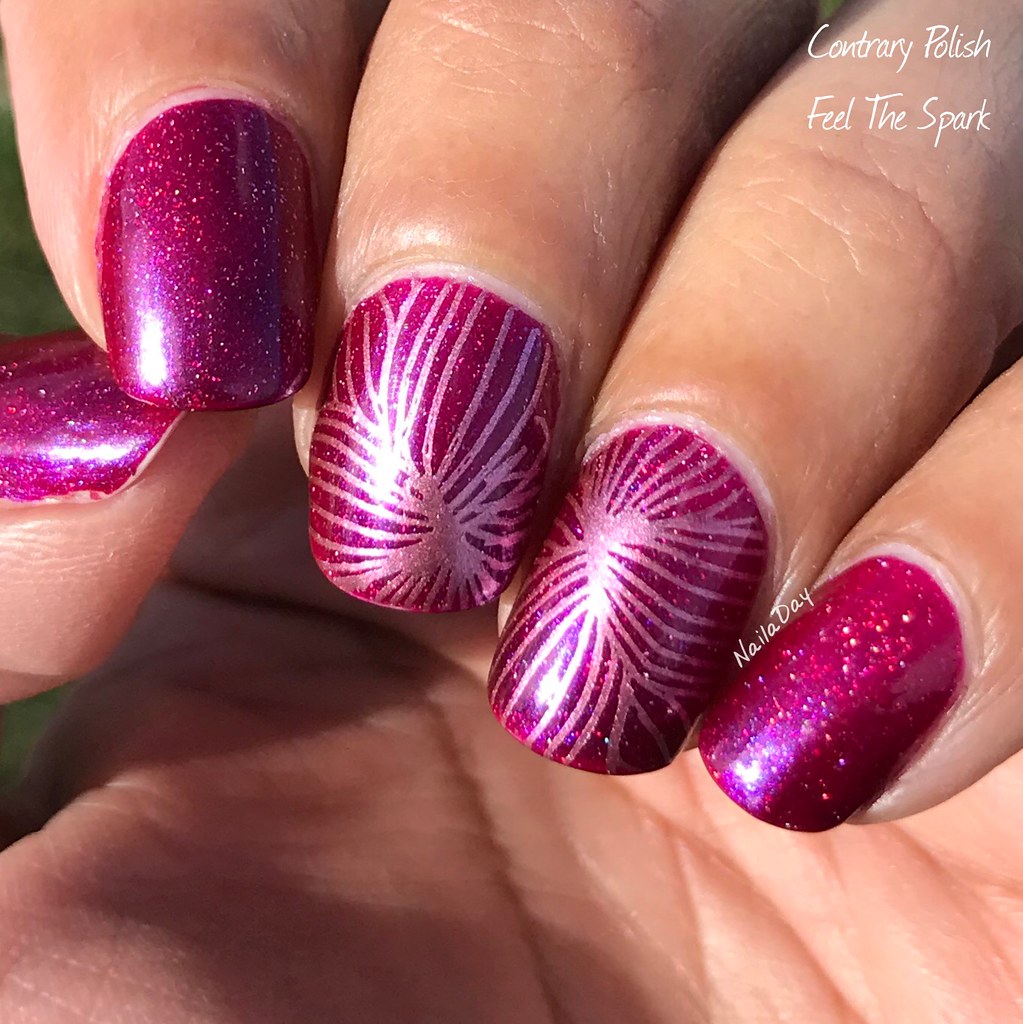
The best thing about the Polish Pickup each month is that you get to try out new indie brands without having to worry about crazy fast restocks and shipping costs. I have a number of new brands that I've been able to get to know this way and today's is one of them. This is Contrary Polish Feel The Spark from the May 2017 PPU. The theme was science. I've mentioned I love fuschia shades once or twice before. This definitely falls into that category and I love the touch of holo and shimmer this polish has. 


I stamped with China Glaze Emotion and an image from my PUEEN Encore set of plates a couple of days later.

NailaDay: Contrary Polish Feel The Spark (May 2017 PPU)


NailaDay: Contrary Polish Feel The Spark (May 2017 PPU)

I am loving each month's Polish Pickup so much! This current month is themed the 90's and it's going on right now. So many great polishes available! To be informed of the polishes available each month and to be made aware of when the preorder window is each month, join the Polish Pickup facebook group. 

Sunday, April 15, 2018

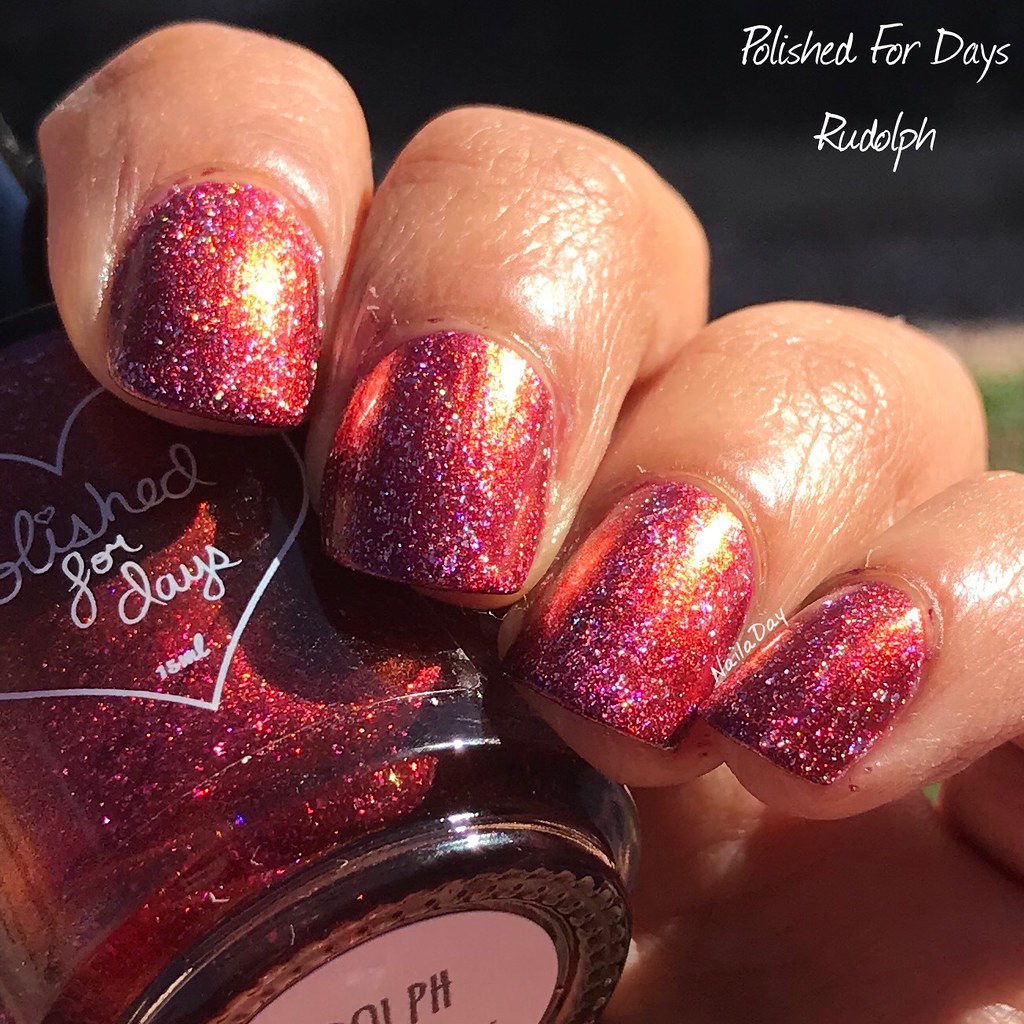
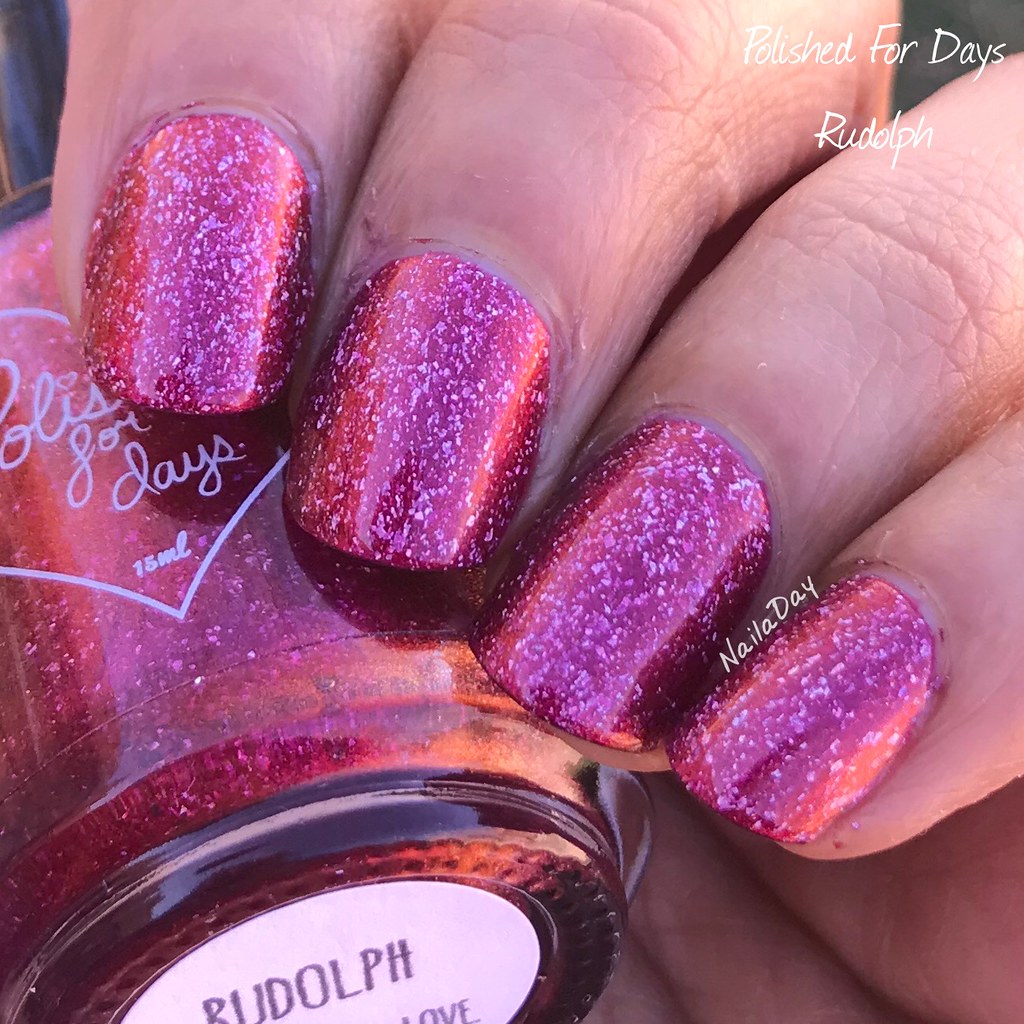
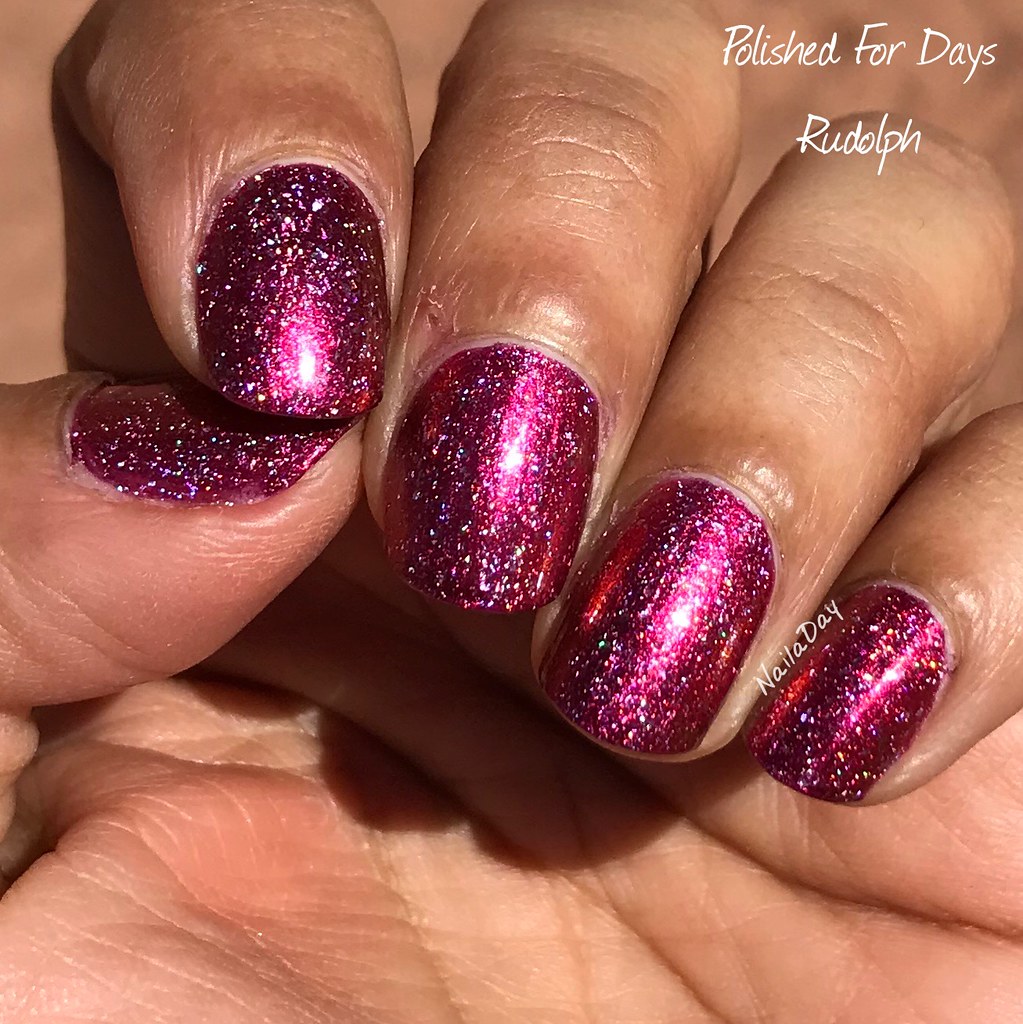
Polished For Days Rudolph

Hi folks! How is everyone doing? Having moved to the Pacific Northwest, for the first time since I moved to the US, I get to experience much milder winters than I used to in the Midwest. I am seeing pictures of my friends and family battling ice and snow storms right now and I feel so bad for them, and so happy for me! A couple of months ago, I also got a chance to go to New Mexico for a couple of days and did some hiking there. I knew I had to bring something flashy like Polished For Days Rudolph with me to capitalize on aallll that sunshine!

NailaDay: Polished For Days Rudolph

Rudolph was one of the holiday polishes from 2017, one of the Reindeer Games collection. I think I ended up getting most of the polishes from that collection and they are all so beautiful. Rudolph is a multichrome polish loaded with holo flakes that you can see in the shade picture down a couple of pictures below. It's officially described as having a glowing bright red base with a copper-green-red shifting shimmer and holographic flakes. In the rest of pictures below, I am trying to show you the shift in the colors of the shimmer as I angles my nails in the sun. 

NailaDay: Polished For Days Rudolph


NailaDay: Polished For Days Rudolph


NailaDay: Polished For Days Rudolph


NailaDay: Polished For Days Rudolph


NailaDay: Polished For Days Rudolph

Although the hike itself was amazing as we went through the Canyon de Chelly National Monument, there were plenty of moments where you would have found me marveling at my nails and taking pictures of them instead of looking around like everyone else was!

Thanks for visiting and reading my little blog. See you next time!
Monday, February 26, 2018

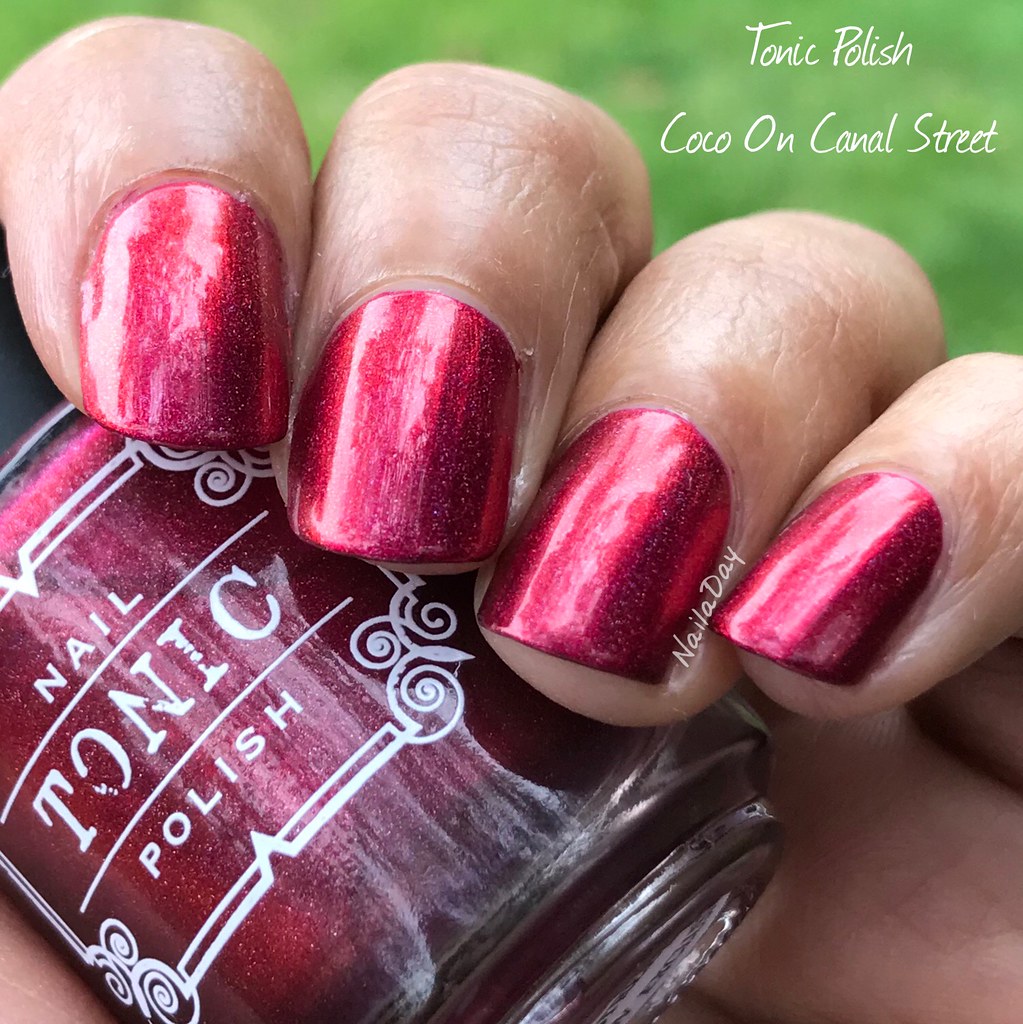
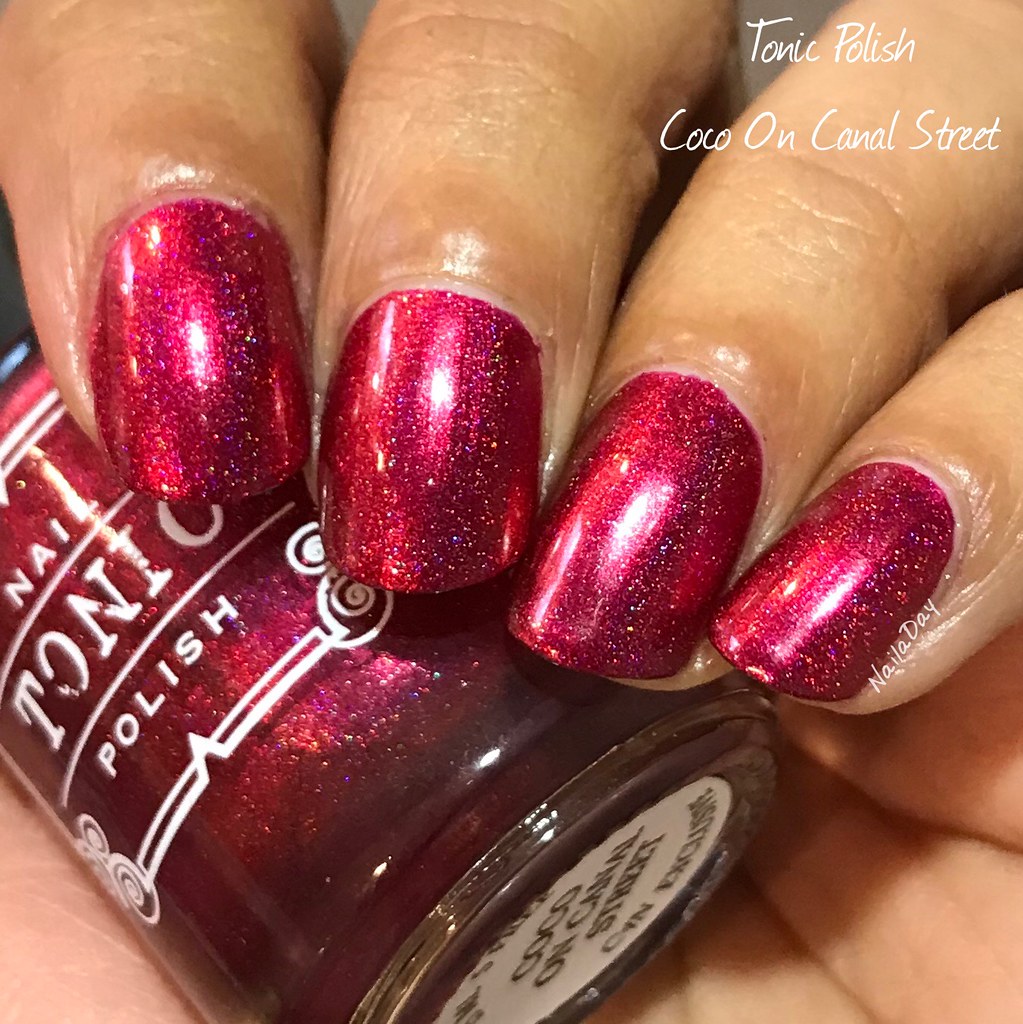
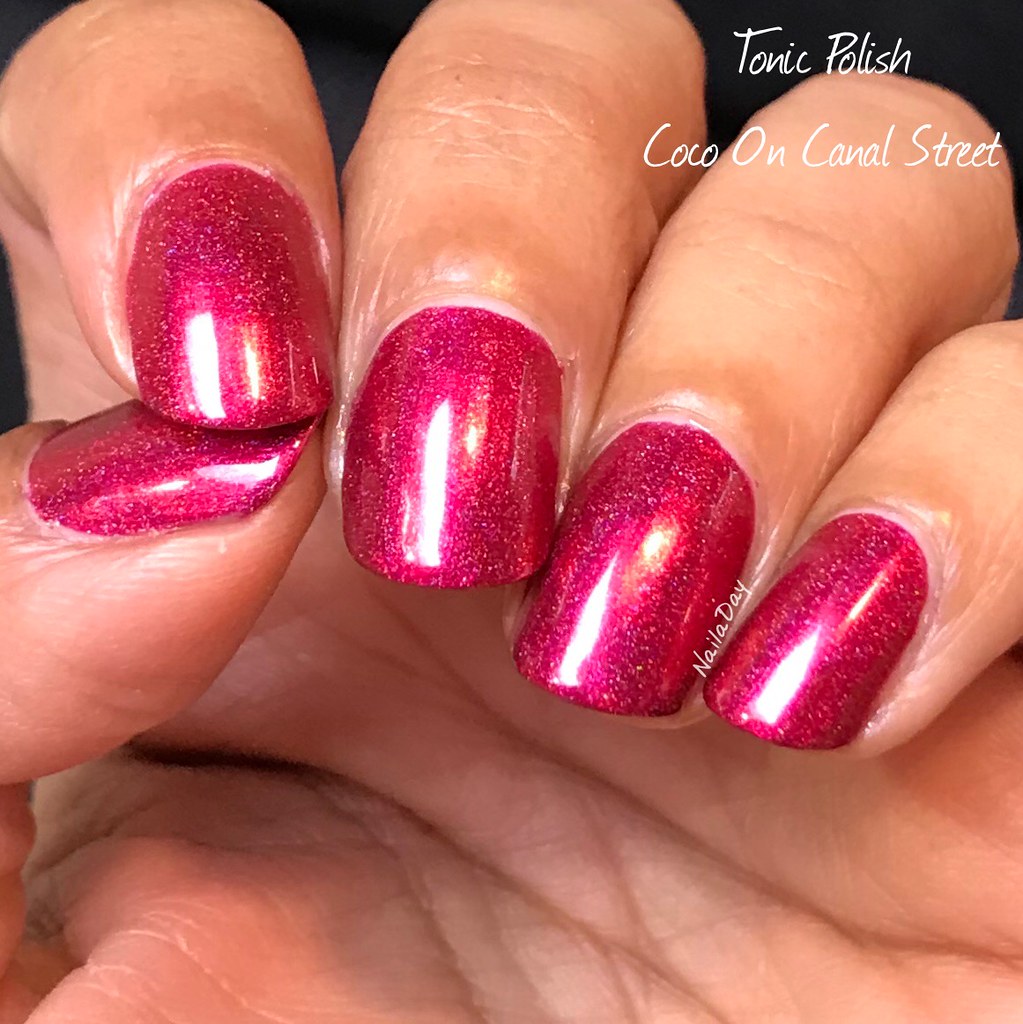
Tonic Polish Coco on Canal Street

Hello everyone!

Another Tonic Polish for you today. This one was a limited edition and it was I think offered exclusively through Color4Nails as part of an NYC duo. It's not your average red. It's has a touch of holo and a touch of duochrome taking it from a almost fushia to hints of orange at the edges. Hopefully the pictures below can show you all the variations!

NailaDay: Tonic Polish Coco on Canal Street

NailaDay: Tonic Polish Coco on Canal Street

NailaDay: Tonic Polish Coco on Canal Street

NailaDay: Tonic Polish Coco on Canal Street

Alright, I don't feel very talky today so that's pretty much it! I entertained the thought of stamping over it while I wore it but I didn't have time/was too lazy. Next time!


Thursday, June 15, 2017

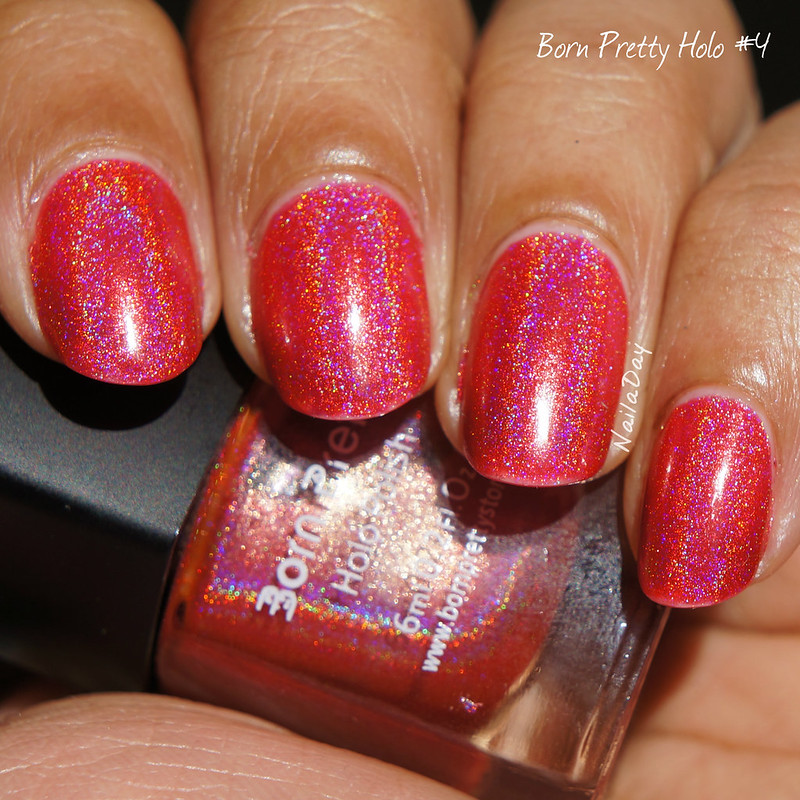
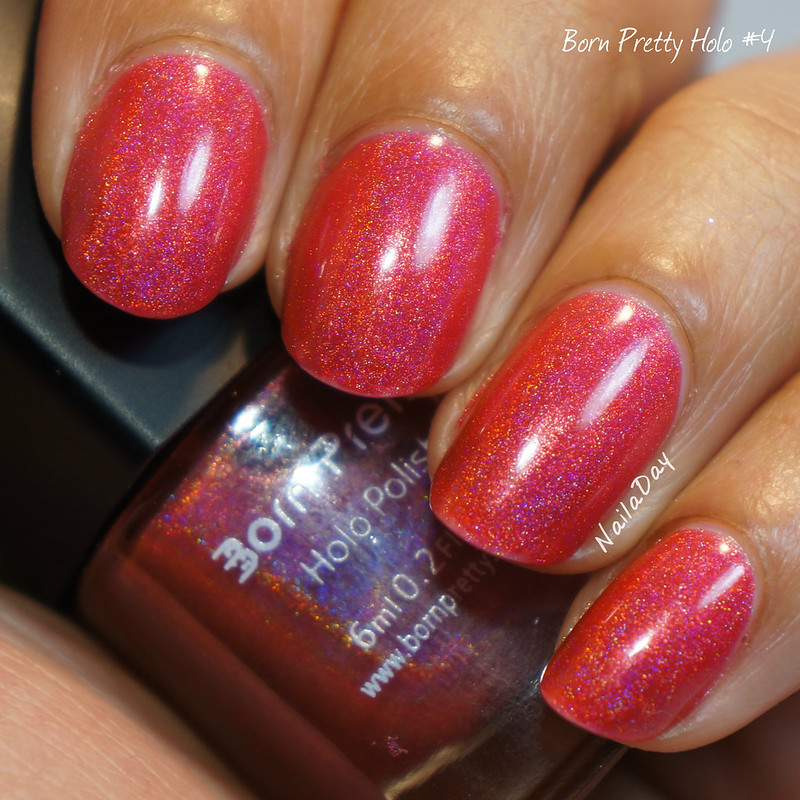
Born Pretty Holo #4

A long time ago, a time when you weren't tripping over a holographic polish every time you turned around, when indie holographic polish was just starting to become a thing, I found out that the Born Pretty Store carried holographic polishes and they were a reasonable price for a small 6 ml bottle. Well, I surely did get myself a bunch of colors and this is one of them. They don't have any fancy names. This one is just called #4. These days, this would be a fairly ho hum holo polish. Nothing fancy, no shimmer, no glitter, no flakies. Definitely no multichrome pigment added. Just a lovely pinky/red/coral (what the hell is this color? Watermelon?) straight holo. And I wore it that way. This is three coats. No stamping, no gradient, no art. It was very pretty. 

NailaDay: Born Pretty Holo #4

NailaDay: Born Pretty Holo #4

NailaDay: Born Pretty Holo #4

Thanks for looking!
Thursday, June 23, 2016

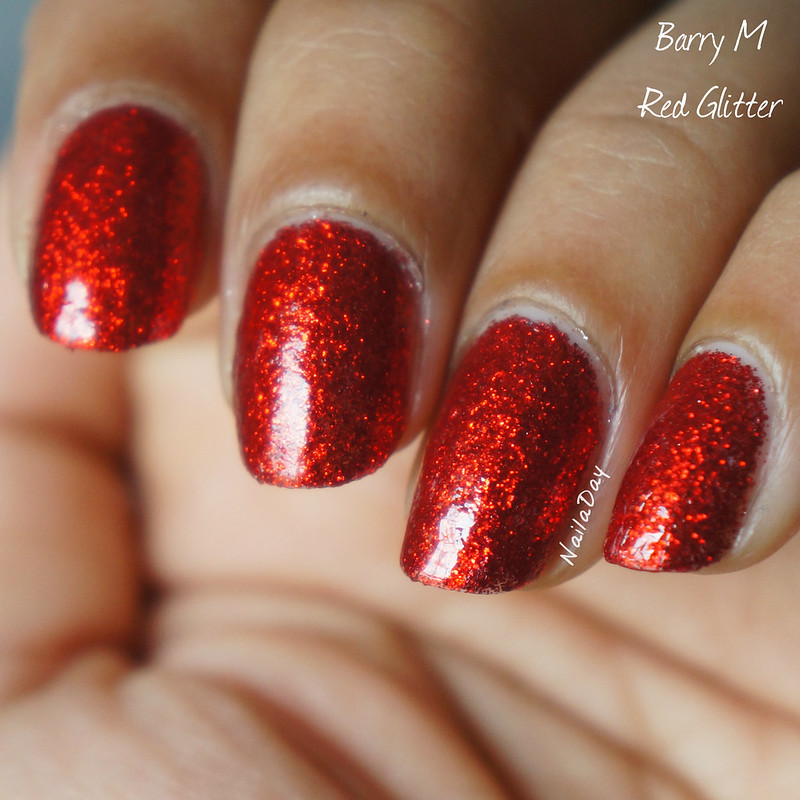
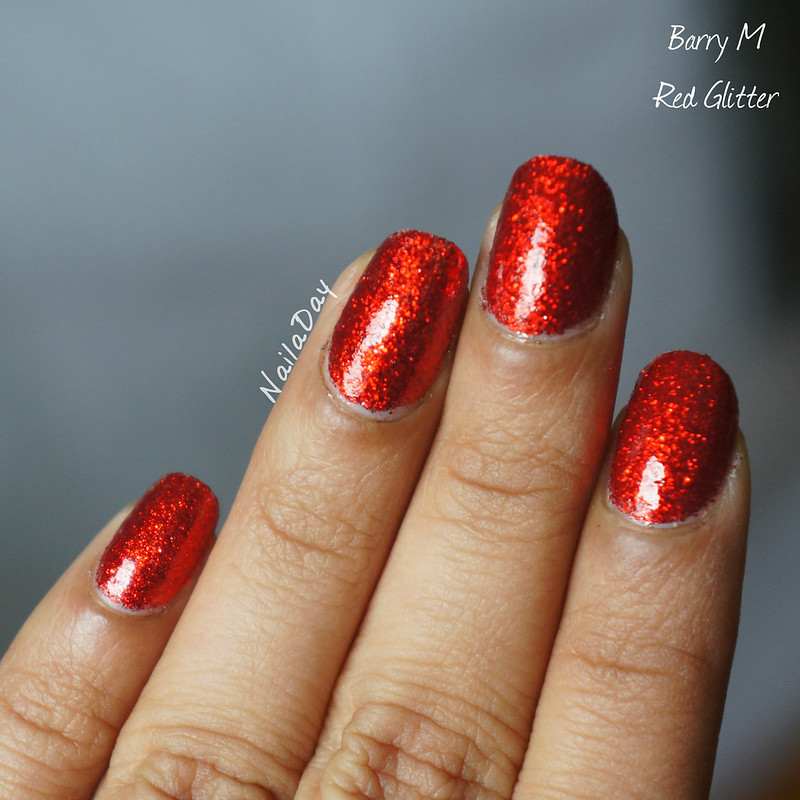
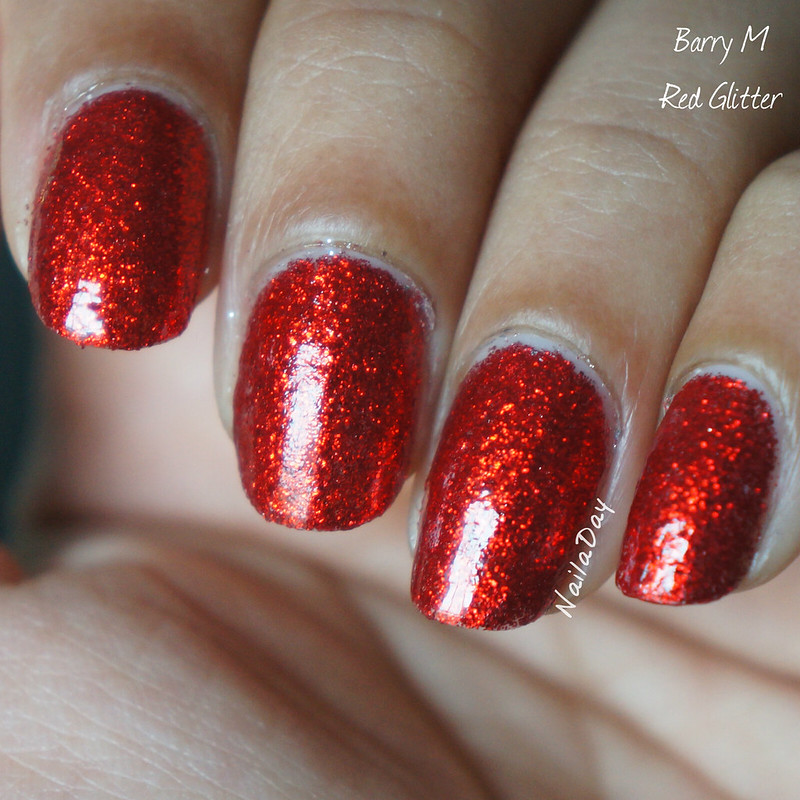
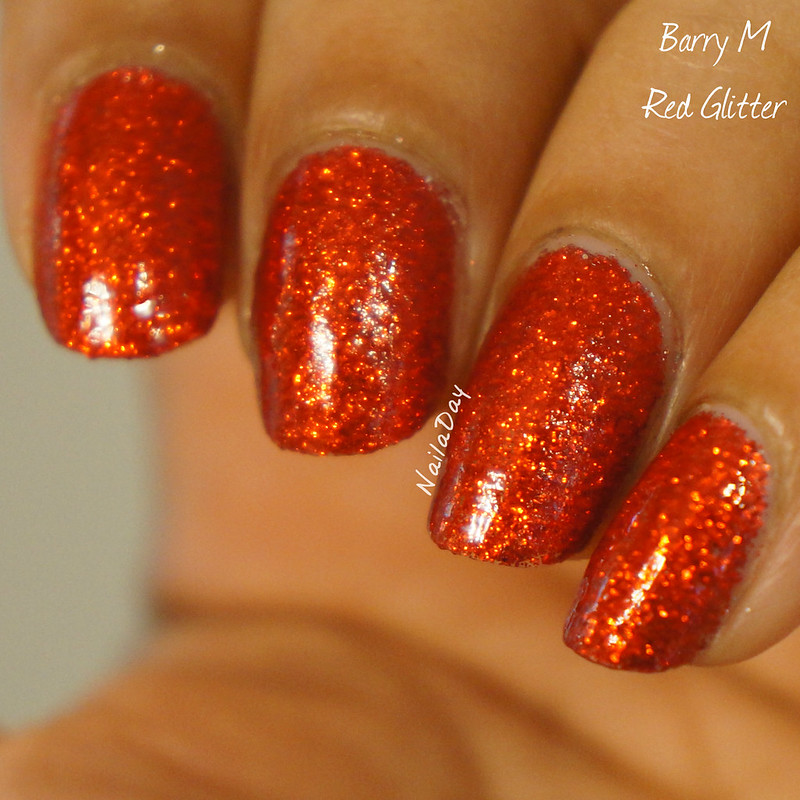
Barry M Red Glitter

I just sigh every time I see pictures of this polish. I think it should have been called Dorothy's Shoes. Unfortunately, it has the very uninspiring name of Red Glitter. That is such a generic term for this fiery, palpitation inducing, dream of a color!! This was my favorite polish to swatch of all the Barry M polishes, and there were a number of really good ones as you'll see in the several upcoming posts. 

Now, on to lots of pictures.

NailaDay: Barry M Red Glitter


NailaDay: Barry M Red Glitter


NailaDay: Barry M Red Glitter


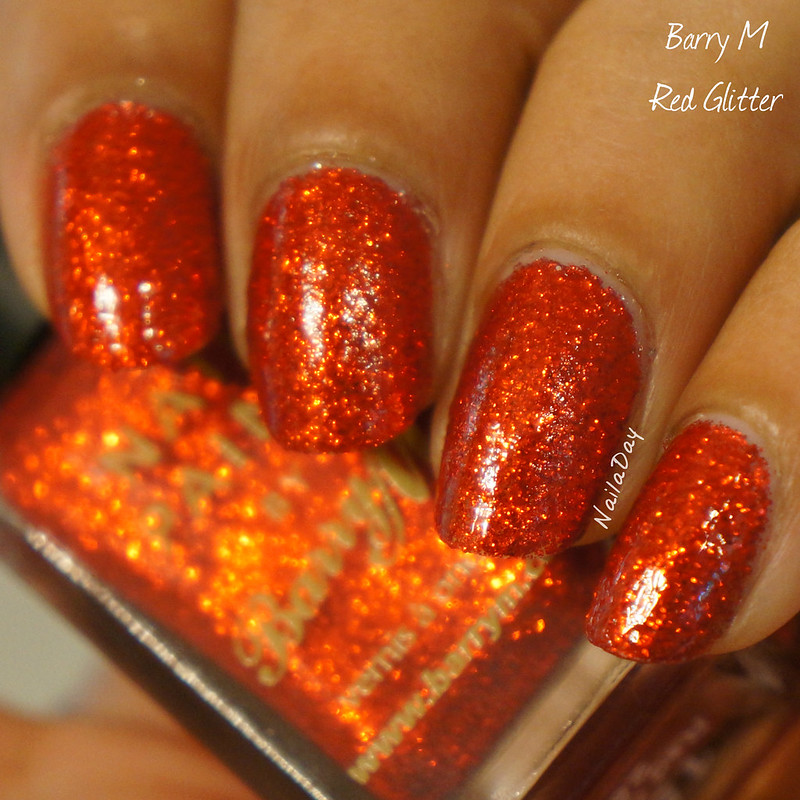
NailaDay: Barry M Red Glitter


Here are a couple from my bathroom. The different lighting gives it a much more orange-y glow.

NailaDay: Barry M Red Glitter


NailaDay: Barry M Red Glitter

As you can see, even just during the process of taking pictures, the top coat sunk farther and farther into the polish. This will require at least two coats to stay smooth. That's okay. That's a glitter for you!

Thanks for looking!!

Wednesday, June 15, 2016

Barry M Bright Red

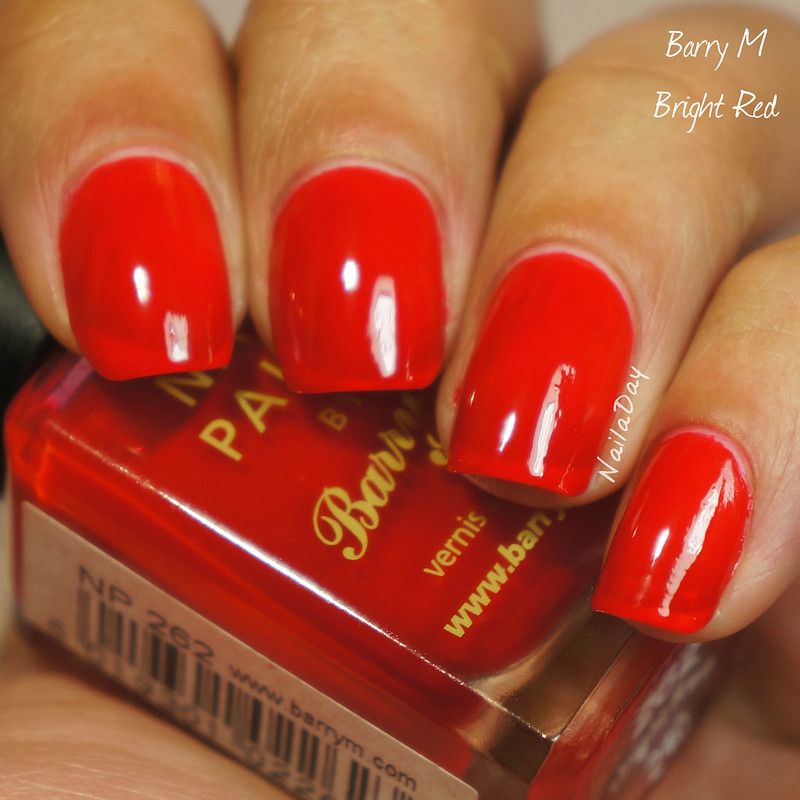
Short post for you guys today. In this one and the next one, I'm going to show you the two Barry M red polishes I have. This is a very simple red, bright and clean looking. My definition of a tomato red. This is three coats but you can see that even then, there's a little bit of a visible nail line in the pictures. In real life, it was not as obvious. 

NailaDay: Barry M Bright Red


NailaDay: Barry M Bright Red

My next post is going to be a very very sparkly Barry M red. I adored it sooo much so keep a lookout for that one.

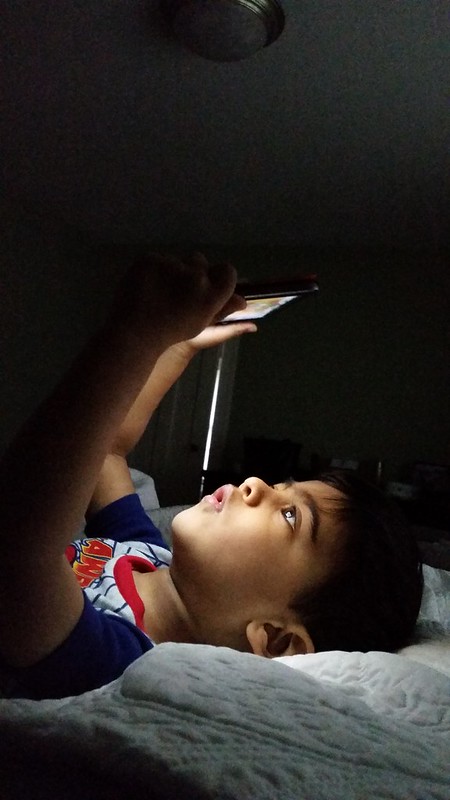
On a personal note, we are on a much needed vacation this week. I still can't stay away from work a 100% but most of the time is spent running after my two little boys. They are growing up so fast it's amazing watching the tiny details of growth emerging each day. Here is a bonus picture of my older one watching a little bit of Daniel Tiger in the morning while we try to catch a few extra minutes of sleep.


Wednesday, May 18, 2016

Femme Fatale Lacquer Royal Rubies

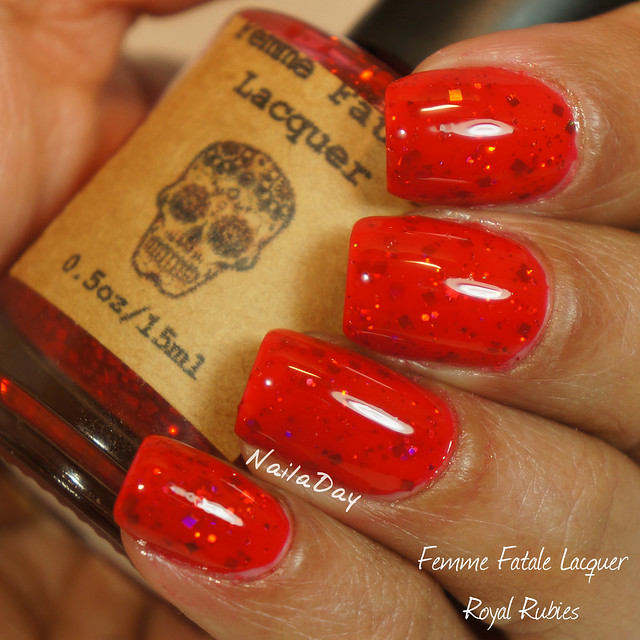
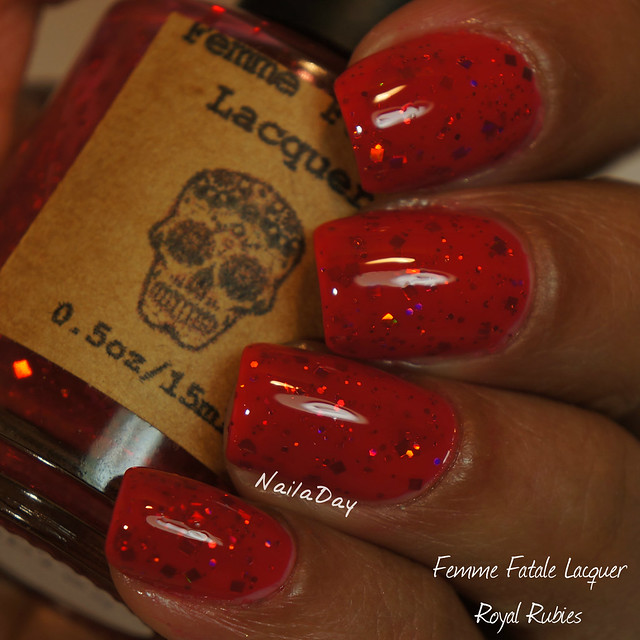
This was a brand that is no longer active. The name always got me confused with Femme Fatale Cosmetics from Australia. I won this polish in a giveaway along with three others and always regretted that there were no more polishes being produced by her. I think they are beautiful. This is Femme Fatale Lacquer Royal Rubies, two coats layered over Love and Beauty Cherry.

NailaDay: Femme Fatale Lacquer Royal Rubies

NailaDay: Femme Fatale Lacquer Royal Rubies


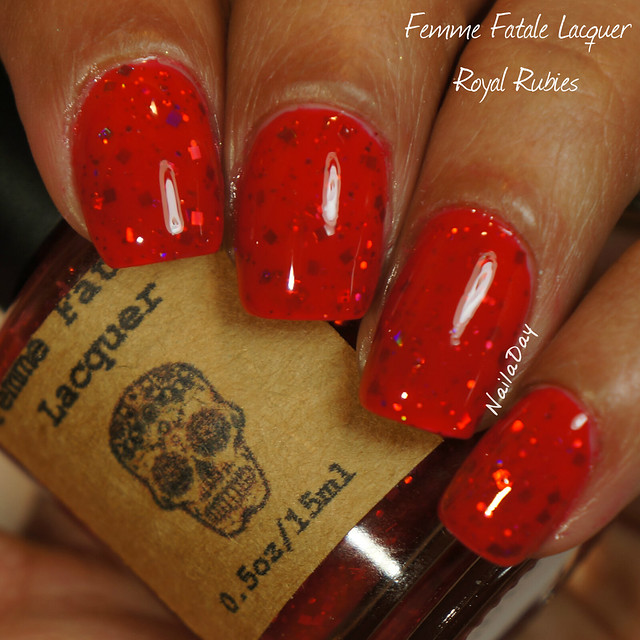
The polish itself has a red jelly base square red holographic glitter and other much smaller red glitter. Those square glitters are EVERYTHING!!  I should have sponged those glitters on because I need more of a payoff of those glitters. 

I took a few pictures with lowered exposure because you could see the holographic glitters much better that way.

NailaDay: Femme Fatale Lacquer Royal Rubies

NailaDay: Femme Fatale Lacquer Royal Rubies


A couple of days into it, I did a design with a stencil from Twinkled_T.

NailaDay: Femme Fatale Lacquer Royal Rubies

Square holo glitters = awesomeness.

Thank you.

Thursday, April 7, 2016

Barielle Glammed out Garnet


A quick Barielle swatch for you today. This is Glammed Out Garnet. This is three coats but I can live with that because it give it a lovely squishy look. 

NailaDay: Barielle Glammed Out Garnet

This is a perfect shimmery red for me. The shimmer particles are small so they are not that prominent in real life. It is just the right amount of berry for me. There are subtle pink flashes in certain lights.

NailaDay: Barielle Glammed Out Garnet

Short and sweet today. Thanks for looking!!

Monday, April 4, 2016

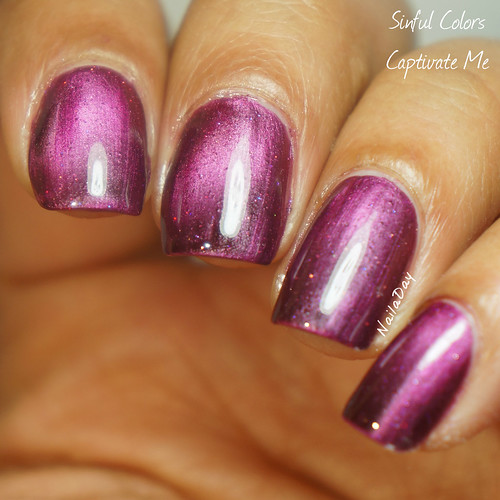
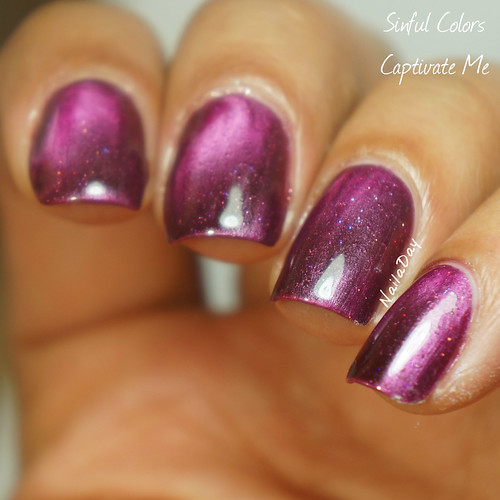
Sinful Colors Captivate Me (trying to imitate Masura magnetic polishes)

Hi guys!
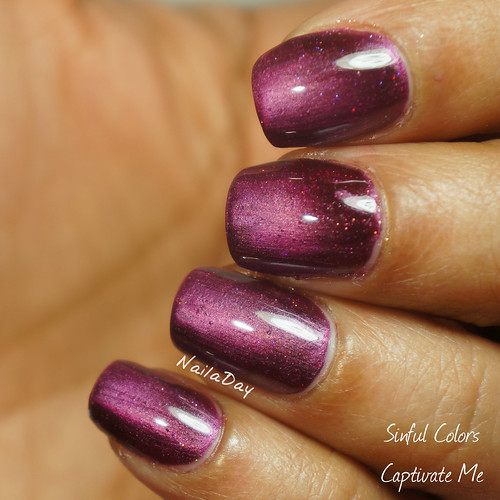
I am very excited to show you guys today's post! After having drooled over Jeanette's (@theswatchaholic) Instagram pictures of magnetic manicures using a neodymium magnet fior a few weeks and then looking at pictures after pictures of Masura magnetic polishes online and lamenting the fact that they are so hard to obtain here in the US, I finally decided to get my own neodymium magnet and try out this new technique of using magnetic polishes. I swear this has given my old magnetic polishes new life. This much more powerful magnet doesn't put little designs on the nail, it just moves the metal powder in the polish around in such a way that the end result looks like rich fabric or a gemstone. I think my nails today look like red velvet (not the cake, the fabric).

NailaDay: Sinful Colors Captivate Me

This is Sinful Colors Captivate Me, purchased by me ages ago when everybody was making magnetic polishes. It is a berry red with tiny little holographic particles in it. As with all magnetic polishes in my experience, it took two coats for full opacity. It was thick but easy to work with.


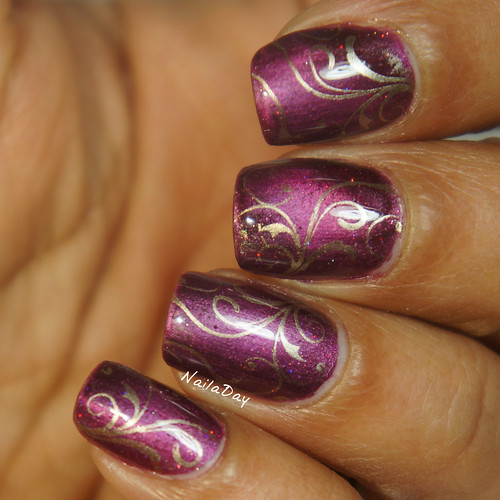
I stamped over it with China Glaze Passion and a design from an Uber Chic plate 1-03.

NailaDay: Sinful Colors Captivate Me with Uber Chic stamping

And more pictures from different angles.

NailaDay: Sinful Colors Captivate Me

NailaDay: Sinful Colors Captivate Me

NailaDay: Sinful Colors Captivate Me

Now more pictures of it stamped.

NailaDay: Sinful Colors Captivate Me with Uber Chic stamping

NailaDay: Sinful Colors Captivate Me with Uber Chic stamping


I even took some videos to try and capture the depth the polish gets when using the neodymium magnet. I just purchased a thin rectangular magnet from Ebay. 

So, the method: I painted a coat of polish over all the nails. Then one nail at a time, I put on a second coat of polish, immediately held the neodymium magnet over the polish at an angle with the thin side facing the nail for a few seconds. It doesn't even have to be all that close to the nail. You can literally see all the metal powder in the polish gather together under the magnet. Then a few seconds later, I rotated the angle about 180 degrees for just a second.to disperse the particles slightly. That's the method I used here. Maybe I'll find a different method later that I also like but that's what I've picked up from watching Russian nail bloggers with perfect manis on Instagram work their incomprehensible magic on a 15 sec video. 


Thanks for looking!!

Related Posts Plugin for WordPress, Blogger...